Replaces
Part Details
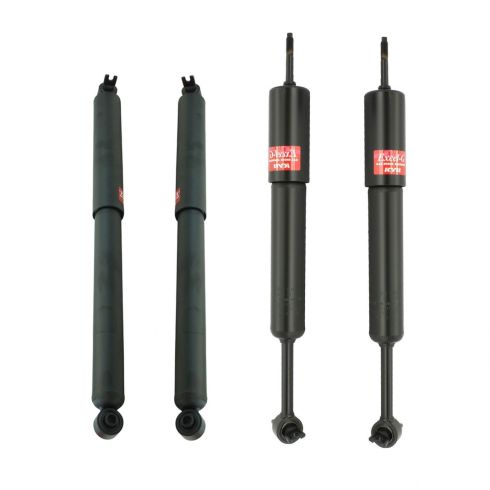
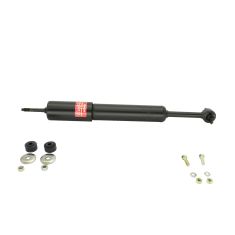
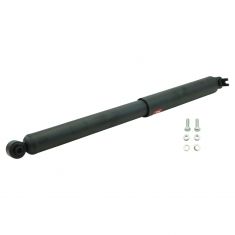
Why Buy KYB Excel-G?
KYB Excel-G shocks and struts will match your vehicle’s Original Equipment (OE). These shocks and struts are perfect for restoring or surpassing your original suspension performance. Some of their perks include:
Lifetime Warranty
This item is backed by our limited lifetime warranty. In the event this item should fail due to manufacturing defects during intended use, we will replace the part free of charge. This warranty covers the cost of the part only.
FREE Shipping is standard on orders shipped to the lower 48 States (Contiguous United States). Standard shipping charges apply to Hawaii and Alaska.
Shipping is not available to a P.O. Box, APO/FPO/DPO addresses, US Territories, or Canada for this item.
Expedited is available on checkout to the United States, excluding Alaska, Hawaii.
Final shipping costs are available at checkout.


Created on:
Tools used
Brought to you by 1AAuto.com. Your source for quality replacement parts and the best service on the Internet.
Hi, I'm Mike Green. I'm one of the owners of 1A Auto. I want to help you save time and money repairing and maintaining your vehicle. I'm going to use my 20 plus years experience restoring and repairing cars and trucks like this to show you the correct way to install parts from 1AAuto.com. The right parts, installed correctly, that's going to save you time and money. Thank you and enjoy the video.
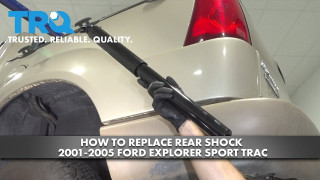
In this video, we're going to show you how to replace the shocks on this '98 Ford Explorer, same as many trucks and SUVs. Although, you may not need to lower the spare tire like you do on this truck. For this vehicle, you'll need penetrating oil, 18-millimeter socket and ratchet, and 13- and 15-millimeter wrenches. You may not even need to raise your car off the ground, but a jack and jack stands might help. We're going to use some penetrating oil right there. You can see right here I put a jack underneath the axle. That's just to make sure when we disconnect the shock that that's not the last thing holding it and the rear end doesn't suddenly jerk down.
We've got a 15-millimeter wrench on here, and this is an 18-millimeter socket. Here, I went to the hand tools because actually the impact wrench didn't work as well as pulling with a big bar like this. The jack handle on this vehicle is missing, so I've inserted a long screwdriver right into this hole down here. It goes in and you turn it counterclockwise and that lowers the spare tire. You should be able to reach right in and pop that little bracket off. This probably has never been down from the car, so you whack and then push that up through, take the spare out. Now, with the spare out of the way, you can see right up in and get to everything really nice and easy. I'm just using a 13-millimeter wrench, reach right over the top and just got to do it a quarter of a turn at a time.
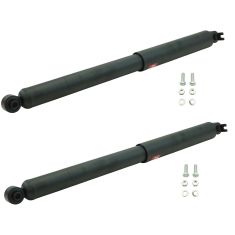
Unfortunately, it would appear that the only way to get to this one is with a 13- millimeter wrench as well. Make sure you get the wrench down on there as low as possible. I'll speed it up here. These bolts are ... they're not that hard to get to but they're just a ... you just take them off patiently, a quarter turn at a time. I've got a new shock from 1A Auto; it's got this catch on it. You can remove that. You can see it slowly comes out. Here's, obviously, the old shock on the right. I'm putting basically the same pressure on and the old one just goes right in, whereas the new one offers a whole lot more resistance. The new shock comes with new mounting hardware.
Actually, what I like to do is feed the bolts in from up top. Put the shock up in and just twist it. That holds the bolt steady. Put the nuts on. Super nice about that new hardware is now we can use an air ratchet and grab onto the nut ... or the bolt ... from the top with a wrench. Now that you have the bottom started, you can now tighten up the top. It's nice with the new hardware; you can use a nice long extension and a wrench and then tighten up the bottom. Tighten these up nice and tight. You can put your spare tire back up, and you're all set.
We hope this helps you out. Brought to you buy www.1AAuto.com, your source for quality replacement parts and the best service on the Internet. Please feel free to call us toll free 888-844-3393. We're the company that's here for you on the Internet and in person.
Tools used
Brought to you by 1AAuto.com, your source for quality replacement parts and the best service on the Internet.
Hi, I'm Mike from 1A Auto. I hope this how-to video helps you out, and next time you need parts for your vehicle, think of 1AAuto.com. Thanks.
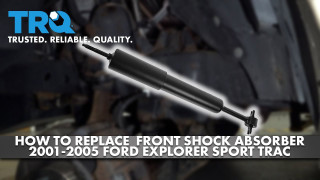
In this video, we're going to show you front shock replacement on this Ford Explorer Sport Trac. It's the same for the Sport Trac as well as a lot of Explorers, Mountaineers, and Rangers. We show you the left side, but the right side's the same procedure. You'll need new front shocks from 1AAuto.com, penetrating oil, 10 to 14 millimeter wrenches and sockets and ratchets, and you may need a reciprocating saw if your shock is in rough shape, although we avoid using it in this video.
Okay, we were checking some other things on the suspension of our truck. As we come under here, if you look at the shock, you can see it's got some oil down below that section, and that is a sign that your shock is either bad or it's wearing out and will soon be bad. To replace it, we're going to start spraying down the top of the shock there. We can see it's in pretty good shape. If yours was pretty rusty or old, you may want to use a reciprocating saw and just cut the bolt and the top of that shaft right off. It can be a lot easier sometimes but, again, ours look to be in pretty good shape, so we'll lock a set of pliers onto the top to hold the shaft from spinning. Then it's a 14mm bolt on this shock. It could be different on yours. Remove that nut. Once it starts going, we'll just fast-forward here. Once we get to a certain point we can take the lock pliers off and then the nut comes off the rest of the way. Also remove the top washer and bushing.
Underneath the shock's held on by two bolts. I have it up on a lift just to make it easier to show you, but the two bolts you can see here. I'm going to spray them down a little bit on the bottom, and then you need to hold them on the top as well see one up there. I'm using a wrench to put it on the bolt at the top and then a socket and ratchet with an extension to remove the nut on the bottom. Once you have both nuts off, you can pull one of the bolts out pretty easy, but the other one kind of stays in there. You have to force the shock up, compress it a little bit, and then pull it back and out. Take your new shock from 1A Auto, you want to put a washer on top first, and then one of the rubber cushions. Then put the shock up into place. You're going to have to kind of force it up in, compress it some once you put it up into, obviously where it goes, the shock mount at the top, you'll have to force it up and then into the mount at the bottom.
Once you have it in place, you're going to start the nuts and bolts on. On some shock designs it may be good to put a bolt into place first. If the shock kind of has an open end to the bolts and sometimes if the shock has a closed hole for the bolts, you'll want to put a bolt into the shock first and then install it into the car. Now tighten up both lower bolts; again, you're going to want to have a wrench at the top, hold the wrench, and then tighten up the nuts nice and firm. Don't over-tighten them; you don't want to break the bolts. Back up top, you want to make sure that the lower bushing's lined up in the center of the hole. Put the upper bushing on and then the washer and then thread the nut on. We'll fast-forward as I tighten up that nut. You want to tighten the nut until those two bushings compress and are basically the same diameter as the washer. You can see that they're a smaller diameter than the washer now. You compress them down and they kind of get basically smooshed out until they're the same diameter as the washer.
The particular shocks I'm installing come with a second nut that goes on. You tighten it down onto the other one to lock them in place. Here I'm just putting an adjustable wrench on the bottom one and then tightening up the top one down onto it. Repeat everything for the other side.
Thanks for tuning in. We hope this video helped you out. Next time you need parts for your car, please visit 1AAuto.com. Also check out our other helpful "how to" as well as diagnoses videos.
Thanks for tuning in. We hope this video helped you out. Next time you need parts for your car, please visit 1AAuto.com. Also check out our other helpful how-to and diagnosis videos.