Replaces
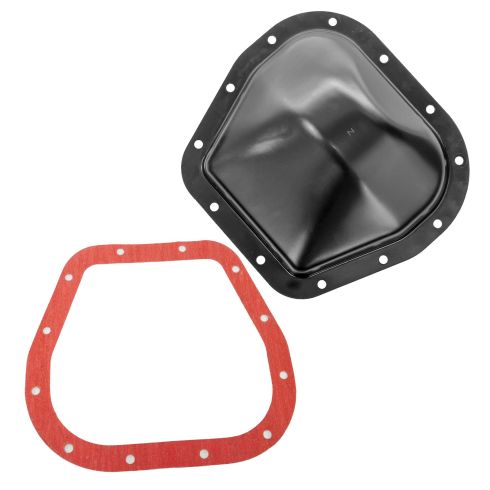
2004 Ford E150 Club Wagon Rear with 9.75 Inch Ring Gear Differential Cover TRQ DCA34173


DCA34173
This part doesn’t fit a . Select from parts that fit.
Specify your vehicle's year, make and model to guarantee fit.
This part doesn't fit a . Select from parts that fit.
Buy in the next and
Orders must be placed by 2pm ET
Recommended for your 2004 Ford E150 Club Wagon
Part Details
- Gasket
Specifications
- with 9.75 Inch Ring Gear
- Rear
About TRQ:
TRQ is a trusted brand dedicated to making every repair a success story by combining premium parts with easy installation. Each TRQ part is engineered by a team of automotive experts to meet or exceed OEM standards, delivering enhanced performance and maximum longevity. With rigorous in-house testing, the brand ensures superior fit and function across every product line. TRQ also provides customers with best-in-class, step-by-step installation videos—so you can complete repairs with confidence, whether you're a first-time DIYer or an industry professional.
Attention California Customers:
![]() WARNING: Cancer and Reproductive Harm - www.P65Warnings.ca.gov.
WARNING: Cancer and Reproductive Harm - www.P65Warnings.ca.gov.
Lifetime Warranty
This item is backed by our limited lifetime warranty. In the event that this item should fail due to manufacturing defects during intended use, we will replace the part free of charge. This warranty covers the cost of the part only.
FREE Shipping is standard on orders shipped to the lower 48 States (Contiguous United States). Standard shipping charges apply to Hawaii and Alaska.
Shipping is not available to a P.O. Box, APO/FPO/DPO addresses, US Territories, or Canada for this item.
Expedited is available on checkout to the United States, excluding Alaska, Hawaii.
Final shipping costs are available at checkout.


Created on:
Tools used
- Raise and support the vehicle with a jack and jack stands Have a drain pan ready Loosen the drain fill plug with a 3/8" ratchet Let the fluid drain Hand-tighten the plug
- Have a drain pan ready Loosen the 1/4" bolts around the cover Remove all of the bolts except for one Lightly tap the cover with a mallet Slightly pry open the cover with a flat blade screwdriver Let the fluid drain Remove the last bolt Remove the cover Stuff a paper towel or rag beneath the mating surface Scrape off remaining adhesive with a razor blade Clean the mating surface with brake parts cleaner
- Align the gasket on the cover so that the holes line up Press the differential cover to the differential Hand-tighten the bolts Torque the bolts 28-38 foot-pounds evenly in a crossing pattern
- Remove the fill plug Wipe off the metal shavings from the magnet on the plug Refill the fluid with a fluid transfer pump until the fluid dribbles out Hand-tighten the fill plug Torque the plug to 30 foot-pounds
Raise and support your vehicle. Before removing the rear differential cover and draining all the fluid out, make sure that you can remove the fill plug. When you reinstall the diff cover, you can fill the differential back up with the fluid.
This uses a 3/8 drive. It's just a square drive, the end of your ratchet. Get this in here. This one's a little tight, but it's spinning free. You'll want to have your drain pan handy. You can also check your fluid level this way. Fluid should just be below the edge. Can try to get your finger in there. Yeah, there it is. The fluid level is actually really good. I'm just going to reinstall that for now, and I'll take it back out when I'm ready to fill it. The drain pan in place to catch all the fluid that's going to come out. I'm going to use a half-inch socket on my ratchet and start removing the bolts around the outside of the cover.
I'm going to leave this top bolt in here so when I pry the cover off, it suddenly comes loose. It won't just fall into my drain pan and splash fluid everywhere. Just going to take a flat-bladed screwdriver. Try to get it under the edge. This is sealed with like a RTV sealant. You just have to break that bond and get this off of here. Going to use a rubber mallet to try and break it free. There it is. It's free. I'm going to let that drain. Now it's free.
I'm just going to open it up just a little bit to let some of the fluid drain out. This way, it doesn't go splashing everywhere. With that pretty much drained, I'll remove that last bolt. We'll take our old cover. I'm just going to sit it in the drain pan. Before you can install the new one, this old gasket material needs to be cleaned off. Take a razor blade and a rag and just start scraping it off. Try to keep it from falling into the open differential. That's what the rag is for. It's just a matter of taking your time scraping it off. Now that the majority of it is cleaned off, I'm going to take some brake parts cleaner. I'll spray it on my rag and just finish wiping down the surface.
Here's our old rear diff cover from our vehicle. It's all kind of dirty, oily. Can see the old silicon sealer. This is our new cover from 1aauto.com. This one actually comes with a magnet in it to catch any metal shavings from the gears, which is really nice. You can see the O-pattern is the same, same shape. However, instead of using a silicon on this one, it comes with a cork gasket that we'll install, so you don't have to deal with messy sealers. This should work great for application.
When you're installing this cover, and you're placing the cork gasket over it, there is an orientation to it. Just double check. See, in this, when it's sitting like this, these two holes don't line up, but if we flip it over, all of the holes line up. Just double check the orientation of the gasket before you install it. I'm going to take one of our old bolts, put it through the pan, through the gasket. Place the pan and gasket in place.
Now that the pan's held in place, I can thread in the rest of the bolts. I'm just going to put these tags back where I found them. With them all pretty much seated by hand, I'm going to torque them now. The torque is 28 to 38 foot-pounds, so I'm going to torque these at 35, right in the middle. We'll just start at one side. Then, go opposite. Can move this out of the way for the time being. This way, you're tightening the cover evenly, and you're not warping it. I'm going to remove the fill plug that we loosened earlier. Put that aside so I don't lose it. This fill plug actually has a magnet on it. Just from normal driving, the gears inside the differential will wear, and you'll little bits of metal. Then, this magnet catches them. Before you refill it, just take a rag and clean off the metal shavings from the magnet.
Using a fluid transfer pump, I'm going to fill the differential with the recommended fluid from the manufacturer. You're going to want to have your drain pan in place, too. In this differential, the fluid level is supposed to be about a quarter of an inch to 9/16 of an inch below the level of the fill hole. That can be hard to tell. You can just get your finger in there and try to dip it a little bit. Or, I like to go just about now, where it's starting to dribble out. Get a little more in there. When it starts to dribble out, you should be about full. I'm just going to take my finger and just put it in. I can just feel the gear oil, and that's right about where it should be. With the level correct, reinstall the fill plug. I'll then torque it to 30 foot-pounds.
This is a 3/8 drive. I'm just going to use the 3/8 drive on the torque wrench. It is set to 30 foot-pounds. Can use some brake parts cleaner on a rag. Just wipe up any excess oil. This way, if you have a leak, it's easier to tell if it's fresh or not.
Thanks for watching. Visit us at 1AAuto.com for quality auto parts, fast and free shipping, and the best customer service in the industry.
Tools used
Tools used
- Have a drain pan ready Remove all but the top two 13mm bolts from the differential cover Pry out the differential cover with a flat blade screwdriver Allow the fluid to drain
- Remove the remaining two 13mm bolts from the differential cover Pull off the differential cover
- Put a rag into the differential to protect the gears Scrape the gasket residue off with a razor Remove the rags Clean the sediment out of the differential reservoir Wipe down the outside of the differential
- This step is optional Clean the differential cover with mineral spirits Spray the differential with primer Allow the primer to dry Spray paint the differential the desired cover
- Apply RTV to the gasket mounting area Put on the gasket Apply RTV to the gasket
- Make sure the differential cover mounting area is clean Push on the differential cover Start the 13mm bolts into the differential cover Tighten the 13mm bolts to 20 foot-pounds of torque in a crossing or star pattern
- Remove the differential fill cap with a 3/8" ratchet Clean any sediment of the fill cap Add gear oil to the differential Add limited slip differential additive to the differential if desired Mix half limited slip differential additive and half gear oil Add the mixture to the differential Add gear oil to the differential until it leaks out the side
Brought to you by 1AAuto.com, your source for quality replacement parts and the best service on the Internet.
Hi, I'm Mike from 1A Auto. I hope this how-to video helps you out, and next time you need parts for your vehicle, think of 1AAuto.com. Thanks.
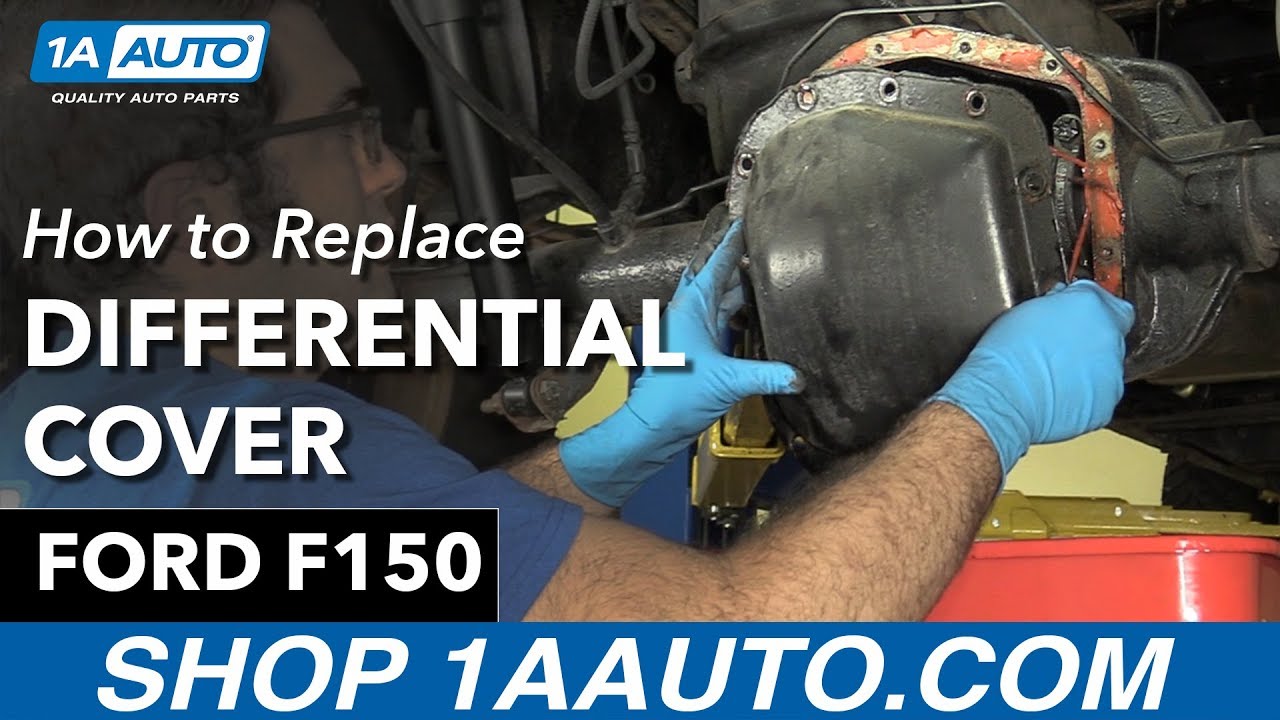
In this video, we're going to show you how to replace the rear differential cover on this 2005 Ford F150 with the 8.8 inch ring gear, and it's the same part and similar process on these F150s from 2004 to 2013 and the items that you'll need for this is new rear differential cover from 1AAuto.com, 13mm socket and ratchet, a drip pan, razor, RTV, torque wrench, four quarts of 75w-140 gear oil, and a hammer.
You come under here. There are two tags on the rear differential. This tag says, "75w-140, synthetic oil only." That's telling you what weight to use. I'm not sure exactly what that tag is. It probably tells you about the rear end, but these are 13mm bolts. Leave two bolts at the top of the cover and then, using a flat blade screwdriver, you want to just pry open the bottom of the cover and it helps if you just hit it up into place with a hammer and you'll start to see the fluid trickle out. You want to make sure you have a drip pan underneath and just keep hammering until, when you pull back on the screwdriver, it drains.
When it's done draining, remove those last two bolts and then pull your cover off. Now, put some paper towels in over the gears and those will just protect them while you do the next step. Using a razor, just scrape off all the old gasket around where your cover was. When you finished, you can remove those paper towels. At the bottom of your differential, there's a little reservoir that collects sediment. Just try to get as much of that out of there as you can and then wipe down the outside of the differential.
Now, we're going to paint our new rear differential cover. It shows up silver. We want it to look black so it matches the vehicle more. We're just going to wipe it down with some mineral spirits. You don't have to do this. You can just leave it silver, but if you did want to paint it, just spray it with some primer. When the primer is for the most part dry, still a little tacky, you can spray on your spray paint doing nice even coats.
Now, even if you don't paint your rear differential cover, this next step you need to do. Just take some RTV and trace around the outside and put the gasket into place and then trace with some RTV around the outside of the bolt holes all the way around the cover.
Again, make sure the outside of the differential is clean and then push the cover back into place and start replacing those bolts. You do want to make sure that the outside was clean before you put this into place, because any oil will ruin the seal. We'll fast forward as Mike replaces those bolts and tightens them up preliminarily. Torque each of these to 20 foot-pounds in a crossing pattern.
Back here is your fill cap. Using a 3/8th ratchet, just open up that fill cap and pull it out. It is magnetic so it will have some sediment on it. You just want to clean that off. Then, using your 75w-140 gear oil, just squirt it in.
Here, we're going to add some limited slip differential additive. We'll just squirt some directly in and then we're going to take an empty bottle of gear oil and just squirt it into the empty bottle and then fill the bottle to the halfway mark with some regular gear oil. Then we're just going to squirt that mixture into our differential and then top it off with some more gear oil. If it starts to trickle out because the oil has reached the bottom of that fill hole, then you're all set and then you can just put that cap back in and tighten it up. Then just wipe down the area and you're all set.
We hope this video helps you out. Brought to you by www.1AAuto.com, your source for quality replacement parts and the best service on the Internet. Please feel free to call us toll-free, 888-844-3393. We're the company that's here for you on the Internet and in person.

DCA34173
877-844-3393
Monday - Friday 8:00am - 9:30pm ET
Saturday - Sunday 8:00am - 4:30pm ET
Specify your vehicle's year, make and model to guarantee fit.
This part doesn't fit a . Select from parts that fit.


