Replaces


Part Details
About TRQ:
TRQ is a trusted brand dedicated to making every repair a success story by combining premium parts with easy installation. Each TRQ part is engineered by a team of automotive experts to meet or exceed OEM standards, delivering enhanced performance and maximum longevity. With rigorous in-house testing, the brand ensures superior fit and function across every product line. TRQ also provides customers with best-in-class, step-by-step installation videos—so you can complete repairs with confidence, whether you're a first-time DIYer or an industry professional.
Product Features
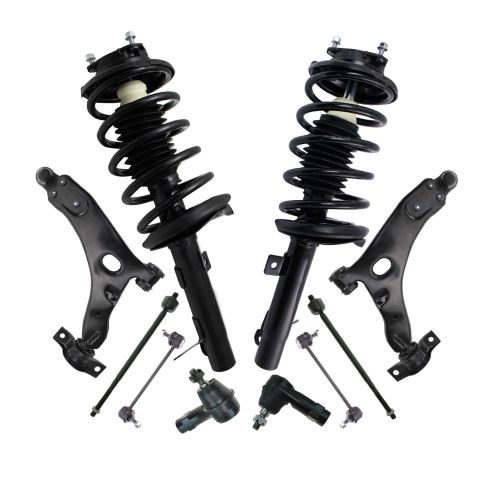
TRQ suspension kits are manufactured using premium raw materials and coatings for extended service life. Each TRQ suspension component is designed to be a direct, maintenance-free replacement to the stock unit. To extend the life of your steering and suspension components, TRQ recommends replacing components in pairs, sets, or kits. All products are fit and road-tested in our Massachusetts R&D facility to ensure we deliver on our promise of Trusted Reliable Quality.
Replacing struts used to require specialized tools to compress, remove, and transfer the old spring and mount. Our Pre-assembled, complete strut & spring assemblies come with all new parts and make the job much quicker and easier for the do-it-yourself mechanic.
Strut & spring assembly contains:
Install Tip: When replacing steering components, have a professional alignment performed afterwards. This ensures proper tracking and even tire wear.
Our steering and suspension components are pre-greased and sealed for long life and do not require the extra maintenance typically required by greaseable versions.
Attention California Customers:
 WARNING: This product can expose you to chemicals including Lead and Lead Compounds, which are known to the State of California to cause cancer, and birth defects or other reproductive harm. For more information, go to www.P65Warnings.ca.gov.
Lifetime Warranty
This item is backed by our limited lifetime warranty. In the event that this item should fail due to manufacturing defects during intended use, we will replace the part free of charge. This warranty covers the cost of the part only.
FREE Shipping is standard on orders shipped to the lower 48 States (Contiguous United States). Standard shipping charges apply to Hawaii and Alaska.
Shipping is not available to a P.O. Box, APO/FPO/DPO addresses, US Territories, or Canada for this item.
Expedited is available on checkout to the United States, excluding Alaska, Hawaii.
Final shipping costs are available at checkout.
Created on:
Tools used
Hi, I’m Mike from 1A Auto. We’ve been selling auto parts for over 30 years!
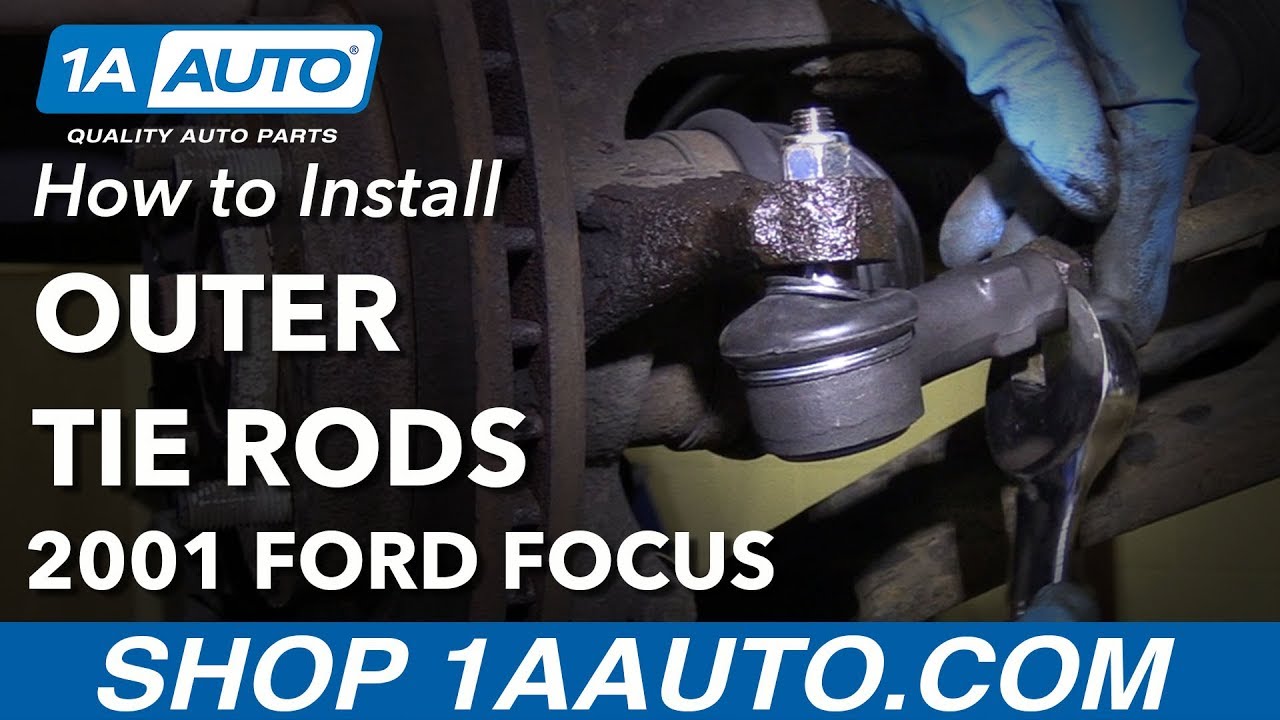
We're going to be working on this 2001 Ford Focus. The first thing we're going to do is we're going to take the tire off. One thing to note, this has these little caps that go over the lug nuts. There's two that are missing on this vehicle, regular ones are 19 millimeter, but because the caps are missing, we're going to have to use an 18 millimeter socket to get those off.
So we'll use a 19 millimeter socket and a breaker bar. Just crack these free before we put the vehicle up. Now I'll switch to the 18. These are really tight, normally they shouldn't be this tight. We're using a two post lift to raise and support the vehicle. You can use a jack and jack stands. Now we'll take these lug nuts off, use a little ratchet and an 18 millimeter socket. Take this last lug nut off, take the tire off. Just hit it a couple times.
This one's kind of tight so we're going to hit it off with a hammer. So I put one lug nut on, that's to prevent the wheel from going falling off when I hammer it off with a dead blow. And I'm going to hit right here really hard on the tire and it will pop right off. Now we'll take this lug nut off and pull the wheel off.
Keep in mind that whenever you're doing any front end repair or replacing any front end components, you're going to want to go to a local shop and have your alignment performed, or at least checked. That way, that'll keep your tires from wearing prematurely.
Before we go to take the tire rod off, we want to use some rust penetrant on the nut right here, and also back here. They've been on there for a while, so it'll be pretty rusty. I'm going to loosen this nut up on the back here, I just want to crack it free. This is the nut for the adjuster that keeps the adjustment for the alignment on the front toe of the vehicle. We'll use a 22mm wrench. We could use a 7/8 wrench, but 22 fits a little bit better. We'll just crack it free just like that. We're going to take this nut off up here. We're going to use a 15mm wrench, and there's a little spot on the top that I can put a torque spit, a T30. I'll use that to hold the stud from spinning. If you had an impact gun, you could take it off with that. Put our wrench on first. Then we're going to put this on tighten and that's just going to hold the stud. Then we'll loosen the nut.
Okay, now that that nut's loose, take that off. I'm going to take a hammer and separate the stud from the front knuckle. Just tap it down, just like that.
Next thing you're going to want to do when you take this outer tire rod off, you're going to want to count how many threads there are, so every time you go around, that's one, two, three, four, five, six, seven, eight, nine, 10, 11, 12, 12 and a half. What I'm going to do is I'm just going to take a marker, write down 12.5. That way when I go to put the new one on, I'll tighten it as many turns, and that'll bring the alignment closer to where it needs to be, so that you may not actually need an alignment when they go check it. It may be right on target.
Here's our old part. Here's our new part from 1AAuto.com. As you can see, this shape is the same. It comes with a new nut. The bottom is the same. Get yours at 1AAuto.com and you'll be ready to rock and roll.
Now we're going to put the new one on. We're going to count our turns: One, two, three, four, five, six, seven, eight, nine, 10, 11, 12 and a half. Then we'll twist this like that. Then we'll line the stud up here. Spin that in there. Take the nut and spin this one. Now we're going to tighten this nut down. I'm going to use a 16mm socket and a ratchet. If the stud was spinning on you, and this nut would not go down, what you can do is take a pry bar, go underneath the stud right here, and just tighten it up that way, or you could even put a little jack and jack up the car right there, just lightly, just to get stat stud to stop spinning. We're going to tighten this nut up.
We're going to use a torque wrench and a 16mm socket. We sell these torque wrenches at 1AAuto.com. We're going to torque it to 35 foot pounds. We're going to tighten this tie rod end lock nut. We're going to use a 22mm wrench. The torque spec on this is 46 foot-pounds, but I don't have the ability to torque it with a torque wrench, so just do the best you can. Snug it up. It's good.
So this wheel and tire when coming off the vehicle actually took a lot of effort to get it off. One of the reasons why is because of the two dissimilar metals corroding. You had the metal from the hub and also the aluminum from the wheel corroding together. So we're going to take a wire brush, just lightly on the wheel go around and clean that up a little bit. You don't want to do too much. You really don't want to sand down the wheel and cause any damage to the wheel but just get a little bit of that off. Just like that and then over on the hub we can go all around the hub, clean all this corrosion off of here, and this will help getting the wheel on and off. One of the things to help prevent this from happening is using a little bit of anti-seize lubricant. I don't like to use a whole lot of this, just a little bit, and only on instances where it's really bad so we'll just put a little bit on there then next time we take the wheel off it will be easier.
Now we're going to throw the wheel up and it went right on. Put our lug nuts on, just tighten these lug nuts. I'm going to torque these lug nuts with a 19 millimeter socket and a torque wrench to 98 foot pounds. We sell these torque wrenches at 1AAuto.com. You're going to do it in a cross pattern so that it tightens the wheel properly. And I'll switch to my 18 millimeter socket for these other lug nuts.
Thanks for watching. Visit us at 1AAuto.com for quality auto parts, fast and free shipping, and the best customer service in the industry.
Tools used
Hi, I’m Mike from 1A Auto. We’ve been selling auto parts for over 30 years!
We're going to be working on this 2001 Ford Focus. The first thing we're going to do is we're going to take the tire off. One thing to note, this has these little caps that go over the lug nuts. There's two that are missing from this vehicle. Regular ones are 19mm. But because the caps are missing we're going to have to use an 18mm socket to get those off. So we will use a 19mm socket on the breaker bar. Just crack these free before we put the vehicle up.
Now I'll switch to the 18mm. These are really tight. Normally they shouldn't be this tight. We are using a two post lift to raise and support the vehicle. You can use a jack and jack stands. Now we'll take these lug nuts off. I'll use a little ratchet and an 18mm socket. I'll just take this last lug nut off, take the tire off, just hit it a couple times. This one is kind of tight, so we're going to hit it off with a hammer.
So I put one lug nut on, that's to prevent the wheel from going, falling off, when I hammer it off with a dead blow. And I'm going to hit right here really hard on the tire. And it will pop right off. Now we'll take this lug nut off and pull the wheel off. Keep in mind that whenever you're doing any front end repair or replacing any front end components, you're going to want to go to a local shop and have your alignment performed or at least checked. That way that will keep your tires from wearing prematurely.
Before we go to take the tie rod off, we want to use some rust penetrant on the nut right here, and also back here. They've been on there for a while, so they'll be pretty rusty. So I'm going to loosen this nut up on the back here—I just want to crack it free. This is the nut for the adjuster that keeps the adjustment for the alignment on the front toe of the vehicle.
So we'll use a 22mm wrench. We could use a 7/8" wrench but a 22mm fits a little bit better. So we just crack it free, just like that. So we're going to take this nut off up here. We're going to use a 15mm wrench and there's a little spot on the top that I can put a T30 Torx bit on, so I'll use that to hold the stud from spinning. If you had an impact gun, you could take it off with that.
So put our wrench on first. Then I'm going to put this on tighten, and that's just going to hold the stud, and then loosen the nut. Okay now that that nut's loose. Take that off. Now we're going to take a hammer and separate the stud from the front knuckle. Just tap it down, just like that.
The next thing you're going to want to do when you take this outer tie rod off, you're going to want to count how many threads there are so every time you go around, that's one, two, three, four, five, six, seven, eight, nine, ten, eleven, twelve, twelve and a half. So what I'm going to do, is I'm just going to take a marker and write down 12.5 and that way when I go to put the new one on, I'll tighten it as many turns, and that will bring the alignment closer to where it needs to be so that you may not actually need an alignment. When they go check it, it may be right on target. Now I'm going to prevent the tie rod from spinning because I want to take this nut off. So I'm going to use some locking pliers. You just snug those on there. Then I'm going to take a 22 mm socket and a ratchet, and I'm going to take this nut off. The reason why we're taking this nut off is because the step when we go to take the boot off, we're going to need the boot to slip all the way off the tie rod and the nut will get in the way. So we'll take the nut off and set it aside. Then we can take off the locking pliers.
Next I want to take this clamp off that holds the boot on at the base. I'm going to use some needle nose pliers. So I'll just squeeze that. We can pull this clamp all the way off. There's a clamp right here on the backside of the boot that holds the boot on. It's like a pinch clamp. Like a band clamp that's pinched on. I'm going to remove it with this right angle tool, we sell this from 1AAUTO.COM. It's like a pick tool. And I'm going to go up in there and try to get it.
All right, so the clamp is right here. There's a little section right here that's raised up, that's kind of how they pinch it tight. I'm going to take the right angle tool, and see it's just going to get under there and pry up a little bit. Just go back and forth, and it released. Now I'll be able to take the boot off. So there's this rod that connects the two boots together. So we're going to take it out of this side—it's connected in over here—so we'll pull that out like that.
Keep in mind what direction this was in when it came out. This was on the, this bend right here was on the driver's side. So you don't put it in backwards. So we'll just put it on the ground the same way it came out. So we're going to pull this boot off. If it gets stuck, you can take a right angle pick and just get under here and try to work it. Try twisting it back and forth, and pull it all the way off. There's your boot.
This boot looks like it's in good shape. It’s not torn or anything so we're going to reuse it. I'll pull the clamp off. And this is actually okay as well. We'll try to reuse that. The new inner tie rod from 1A Auto actually has these grooves so that you can get an inner tie rod tool on it or a wrench. The factory one does not have those, so you need a special tool to remove that. We don't have the tool in our shop today, so we're going to remove the lower control arm so that we can get access to the inner tie rod end. This might help you if you didn't have the tool to remove the inner tie rod end, and you already had the vehicle apart in your driveway. This is something you could do.
We're going to take this bolt out. There is a nut on the backside. We're going to use a 21mm wrench, go over here and go in between the sway bar, right there, get that on the nut. Then we're going to take an 18mm socket and a breaker bar. It's a little tight next to the oil pan of the transmission. Hold that with one hand. We're going to use a pipe for some leverage. Spin it free. Because this is tight right here, I'm going to use a smaller 18mm socket and a ratchet. Take this off, the nuts loose, I'm just going to take the wrench off and just use my fingers and take the nut off over here. Set that aside.
So because of the location of the transmission pan, I can't get this bolt out. So I'm just going to use a screw jack and it up right here, you can use a floor jack, might want to put a piece of wood under here. Be careful keeping in mind your vehicle is supported, you don't want to take it off the support. So just go up as high as you can so that the vehicle doesn't come off your support. Okay, unscrew the bolt and get it out. At this point, I'm going to let it down because I feel like it's safer to not be up that long. Next I'm going to take this bolt out. I'm going to have to use a wrench on the top nut that holds it on. It's an 18mm wrench and a 15mm bolt, so I'll use that and a breaker bar to break this free. I switched to a bigger breaker bar because this bolt is really on there. All right, so now I switched to a ratchet. I'll take this bolt out.
So I press the wrench up against the frame right here, and that will help from me having to really put a lot of pressure on the wrench. I just hold it in place, and then I can ratchet the bolt off. Pull that off. So next I want to take this bolt out. There is a nut on the top. This nut happens to be a 21mm so I'm going to use a deep 21mm socket and a ratchet. It seems to be the easiest to get to this from over here.
Go around near the exhaust, and then set that right there, and then that's going to be up against the frame. I can loosen this with a breaker bar. The bottom bolt is an 18mm, and I'll use a breaker bar on that. Once that's loose, I can switch to an 18mm socket and smaller ratchet. Now this is loose. Take this down. That’s the nut. The control arm is loose. We're going to grab a pry bar and pry the control arm out.
You could pull this inner shield out of the way, but we're just going to bend it a little bit. Just like that. So I want this inner tie rod out as far as possible, so what I'm going to do is turn the wheel on this side so that that's all the way pushed out so that I have easy access to it. We're going to use some locking pliers on this shaft of the steering rack. The reason I'm doing that is when we're loosening up this tie rod end, it's going to put a lot of pressure on the steering rack. The rack and pinion, so we don't want to put that kind of pressure on it. So we'll do that to hold that while we loosen it up.
Now we're going to use a pipe wrench on the outside, and I'm going to hold the locking pliers on the inside. And I'm just going to loosen it up. And there we go. Once it's loose I can do it by hand. It took a little bit of effort.
Here's our old inner tie rod, here's our new inner tie rod from 1aauto.com. As you can see the lengths are the same. The general design is the same. The threads are going to be the same. The new one has these grooves right here so you can actually get a tool on it, or even a wrench if you had to, which makes it a lot easier for removing and installing. Get yours at 1aauto.com and you'll be ready to rock 'n roll.
Okay so we're going to install the new inner tie rod in. Before I put it on, I'm going to take this nut off because we're going to have to put the boot over that, so we'll just take it off now. Now we'll install it, into the hole, to the rack. We're going to use an adjustable wrench to tighten this down. Just makes it easier. We're going to hold my locking pliers while I do that. And you want this pretty snug. That's good. Tighten it up good and tight.
Take our locking pliers off. All right, I'm going to install the boot. I want to put the clamp on so that I'm able to crimp it right there. Slide it on like this. Slide it all the way on. I am going to turn the wheel back a little bit so that the boot goes on better. Now we'll slide the boot over the rack.
There's a little lip for the outside of the boot. You want that right there. A little section, right there. Before you tighten the clamp down, we're going to install this hose. Remember the bent part, right here, goes on the driver's side. So I'll slide this into this boot first. Push it back and then get it in over here. Now we'll slide the boot back on properly, and it looks pretty good.
Next to crimp that clamp I'm going to use this. This is a CV boot type clamp, so what happens is it pinches the clamp together and it pushes it up on it in the center. So we'll reach and grab on to it right there. All right, and then I'm just going to squeeze it, and that's going to crimp it down.
Next I'm going to install the outer clamp that goes on. We use the needle-nose again. Crimp this, and there we go. Now those are on. Now to install this nut. I'll just slide it on to about there. We're going to count the threads when we install the tie rod on, and then cinch the nut down. Now that we've got that on, we're going to reinstall the lower control arm and pull it back a little bit.
I'll use my pry bar to help me get this in over here. And there you go. So I'm going to slip this bolt back in here, but it's not going to go because our transmission pan's in the way. So we're going to raise the transmission up on this side. You can do this with a floor jack. Just be careful and make sure you use a piece of wood or something to protect the transmission. And there you go. Once you get that in, take the transmission, and drop it back down. Tap this in a little bit, with our hammer. Put the nut on the inside so we can install this bolt right here, and the nut that goes here. And then this bolt right here and the nut that goes on here.
All right, I'm going to start snugging up this back bolt. I'm going to need an 18mm socket on the bottom. On the top where the nut is, I'm going to use a 21mm socket and the ratchet. We're going to snug this one down with a 15mm socket and an 18mm wrench for the nut. Now we're going to torque this bolt. We're going to put my 21mm socket up top still, just like that. I'm going to hold that while I torque this bolt to 85 foot-pounds. We also sell theses torque wrenches at 1aauto.com.
We're going to take our 18mm wrench stick that on the nut up there. We're going to torque this bolt to 85 foot-pounds as well. That's good. So I've got my 21mm wrench on the nut in the back. I'm going to use an 18mm socket on the ratchet on here. We're going to snug this up. So I'm going to raise up under this ball joint. I want to raise the suspension to almost ride height so that the control arm, right here, is as close to where it would be while it's on the ground.
The reason I'll do it right now is it will be easier to torque this bolt or tighten this bolt up. If I was to do it on the ground, it's going to be hard to lay under the car and tighten that bolt. Just get it as close as you can to actual ride height. You're going to put that wrench back on there, and I'm going to use the 18mm socket and this torque wrench.
I'm going to tighten this to 85 foot-pounds. Perfect. We'll lower the suspension back down. Now we're going to install this outer tie rod end. We're going to count 12.5 turns. So we're one, two, three, four, five, six, seven, eight, nine, ten, eleven, twelve and a half. So we'll scoot that up right there, and I'll take a 22mm wrench and my 21mm wrench. Just going snug this up a little bit. That's good. I'll tighten it up later.
Now I want to spin this whole tie rod assembly. I'm going to use a 13mm wrench right here. I'm just going to spin it so that I can put the outer tie rod in the knuckle. Just like that. We can take the nut that goes on the tie rod and put that on. We're going to tighten this nut up with a 16mm socket and a ratchet. We're going to check to see if the stud is spinning. If the stud is spinning, you can put a little jack under here just to put some pressure on it. Don't jack it up too much.
Or you can take a pry bar and stick it under there and put some pressure so that it will not spin. Ours is doing good. Now we're going to torque this to a 35 foot-pounds. Next I'm going to snug this lock nut up to about 46 foot-pounds. I don't have a way to use the torque wrench on this, so I'm just going to the best I can. So this wheel and tire when coming off the vehicle actually took a lot of effort to get it off. And one of the reasons why is because of the two dissimilar metals corroding.
You had the metal from the hub and also the aluminum from the wheel corroding together. So we're going to take a wire brush, just lightly on the wheel go around and clean that up a little bit. You don't want to do too much. You really don't want to sand down the wheel and cause any damage to the wheel. Just get a little bit of that off. Just like that. And then over on the hub, we'll go all around the hub to clean all of this corrosion off of here. This will help getting the wheel on and off. One of the things to help prevent this from happening is using a little bit of anti-seize lubricant.
I don't like to use a whole lot of this, just a little bit and only on instances where it's really bad. We'll just put a little bit on there then the next time we take the wheel off it will be easier. Now we're going to throw the wheel up and it went right on. We'll put our lug nuts on. So we'll just tighten these lug nuts. And I'm going to torque these lug nuts with a 19mm socket and a torque wrench to 98 foot-pounds. We sell these torque wrenches at 1aauto.com. You're going to do it in a cross pattern so that it tightens the wheel properly. Then I'll switch to my 18mm socket for these other lug nuts.
Thanks for watching. Visit us at 1AAuto.com for quality auto parts, fast and free shipping, and the best customer service in the industry.
Tools used
Hi, I’m Mike from 1A Auto. We’ve been selling auto parts for over 30 years!
We're going to be working on this 2001 Ford Focus. The first thing we're going to do is we're going to take the tire off. One thing to note, this has these little caps that go over the lug nuts. There's two that are missing on this vehicle, regular ones are 19 millimeter, but because the caps are missing, we're going to have to use an 18 millimeter socket to get those off.
So we'll use a 19 millimeter socket and a breaker bar. Just crack these free before we put the vehicle up. Now I'll switch to the 18. These are really tight, normally they shouldn't be this tight. We're using a two post lift to raise and support the vehicle. You can use a jack and jack stands. Now we'll take these lug nuts off, use a little ratchet and an 18 millimeter socket. Take this last lug nut off, take the tire off. Just hit it a couple times.
This one's kind of tight so we're going to hit it off with a hammer. So I put one lug nut on, that's to prevent the wheel from going falling off when I hammer it off with a dead blow. And I'm going to hit right here really hard on the tire and it will pop right off. Now we'll take this lug nut off and pull the wheel off. We're going to remove the sway bar link. These nuts are very rusty so what I'm going to use is some rust penetrant right here. Soak that down and then the one on the inside as well. Do that before we start, that'll help us out. I'm going to use a wrench on the back side of this sway bar link. There's a nut that will keep the stud from spinning so I'll use an 18 millimeter wrench that'll hold that while I take this nut out on the outside.
I'm going to use a 15 millimeter socket and a ratchet. I should be able to take it off by hand, you can pull the stud through like that. Now I'm going to use that 18 millimeter wrench on the back side again, on this bottom one, just like I did on the top and then I'm going to use a 15 millimeter socket and a breaker bar to get this nut off. Just get it loosened first. Once it's broken free I'm going to use my 15 millimeter socket and ratchet. Take this nut off, pull that off, we'll take the wrench off and then pull the link straight out.
Here's our old sway bar link, here's our new sway bar link from 1AAuto.com. Comes with new nuts, comes with the same lock so that you can that you can put a wrench on so that it's easier to install and remove. Get yours at 1AAuto.com and you'll be ready to rock and roll.
All right, so we're going to slide the new link in. We're going to have this bottom stud go towards the center of the car and then this top stud is going to come towards the outside of the car. You can lift up on this sway bar, just get them to both line up. Once they're both lined up we can put the nuts, get those started, get that one started, then we'll get the bottom one started down here.
All right, then we're going to tighten this up with our 15 millimeter socket and a ratchet and make sure you hold the stud with your 18 millimeter wrench. Now we're going to use the 15 millimeter socket on a torque wrench. We're going to tighten this to 37 foot-pounds. We sell these torque wrenches at 1AAuto.com. Tighten the top nut the same as the bottom. Right, that's snug. Now we're going to torque it with the torque wrench to 37 foot-pounds.
Pull our 18 millimeter wrench out. So this wheel and tire when coming off the vehicle actually took a lot of effort to get it off. One of the reasons why is because of the two dissimilar metals corroding. You had the metal from the hub and also the aluminum from the wheel corroding together. So we're going to take a wire brush, just lightly on the wheel go around and clean that up a little bit. You don't want to do too much. You really don't want to sand down the wheel and cause any damage to the wheel but just get a little bit of that off. Just like that and then over on the hub we can go all around the hub, clean all this corrosion off of here, and this will help getting the wheel on and off. One of the things to help prevent this from happening is using a little bit of anti-seize lubricant. I don't like to use a whole lot of this, just a little bit, and only on instances where it's really bad so we'll just put a little bit on there then next time we take the wheel off it will be easier.
Now we're going to throw the wheel up and it went right on. Put our lug nuts on, just tighten these lug nuts. I'm going to torque these lug nuts with a 19 millimeter socket and a torque wrench to 98 foot pounds. We sell these torque wrenches at 1AAuto.com. You're going to do it in a cross pattern so that it tightens the wheel properly. And I'll switch to my 18 millimeter socket for these other lug nuts.
Thanks for watching. Visit us at 1AAuto.com for quality auto parts, fast and free shipping, and the best customer service in the industry.
Tools used
Brought to you by 1AAuto.com, your source for quality replacement parts and the best service on the internet
Hi I'm Mike from 1A Auto. I hope this how-to video helps you out and next time you need parts for your vehicle, think of 1AAuto.com, thanks.
In this video, we're going to show you how to replace a front strut and spring assembly on this 2003 Ford Focus, pretty much the same for any 2000 to 2011 Focus. We're going to show you the passenger's side. The driver's side is basically the same procedure. We do always recommend that you replace your struts in pairs.
You'll need new struts from 1A Auto, jack and jack stands, 13 to 19mm sockets with all the accompanying ratchets, extensions and you'll need a breaker bar or pipe for some extra leverage, large hammer. You may need to get off the stabilizer link and nut, you may need a 17mm wrench with a T30 Torx driver. You'll also need some penetrating oil and a torque wrench to put everything back together correctly.
Remove the wheel and tire. You can use your lug wrench that comes with the vehicle. If you're using your lug wrench and hand tools, you want to have the tire on the ground. Loosen the lug nuts first, then raise and support the car and remove the lug nuts. You will need kind of a thin walled socket. Regular impact sockets don't really fit in here.
I'm going to fast forward as I remove the lug nuts, and then, actually, I realize the wheel is stuck on so I thread two lug nuts back on and use a little bit of an alternative method to remove the wheel.
Underneath here, you want to detach a couple of things, the break line pull that out of that bracket. Your ABS sensor, pull that out of here and out of the way. Then, we're going to remove this bolt that holds the upper stabilizer link. First, we're going to spray with some penetrating oil. When we spray that one, we're going to spray the one down here as well that holds the bolt right here that pitches on to the strut and we're going to try to spray the back side of that as much as we can.
Now, a 17mm wrench and put on there and we're going to then hook up the 18mm wrench on like this. It gives us more leverage and we're going to see the nuts actually coming off. What you can do is I have a T30 Torx Driver here. If this starts spinning, just insert that in there and we can hold it steady. It's coming off okay, then hammer. Next is the bolt that holds the strut into the steering knuckle right there. It's a 15mm. Then put a socket with an extension on it to get it clear of this break line. If you have a breaker bar like this, you want to use that. If not, you can use your ratchet. Just use a piece of pipe to give you some extra leverage. I'll just fast forward. You want to take that bolt all the way out. Just spray some penetrating oil where that strut goes in to the steering knuckle.
Get a 15mm socket and disconnect your tie rod in here. The best way to do it is keep the nut as close right up flush with the stud and tie rod. I'm going to repeat the hammer. Once you break the tie rod loose, the stud will start spinning in it so what I did is I took some wood and my jack, jacked up the tie rod into the steering knuckle that holds it in place. I can remove the nut the rest of the way, and then I should just take a light tap and knock the tie rod back out. This vehicle has a broken spring so I actually have lift up on the strut and then hit the steering knuckle until everything comes loose. Then I force the strut up and take the strut out of the steering. Up in the engine compartment, there are three 13mm bolts and they usually come out pretty easy and sometimes they actually break but that's not a big deal if they break off, your new strut assembly comes with new ones.
You can see. Problem with our old strut, right there, a broken spring, not uncommon on these vehicles. This strut is from 1A Auto. It comes all assembled as one piece with the coil spring already on there. It makes it easy to install. I'll remove these. You'll want to put that up in there. I'm going to put it up in there so that this is to the inside. I'm just going to put it in and through here. Take a peek here, just looking at the studs, get them up through. They come up through. Put these bolts on and the nuts. Tighten up the nuts in there. Remember to tighten that with this. Now, continue to be really careful of this harness here. Take care of your strut and your suspension when you're getting that strut right in that groove there. Pull along the strut and pull the steering knuckle out. Push everything together. Now, put a bolt that pinches the steering knuckle back on to the strut in and push on it with your wrench and start it in but don't tighten it yet.
Now, you want to make sure that before you tighten this bolt up, okay, you want to make sure your strut is in the right position. Basically you want to have it so the inside here is just below and then the outside is just flush. The strut is actually indented. You don't want to be too high on the strut. I can probably show you better on this strut here. You can see that the strut comes out and you want to be down below. Your taper is here and you want to make sure you're down below the taper where you tighten it up.
The strut and steering knuckle move around, let's make sure we have it at the right depth. Then use a torque wrench to tighten this bolt between 65 and 70 foot. You're going to put this break back in place, and take your tie rod in and put the wheel over, the tie rod back up in and just kind of put the nut on the tie rod for now to kind of hold it in place and then the stabilizer link here. Get it through. Put this strut back on. As you tighten this up the stud is not spinning, put that back in place. Put that back in place up here. I'm going to fast forward here as I use a jack. Jack the tie rod right on to the tie rod, up into the suspension that holds the stud in place in the steering knuckle. Then you tighten up the nut and torque it to 55 to 60-foot pounds. Put the wheel back on.
I'm going to fast forward here. Put the wheel on. Make sure you thread the lug nuts on a few turns, finger-tight just to make sure that they're not cross threading. Then tighten your lug nuts up preliminarily and then you're going to put the vehicle on the ground and torque the lug nuts. You want to torque the lug nuts to a 100-foot pounds and give me a crossing pattern.
These nuts up here, torque between 25 and 30-foot pounds.
We hope this helps you out, brought to you by www.1AAuto.com, your source for quality replacement parts and the best service on the internet. Please feel free to call us toll free, 888-844-3393. We're the company that's here for you on the internet and in person.

PSA06264
