Replaces


Recommended for your 2009 Chrysler Aspen
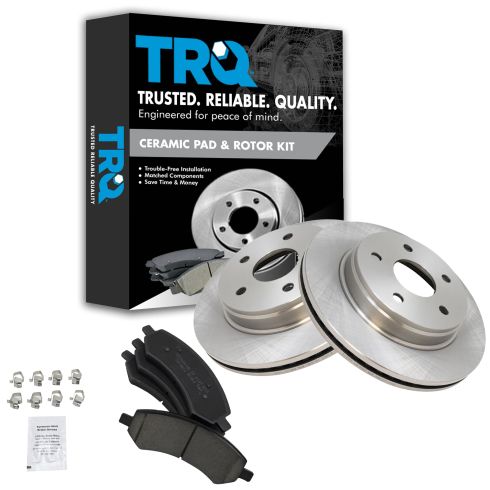
Part Details
Specifications
About TRQ:
TRQ is a trusted brand dedicated to making every repair a success story by combining premium parts with easy installation. Each TRQ part is engineered by a team of automotive experts to meet or exceed OEM standards, delivering enhanced performance and maximum longevity. With rigorous in-house testing, the brand ensures superior fit and function across every product line. TRQ also provides customers with best-in-class, step-by-step installation videos—so you can complete repairs with confidence, whether you're a first-time DIYer or an industry professional.
Product Features
TRQ brake kits are designed to restore your brake system to like-new performance. TRQ brake pads are positive molded, thermal scorched, chamfered, and utilize a multi-layer shim for enhanced performance and service life. TRQ rotors have a non-directional finish that reduces the break-in period for new rotors as well as reducing vibrations throughout the rotor’s lifecycle. All products are fit and road-tested in our Massachusetts R&D facility to ensure we deliver on our promise of Trusted Reliable Quality.
Attention California Customers:
 WARNING: This product can expose you to chemicals including Lead and Lead Compounds, which are known to the State of California to cause cancer, and birth defects or other reproductive harm. For more information, go to www.P65Warnings.ca.gov.
Lifetime Warranty
This item is backed by our limited lifetime warranty. In the event that this item should fail due to manufacturing defects during intended use, we will replace the part free of charge. This warranty covers the cost of the part only.
FREE Shipping is standard on orders shipped to the lower 48 States (Contiguous United States). Standard shipping charges apply to Hawaii and Alaska.
Shipping is not available to a P.O. Box, APO/FPO/DPO addresses, US Territories, or Canada for this item.
Expedited is available on checkout to the United States, excluding Alaska, Hawaii.
Final shipping costs are available at checkout.

Created on:
Tools used
Brought to you by 1AAuto.com-- your source for quality replacement parts and the best service on the internet.
Hi, I'm Mike Green. I am one of the owners of 1AAuto. I want to help you save time and money repairing or maintaining your vehicle. I'm going to use my 20 plus years of experience restoring and repairing cars and trucks like this to show you the correct way to install parts from 1AAuto.com. The right parts installed correctly, that's going to save you time and money. Thank you and enjoy the video.
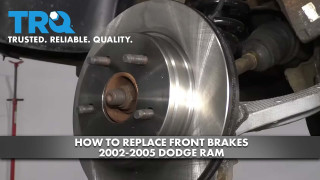
In this video, we're going to show you how to replace the front brake pads and rotors on this 2004 Dodge Ram 1500. This is a full-drive. This procedure is generally the same for most of this generation truck. Tools you'll need are 7/8, actually, or a 22 millimeter, pretty much the same size, 13/16", 13 millimeter sockets, ratchet. You'll probably want a breaker bar or a pipe to get some leverage on your ratchet handle. A sledge hammer if your rotors are rusted like they were on our vehicle, a large screwdriver or a small pry bar, wire brush, large C-clamp and we also use some penetrating oil.
First, you want to remove your wheel. If you're just using hand tools, start with the vehicle on the ground, loosen the lug nuts first and then raise it, secure it with jack stand then remove the wheel. I've got air tools and I use them. Either the 7/8" or 22 millimeter, both will work. Okay, and we'll fast forward here as I remove the lug nuts, the cap and the wheel. Now, with the wheel off, you can check the condition of your brakes or your rotors. Use the back of your finger. Just run them up and if you're feeling hard ridges, or this actually has some pretty deep bruise here so I'm actually going to replace these rotors. Then you can check the condition of your pads. As you can see, my pads are actually in pretty good shape. The pad is right there and I will only turn the rotor. On the rotor, you can see turning for pads right next to it. There are some pretty good bites in the pad but I don't like the look of these rotors so I'm going to replace the rotors and pads.
What you want to do, take a large pry bar or large screw driver or a small pry bar like this. You're going to pry out on the caliper. It pushes the pistons. These are pistons right here. By prying out those pistons, get pushed back into the caliper. You remove the caliper; you're going to want to remove two 13 millimeter bolts, one here and then one up here. Pretty easy and it's loosen up, supposed to be too tight but it will come up with a small ratchet and then socket or wrench. The caliper comes off, take that, just left it up here for now. Now, your brake pads, it will just come right out. You'll need your pry bar and I got it right out. Now, you can see that rotor is still blocked by this bracket. To get the bracket off, it's two bolts, one here, one here. What I'm finding the best is a 13/16", 21 millimeters looks like is a little too big. It's kind of odd that they go back and forth between standard and metric.
When these bolts are done, you'll either want a breaker bar like this or you could just have a ratchet and a piece of pipe, put it under your ratchet or your breaker bar, give yourself an extra leverage and loosen up the bolts. Just be careful when you do this, you'd pull nicely so it doesn't jerk. I mean, you're putting not much torque on it. You don't want to pull off the bolt. After showing you how to do the leverage, I just cheat and use the impact wrench anyways. I'm going to spray the rotor with tons of penetrate. Hopefully, it's getting there. On your vehicle, you maybe want to do this, just sit it overnight and come back on the back side of the rotor and the hub. Pull out the big gun.
You probably noticed the shiny, new hub there. I did do this brake video along with a couple of other repairs. If you like to see the other steps involved in replacing that hub, then just check out our other videos. You go on nicely. I would just take a lug nut. Just sort of somewhat hold on there while I put the brakes together. This is the bracket that the caliper bolt too is on and has a stainless steel slide here. This one will take a wire brush to clean those off real good.
Now, we have two lug bolts, 13/16", just put the bracket on like that. Just a reminder, the bracket goes on the disc side and the bolts go in. I'm going to tighten these bolts a little bit. Made my tool crunch and tighten it to 110 pounds. Now, I'm just going to wipe rotors down, just a little bit of Mineral Spirits here, just to make sure there's nothing on, Mineral Spirits brake cleaner even gasoline as long as it cleans off grease and then evaporate quickly. Okay, my new pads from 1AAuto, exactly the same as the old pads. On here, I assemble around within a minute. It's pretty to put to these on, but what I found was that the brake disc was wobbling around and preventing me so I put another bolt on it and just another, that's all set.
For the next step, you may want to loosen your brake fluid cap a little. When we pried out the caliper, we attempted to reset the pistons. You see the pistons are still slipping out. What we can do is just take an old tab and then a large C-clamp. Then you have the C-clamp to reset pistons, as I tighten the C-clamp, the pistons go further in. Caliper back on just to make sure that these are sliding nice and free. Got to push them all the way that way, and then put this back on. You put the top up in first and then the bottom. You'll now start your 13 millimeter bolts and we'll put these in. Then torque comes to 25 pounds.
Then we'll fast forward through the preliminary tightening of those bolts. I'll fast forward it a little bit here. Remove those two lug nuts that I used to hold the rotor in place, then put the wheel back up on. Hand-thread the lug nuts and then I just tighten them up preliminary with the air wrench. Then, as you lower the vehicle on the ground and then tighten the lug nuts, 120 pounds and you want to create a star pattern as you're torqueing them.
Last very important step, make sure you reset your disk brakes by pumping them and then before you road test, you stop from 5 and 10 miles an hour just to make sure your vehicle just stop before you enter the roadway.
We hope this helps you out. Brought to you by www.1AAuto.com- your source for quality replacement parts and the best service on the internet. Please feel free to call us toll free, 888-844, 3393. We're the company that's here for you on the internet and in person.
Tools used
Brought to you by 1AAuto.com-- your source for quality replacement parts and the best service on the internet.
Hi, I'm Mike Green. I am one of the owners of 1AAuto. I want to help you save time and money repairing or maintaining your vehicle. I'm going to use my 20 plus years of experience restoring and repairing cars and trucks like this to show you the correct way to install parts from 1AAuto.com. The right parts installed correctly, that's going to save you time and money. Thank you and enjoy the video.
In this video, we're going to show you how to replace the front brake pads and rotors on this 2004 Dodge Ram 1500. This is a full-drive. This procedure is generally the same for most of this generation truck. Tools you'll need are 7/8, actually, or a 22 millimeter, pretty much the same size, 13/16", 13 millimeter sockets, ratchet. You'll probably want a breaker bar or a pipe to get some leverage on your ratchet handle. A sledge hammer if your rotors are rusted like they were on our vehicle, a large screwdriver or a small pry bar, wire brush, large C-clamp and we also use some penetrating oil.
First, you want to remove your wheel. If you're just using hand tools, start with the vehicle on the ground, loosen the lug nuts first and then raise it, secure it with jack stand then remove the wheel. I've got air tools and I use them. Either the 7/8" or 22 millimeter, both will work. Okay, and we'll fast forward here as I remove the lug nuts, the cap and the wheel. Now, with the wheel off, you can check the condition of your brakes or your rotors. Use the back of your finger. Just run them up and if you're feeling hard ridges, or this actually has some pretty deep bruise here so I'm actually going to replace these rotors. Then you can check the condition of your pads. As you can see, my pads are actually in pretty good shape. The pad is right there and I will only turn the rotor. On the rotor, you can see turning for pads right next to it. There are some pretty good bites in the pad but I don't like the look of these rotors so I'm going to replace the rotors and pads.
What you want to do, take a large pry bar or large screw driver or a small pry bar like this. You're going to pry out on the caliper. It pushes the pistons. These are pistons right here. By prying out those pistons, get pushed back into the caliper. You remove the caliper; you're going to want to remove two 13 millimeter bolts, one here and then one up here. Pretty easy and it's loosen up, supposed to be too tight but it will come up with a small ratchet and then socket or wrench. The caliper comes off, take that, just left it up here for now. Now, your brake pads, it will just come right out. You'll need your pry bar and I got it right out. Now, you can see that rotor is still blocked by this bracket. To get the bracket off, it's two bolts, one here, one here. What I'm finding the best is a 13/16", 21 millimeters looks like is a little too big. It's kind of odd that they go back and forth between standard and metric.
When these bolts are done, you'll either want a breaker bar like this or you could just have a ratchet and a piece of pipe, put it under your ratchet or your breaker bar, give yourself an extra leverage and loosen up the bolts. Just be careful when you do this, you'd pull nicely so it doesn't jerk. I mean, you're putting not much torque on it. You don't want to pull off the bolt. After showing you how to do the leverage, I just cheat and use the impact wrench anyways. I'm going to spray the rotor with tons of penetrate. Hopefully, it's getting there. On your vehicle, you maybe want to do this, just sit it overnight and come back on the back side of the rotor and the hub. Pull out the big gun.
You probably noticed the shiny, new hub there. I did do this brake video along with a couple of other repairs. If you like to see the other steps involved in replacing that hub, then just check out our other videos. You go on nicely. I would just take a lug nut. Just sort of somewhat hold on there while I put the brakes together. This is the bracket that the caliper bolt too is on and has a stainless steel slide here. This one will take a wire brush to clean those off real good.
Now, we have two lug bolts, 13/16", just put the bracket on like that. Just a reminder, the bracket goes on the disc side and the bolts go in. I'm going to tighten these bolts a little bit. Made my tool crunch and tighten it to 110 pounds. Now, I'm just going to wipe rotors down, just a little bit of Mineral Spirits here, just to make sure there's nothing on, Mineral Spirits brake cleaner even gasoline as long as it cleans off grease and then evaporate quickly. Okay, my new pads from 1AAuto, exactly the same as the old pads. On here, I assemble around within a minute. It's pretty to put to these on, but what I found was that the brake disc was wobbling around and preventing me so I put another bolt on it and just another, that's all set.
For the next step, you may want to loosen your brake fluid cap a little. When we pried out the caliper, we attempted to reset the pistons. You see the pistons are still slipping out. What we can do is just take an old tab and then a large C-clamp. Then you have the C-clamp to reset pistons, as I tighten the C-clamp, the pistons go further in. Caliper back on just to make sure that these are sliding nice and free. Got to push them all the way that way, and then put this back on. You put the top up in first and then the bottom. You'll now start your 13 millimeter bolts and we'll put these in. Then torque comes to 25 pounds.
Then we'll fast forward through the preliminary tightening of those bolts. I'll fast forward it a little bit here. Remove those two lug nuts that I used to hold the rotor in place, then put the wheel back up on. Hand-thread the lug nuts and then I just tighten them up preliminary with the air wrench. Then, as you lower the vehicle on the ground and then tighten the lug nuts, 120 pounds and you want to create a star pattern as you're torqueing them.
Last very important step, make sure you reset your disk brakes by pumping them and then before you road test, you stop from 5 and 10 miles an hour just to make sure your vehicle just stop before you enter the roadway.
We hope this helps you out. Brought to you by www.1AAuto.com- your source for quality replacement parts and the best service on the internet. Please feel free to call us toll free, 888-844, 3393. We're the company that's here for you on the internet and in person.
Tools used
Hi. I'm Mike from 1AAuto. We've been selling auto parts for over 30 years.
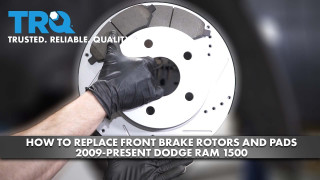
What's up, guys? I'm Andy from 1AAuto. Today I'm going to show you how to install these front brakes on this 2016 Ram 1500. If you need these parts or other parts for your vehicle, click the link in the description and head over to 1AAuto.com.
We're going to loosen up these lug nuts. We're going to use a 7/8 socket and a breaker bar. You can also use a 22 mm socket. Loosen these up. I'm going to raise and support the vehicle. We're using a two-post lift. If you're doing this at your house, you can use a jack and jack stands.
We're going to take these lug nuts off. Just use the socket. Take the lug nuts off. Grab the tire. Pull it down. We're going to loosen up these two 13 mm bolts. I'm going to use a 13 mm socket and ratchet, and right now the caliper slide is spinning, so I'm going to use a pair of pliers on here to hold the slide while I loosen up the bolt. Once it's pretty loose, you can do it by hand. That goes out.
You're going to take a straight blade screwdriver. Get in between the rotor and the caliper. Just pry back a little bit. Slide the caliper out. That's just going to compress the piston a little bit, and then you're going to take this brake caliper hanger. We actually sell these at 1AAuto.com. Slide it into this hole here. Now we can slide it on the coil spring. It's going to hold it. It's going to take the pressure off the brake hose. Slide it like that.
We're going to take a straight blade screwdriver. Take these pads off. Just get in between the pad and the rotor. Pry it out. These are on there pretty good. Frozen a little bit. Slide those out. Slide this one out as well, just like that. Do the same for the outside. I'm going to take a 21 mm socket and a breaker bar. You'll loosen up these two bolts for the caliper bracket. Loosen up the top one. Once those are loose, I can switch to a ratchet. Take that bolt out. Once this is loose enough, do it by hand. Support the bracket with your other hand. Pull the bolts out, and slide the bracket right off the rotor.
We're going to take this little retainer off. They only use this to hold the rotor on at the factory. It's not required, so we're just going to take it off. We'll cut it off and throw it out. We'll use some side cutters. Just grab it right here. Pry it out a little bit. Once you break it, it's pretty easy to get it off. Slide it out.
Now to get the rotor off, we're going to use a hammer. We're just going to hit in these locations, being careful not to hit the studs. There we go. Grab the rotor. Slide it off.
Here's our old brakes. Here's our new brakes from 1AAuto.com. If you look at the pads, the pads are the same shape. They have the same ears, the same pad design on the back side. Both the same. If you look at the rotors, rotors are the same height. You have the same bolt pattern, the same fins in the middle to cool. Back side, the same. Get yours at 1AAuto.com, and you'll be ready to rock and roll.
We're going to clean up this caliper bracket. Just take a wire brush. Just clean up in this area right here, just like that. Get some of the rust out, corrosion. Looks good like that, and we're going to do the same for the other side. Now we're going to take the slide pin out. Just grab the rubber grommet right there. Slide it out. Take a little bit of brake parts cleaner. Spray it on here. Use a rag to wipe it off. Clean that up good. Take a little brake parts cleaner. Spray it down the hole where the pin goes. Use a rag to clean some of that up. Drain it out. Take some brake caliper grease. Put it on the slide pin, just like that. Reinstall the pin. Make sure you get the rubber grommet to slide into position, just like that, and we'll do the same for the other side.
We're going to clean up these pad clips. I'll just take a wire brush. Just clean these up a little bit because we're going to reuse them. Once that's cleaned up, just slide it off. Just wiggle it back and forth, and take the new pad. Just get it into position, and just slide it on just like that. Now we'll do the same for the other ones.
I'm going to take a wire brush. We're going to clean this hub up before we reinstall the rotor to clean some of the rust off, just like this. All right. That looks pretty good. I'll take a new rotor. I'm going to put it on backwards first. Take some brake parts cleaner and clean off the back side of the rotor. There is a protective coating on it, so we want to wipe that off. Now we'll flip it around and do the same on this side. Spray some brake cleaner. Wipe it off.
To make this easier to install, I'm just going to take a lug nut. Just put this on temporarily, so it's easier to install the brakes. I'm going to take the brake caliper bracket, line this back up over the rotor, and then take the caliper bolts. There is some thread locker on these bolts. You can apply new thread locker, if you'd like. Get those started. I'll take a 21 mm socket and ratchet, and I'll snug these bolts up.
We're going to take a 21 mm socket and a torque wrench. I'm going to torque these bolts to 130 foot pounds. Now we're going to take some brake caliper grease. We'll just put it on the brake pad clips right here. We'll do it on the other side, as well. Then also on the back of the pads. We'll just put a little bit of it on the back of the pads, just like that. We'll install this one on the outside. Be careful not to get grease on the pad material itself. Now we'll do the same with the other one.
Now we're going to take the brake caliper, take the hanger off. Slide that out of there. Flip the caliper over. Take one of the old brake pads. Slide this into position. Now we have this brake caliper compressor tool. We sell this at 1AAuto.com. This is only a single piston tool. We have two pistons here. It will still work. We're just going to have to go back and forth with it. Just get this started. I'm just going to compress this slowly. As we're compressing this piston, the piston's moving into the caliper. It's pushing brake fluid through the hose, through the lines, back up into the master cylinder, and back into the reservoir. It's a good idea to check your reservoir after you're done your brake job and adjust the fluid level accordingly. Just go back and forth. Loosen it up. Go back to this side.
Once those pistons are completely compressed, make sure the rubber seals or the dust seals are not in the way. They're in there properly. You can make sure the hose is not twisted. Line this back up on the caliper bracket. Take the bolts that hold this on. Get this started. Get the lower one started.
Next I'm going to use a 13 mm socket and a torque wrench. I'm going to tighten down these bolts to 31 foot pounds. I am going to use a pair of pliers to keep the caliper bolt from spinning, caliper slide from spinning. Do the same for the top one. That's good.
I'm going to take this lug nut off. Install the tire and wheel. Slide that in position and take the lug nuts. Install them. Just take the socket. Just make sure these are all snug. I'm going to lower the vehicle and torque them.
Now I'm going to take a 7/8 socket or a 22 mm socket and a torque wrench. Going to torque these to 130 foot pounds. I'm going to tighten these down in a star pattern. That'll make sure the wheel gets tightened down evenly. I'll just go around again. Make sure they're all tight. Those are good.
After we do a brake job, we want to make sure that we get back in the truck and we pump the brake pedal, because there's going to be an air gap between the caliper piston and the brake pads, so just pump it slowly. Once you feel that the pedal is hard, then you're good to go.
After we're done, we want to make sure and check the brake fluid level. The level right now is at the max line. There's a max line here, a min line here. We're going to want to adjust this level accordingly. If you had to add fluid, just take the cap off. Add fluid. If you have to suck some out, just get it in between those two marks, preferably near the max line.
Speaker 3: Thanks for watching. Visit us at 1AAuto.com for quality auto parts, fast and free shipping, and the best customer service in the industry.
Tools used
Brought to you by 1AAuto.com, your source for quality replacement parts and the best service on the Internet.
Hi, I'm Mike from 1A Auto. I hope this how-to video helps you out, and next time you need parts for your vehicle, think of 1AAuto.com. Thanks.
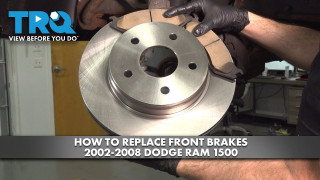
In this video, we're going to show you how to do the front brakes on this Dodge Ram. This one's a 2008, but the procedure’s pretty much the same for 2006 to 2008.
You'll need new pads and rotors from 1AAuto.com, a tire iron or a breaker bar with a socket to get your tire off. 13 to 22 millimeters sockets with a ratchet, a small pry bar or a flatblade screw driver, bungee cord or cable – I'll show you how to use those – a hammer, wire brush, large pliers, brake grease, torque wrench and jack and jack stands.
With the vehicle on the ground, using the 22 millimeter socket and breaker bar, break the lug nuts for your wheel lose. These chrome lug nuts tend to be swollen, so make sure your socket’s on there good. Once your lug nuts are loose, raise and support the vehicle with a jack and jack stands. This wheel and tire assembly, being a big off road tire and twenty inch wheel, is going to be real heavy. We're only going to bring it up a little bit when we take it off. Remove the wheel and tire from the hub.
Using a 13 millimeter socket and ratchet, remove the caliper slide bolts from the back of the caliper. Using a small pry bar or a large flat blade screw driver, remove the caliper from the pads, hang it from the control arm with a small bungee cord, a zip-tie or a mechanics wire.
To remove the brake pads from the carrier, you may find it helpful to use a screw driver to help pry them out. Using the 21 millimeter socket and ratchet, remove the caliper carrier bolts from the spindle. Remove the caliper carrier from the spindle. Remove the rotor from the spindle, often these are rusted on. Where this is not going to be reused we could hit the rotor, but in case you're reusing your rotor, be sure to hit this portion. Don't hit the lugs or the machined surface.
You can see our old rotor off the truck is all pitted and corroded, it's not going to brake well. It's going to make a lot of grinding noises. Our pads however, really aren't that bad, they look fairly recent, but you can see that they've been chewed up a bit by all this pitting and corrosion on the old rotors. You can see this new kit from 1A Auto is the exact same as the parts we pulled off of the truck. It's going to go right on just like your original equipment, direct fit. If your brake pads are worn out, or your rotors are damaged or warped, this new kit from 1A Auto is going to fix you up right.
Using a heavy wire brush remove as much of the rust scaling from the hub and the studs as you can. Using a large pair of water pump style pliers, compress the calipers, one piston at a time. Be sure to go slow so you don't damage any seals or force any excess brake fluid out of the master cylinder. Also going too fast can cause the other piston to come out. Once you've bottomed it out, move onto the top piston. Like I said, sometimes the other piston will come out as you're compressing the other. If you go slow, you may have to go back and forth a few times to make sure that both pistons are fully bottomed out in the caliper.
Apply brake grease to the contact points on the hub, to prevent our rotor from seizing like the old one did. You don't need too much, just a nice thin coat to make it easier for us to take it off next time. Reinstall the rotor onto the hub and, to keep the rotor upright while we install our caliper and pads and make it a little easier to put them on, I'm going to use an axle nut, if you have one around or you can use something else to space it. Sometimes a roll of electrical tape will work, anything that fits over the stud and inside the lug nut, so you don't have to thread the lug nut on all the way to keep the rotor upright.
Using a small wire brush remove the rust scaling from the slides on the brake caliper carrier. Just want to ensure that our brake pads and hardware move freely without binding or making any noise. Now we'll check our caliper slides, if there's any rust or corrosion on them you'll have to replace them, if it's too far gone, or you can clean the grease off, bring them down with a wire brush. Ours look good, so we're just going to remove them and grease all the moving surfaces on our caliper carrier. Reinstall the caliper bracket under your spindle, start the two 21 millimeter bolts. Torque the caliper bracket bolts to a hundred and thirty foot-pounds.
Install your new brake pad into the caliper bracket. Apply a thin coat of brake grease to the backing shim of the pad where the caliper will contact it. Remove the bungee cord from your caliper. Be sure that you don't twist the brake line, and reinstall it onto the carrier. You may have to push in on the slides a little to make it line up. Reinstall your thirteen millimeter bolts into the caliper slides. Torque the caliper pin bolts to twenty-four foot-pounds.
Remove your lug nut and the spacer holding your rotor on if you used one. Reinstall your wheel and tire. Start your lug nuts by hand, tighten the lugs as far as you can, remember to bring the wheel down evenly and always tighten in a cross pattern. Once the lugs are as tight as you can get them with the tire in the air, put partial weight of the vehicle on the ground by lowering it off your jack stands. Torque your lug nuts to a hundred and thirty-five foot-pounds in a cross pattern.
Thanks for tuning in. We hope this video helps you out. Brought to you by www.1AAuto.com, your source for quality replacement parts and the best service on the Internet. Please feel free to call us toll-free, 888-844-3393. We're the company that's here for you on the Internet and in person.

BKA11062