Replaces


Recommended for your 2007 Dodge Magnum
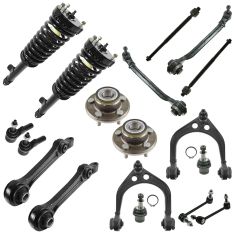
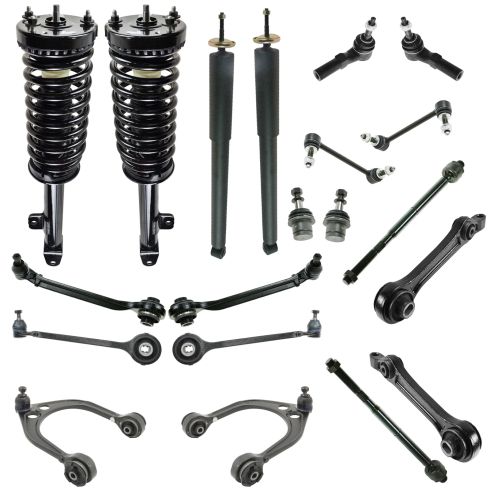
Part Details
Specifications
About TRQ:
TRQ is a trusted brand dedicated to making every repair a success story by combining premium parts with easy installation. Each TRQ part is engineered by a team of automotive experts to meet or exceed OEM standards, delivering enhanced performance and maximum longevity. With rigorous in-house testing, the brand ensures superior fit and function across every product line. TRQ also provides customers with best-in-class, step-by-step installation videos—so you can complete repairs with confidence, whether you're a first-time DIYer or an industry professional.
Product Features
TRQ suspension kits are manufactured using premium raw materials and coatings for extended service life. Each TRQ suspension component is designed to be a direct, maintenance-free replacement to the stock unit. To extend the life of your steering and suspension components, TRQ recommends replacing components in pairs, sets, or kits. All products are fit and road-tested in our Massachusetts R&D facility to ensure we deliver on our promise of Trusted Reliable Quality.
Our direct fit gas-charged shock absorbers help restore your vehicle's handling and ride quality to just like new.
Replacing struts used to require specialized tools to compress, remove, and transfer the old spring and mount. Our Pre-assembled, complete strut & spring assemblies come with all new parts and make the job much quicker and easier for the do-it-yourself mechanic.
Strut & spring assembly contains:
Install Tip: When replacing steering components, have a professional alignment performed afterwards. This ensures proper tracking and even tire wear.
Our steering and suspension components are pre-greased and sealed for long life and do not require the extra maintenance typically required by greaseable versions.
Attention California Customers:
 WARNING: This product can expose you to chemicals including Chromium (Hexavalent Compounds), which is known to the State of California to cause cancer, and birth defects or other reproductive harm. For more information, go to www.P65Warnings.ca.gov
Lifetime Warranty
This item is backed by our limited lifetime warranty. In the event that this item should fail due to manufacturing defects during intended use, we will replace the part free of charge. This warranty covers the cost of the part only.
FREE Shipping is standard on orders shipped to the lower 48 States (Contiguous United States). Standard shipping charges apply to Hawaii and Alaska.
Shipping is not available to a P.O. Box, APO/FPO/DPO addresses, US Territories, or Canada for this item.
Expedited is available on checkout to the United States, excluding Alaska, Hawaii.
Final shipping costs are available at checkout.
Created on:
Tools used
Hi, I'm Mike from 1AAuto. We've been selling auto parts for over 30 years! We're dedicated to delivering quality auto parts, expert customer service, and fast and free shipping, all backed by our 100% satisfaction guarantee. So visit us at 1AAuto.com, your trusted source for quality auto parts.
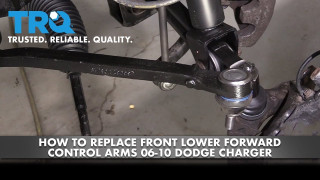
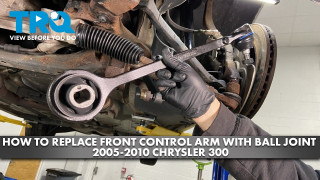
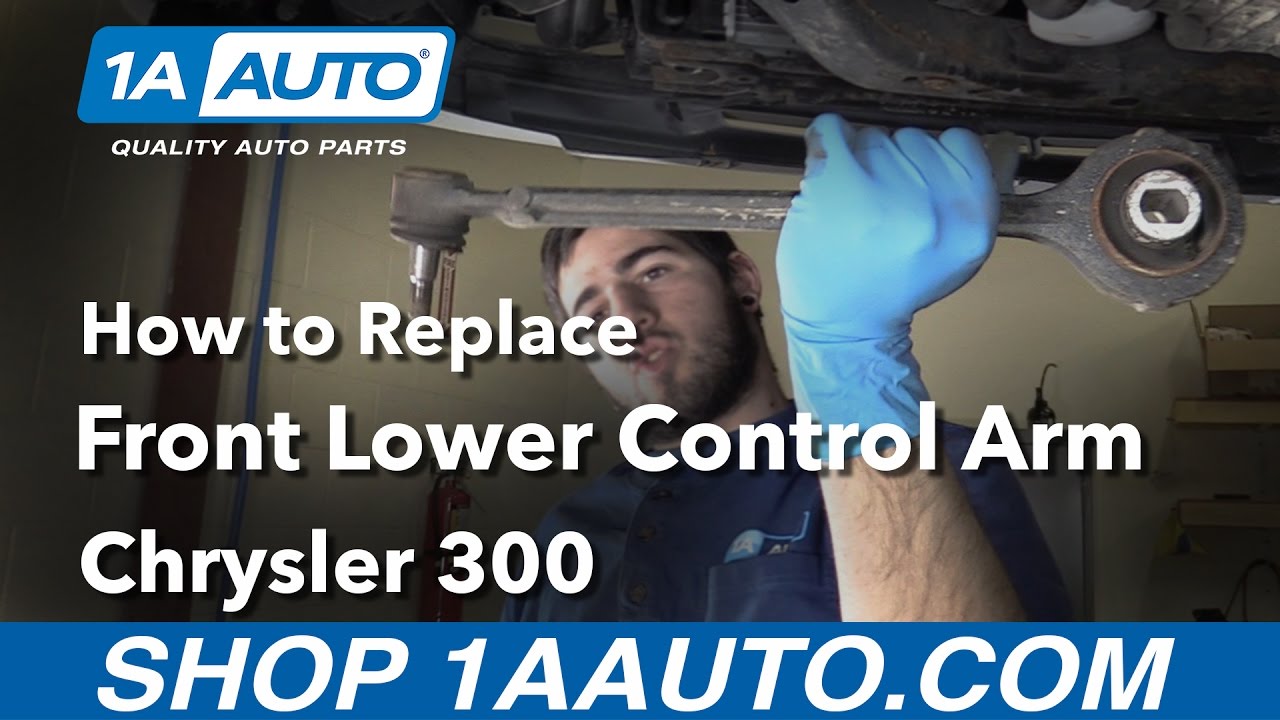
In this video, we're going to be working with our 2006 Chrysler 300. We're going to show you how to remove and replace your vehicle's front lower control arm. This is the one in the front of your spindle with the ball joint installed in the actual arm, and not the one that connects to the spindle and the strut.
If you like this video, please click subscribe. We have a ton more information on this and many other vehicles. If you need this part for your car, you can follow the link down in the description over to 1AAuto.com.
Here are the items you'll need for this repair: full metric socket set, ratchet, socket extensions, 21mm wrench, 22mm wrench, breaker bar, torque wrench, 6mm Allen key, hammer, safety goggles, gloves, rust penetrant, jack and jack stands
Using a 21mm socket and a breaker bar, loosen all of your lug nuts about one turn. Raise and support your vehicle. We're using a lift to make it easier to show you what's going on, but this job can easily be done at home with a jack and jack stand. Remove your lug nuts the rest of the way by hand. Remove your wheel and tire.
After removing your wheel and tire, locate the bolt for the forward lower control arm on the sub-frame to remove this. We use an 18mm socket breaker bar, as well as an open ended 21mm wrench on the nut at the back. Make sure that's on there good and tight, because you have much fewer points of contact with a wrench. You don't want to risk stripping it. Once you get it loose, you should be able to switch over to a socket and ratchet. Finish removing the nut and bolt by hand. Be sure not to lose these large washers that are on either side of the sub-frame.
We'll place those somewhere safe while we finish removing our forward lower control arm. Remove the 22mm nut on the bottom of your ball joint with a socket and a breaker bar. Now, what we're going to do here is loosen that nut so it's flush with the end of our bolt.
Now, we'll hit the end of the stud and the nut with a hammer until it releases from the spindle. Be careful not to damage the backing plate in the process. Be sure to use safety goggles during this step. Using the 6mm Allen key to hold the stud on the ball joints steady, remove the nut. This step should only be necessary if in hitting the nut you get it wedged onto the stud, so be sure to check the condition of the threads once you finish removing the nut. You may have to swing the spindle away some in order to get that ball joint out. You may need to use a pry bar to help work the control arm out of the sub-frame if it's really wedged in there like ours is. Remove the control arm from the vehicle.
Here we have our old control arm, which we removed from our vehicle, and our new part from 1AAuto.com. As you can see, this new part is a complete assembly, which comes with a nice new boot. You can see how beat up this old one is. Has a new nut for the end of our ball joint. You can see, this is actually a really good example of some reasons you might replace this arm.
Here we can see how bad the ball joint on the end is, while our new one has no up and down play in it. You can see that our bushing is tearing through pretty bad over here. Now, there is evidence that this vehicle was lowered substantially, meaning that the suspension took much more abuse than it would at its factory ride height, so this new part from 1AAuto is going to get our vehicle riding back the way it should, like it did when it was new without the clunks and bangs and the poor feel of suspension and handling from this torn bushing and bad ball joint. It's going to go in direct fit, just like our original equipment, and fix this up right.
Reinstall the lower control arm. We'll have to start on the spindle end. Turning the wheel could help give us a little bit of the extra clearance we're going to need. Remember, without both lower control arms, you are able to move the hub a little bit. We'll line up the rear and reinstall our bolt hand-tight to start. The bolt will go through from the front. Now, ours was being pretty difficult going in, so I ended up using the 18mm socket and ratchet to help spin it into place. Make sure that there's no substantial weight on the control arm when doing this. Otherwise, you risk damaging your threads.
Now, we'll support the nut with our 21mm wrench. We're just going to get this down close, but not tight until the weight of our suspension is on the vehicle. Otherwise, we risk pre-loading the bushing and cause premature wear to our new part. Now set the ball joint end into its hole in the control arm. You may have to move the stud in the ball socket or turn the spindle one way or the other or pull it in and out to line everything properly. Start your new nut on the end of the threads.
Now, you'll notice I'm pushing down on the ball joint to set the taper into the spindle. This should help prevent the stud from rotating. If not, we'll have to use that 6mm Allen key to hold the stud in place while we tighten the nut with a 22mm open-ended wrench. Torque the ball joint to 50 foot-pounds and add 90 degrees to it.
Now, we're going to use a screw jack, but you can easily do this by reinstalling your wheel and tire and just letting your vehicle off the jack, or you can use a jack to push up on this lower control arm. Now we're going to put the weight of the vehicle back on to the suspension by lifting up on it, just until it comes off of your jack stands or in our case the lift. We'll torque our lower control arm bolt at the cradle to 130 foot-pounds. Remove your jack or a screw jack.
If you didn't use the weight of the vehicle on the tires in order to reinstall it, we'll reinstall your wheel and tire now. Get your 21 mm lug nuts as tight as you can by hand. Lower the partial weight of your vehicle back onto the tires. Torque your lug nuts to 110 foot pounds in a cross pattern.
Thanks for watching. Visit us at 1AAuto.com for quality auto parts, fast and free shipping, and the best customer service in the industry.
Tools used
Hi, I'm Mike from 1A Auto. We've been selling auto parts for over 30 years. We're dedicated to delivering quality auto parts, expert customer service, fast and free shipping, all backed by our 100% satisfaction guarantee. Visit us at 1AAuto.com, your trusted source for quality auto parts.
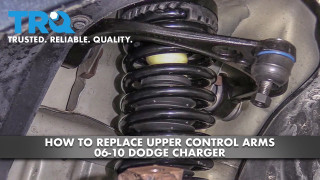
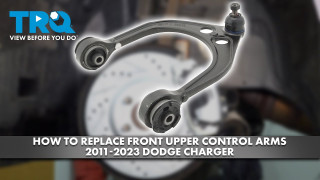
In this video, we're going to be working with our 2006 Chrysler 300. We're going to show you how to remove and replace your vehicle's upper control arm in your front suspension. Now this part is an assembly, so it comes with new bushings and a new ball joint all ready to go. If you like this video, please click subscribe. We have a ton more information on this and many other vehicles. If you want this part for your car, you can follow the link down in the description over to 1AAuto.com. Here are the items you'll need for this repair.
Using a 21mm socket and a breaker bar, loosen all of your lug nuts about one turn. Raise and support your vehicle. We're using a lift to make it easier to show you what's going on, but this job can easily be done at home with a jack and jack stands. Remove your lug nuts the rest of the way by hand. Remove your wheel and tire.
Remove the nut on the bottom of your ball joint with a 19mm socket and ratchet. Using a bungee cord or a mechanic's wire, we're going to secure our control arm. Now this should be okay, but you want to be careful when it releases to make sure that it doesn't flop over too far and tear something like your ABS sensor or your brake hose.
Now if you were to just replace this upper control arm, you could use a pickle fork or a ball joint fork and separate it by tapping that in between. However, that's prone to damaging the boots. If you're going to remove this to service the spindle, the strut, or something like that, you'll want to keep this intact. To do that, we'll use a hammer and tap on the front or side of the spindle right where the ball joint taper goes through to release it. Once you've tapped it free, you'll see why we installed that bungee cord.
Remove the 18mm nut on the outside of the strut tower here, and its twin over on the backside down here. You can't see it very well but you can reach it with an 18mm wrench, so we'll remove both of those. Remove the nut and move onto the back side. Be very careful of any wiring you find here. Our bolt was actually pretty rusty and I was having a tough time getting it off with a wrench. Fortunately, an 18mm socket and this flexible handle ratchet was able to get in there and do the trick. Remove the nut.
Now we did our job on the passenger side but you'll follow the same steps for the driver side with this small exception of relocating your coolant reservoir. Now this only takes a moment so we'll show you how to do it. You push this thumb tab over here so you can lift up and release the power steering reservoir. Just hang that off to the side. Then using a 10mm socket, ratchet, and extension, we'll remove these two 10mm bolts. Now you simply lift up and you can move the reservoir out of the way to access your 18mm nut.
Now to access the rear bolt on the driver side you have this cool little access panel for your brake fluid reservoir, which may allow you a little more room to get at this nut down here.
Remove the two captured bolts securing the control arm in. All you got to do is grab the tab, wiggle them out. You got to lay them down flat to get them behind the strut like that. Do the same thing on the rear. Remove the control arm from the vehicle.
Here we have our old upper control arm that we removed from our vehicle and our new part from 1AAuto.com. As you can see, these parts are mirror images of each other, the reason for that being this is the passenger control arm that we removed and this is the driver side upper control arm that I ordered for the vehicle. I made a mistake here. It's very important that you check your parts before beginning a job for this exact reason here. Everybody makes mistakes. I ordered the wrong thing and started on the wrong side of the car, and had we been doing this in the driveway, we would have been in some trouble right now with a job we couldn't finish and a car we probably drive every day.
However, if you ordered the correct part, you'll see that they have the same ball joint. Our new one even comes with this nice nylon thread-locked nut on it and two brand new bushings. The shape of this control arm is a mirror image of this because, again, it's the opposite side. You can see that the shape does follow the same contours, so the passenger side would be identical to this just as the drivers on our vehicle would be identical to this part. If your bushings go bad, it can cause a little bit of a vibration or a thud, maybe some creaking noises when you go over bumps. As can a bad ball joint, these can cause alignment and tire issues as well as handling and steering issues that you'll notice when driving the vehicle. If you have a bad upper control arm, be it the arm itself being rusted or damaged, bad bushings, or a bad ball joint, this complete replacement assembly from 1AAuto.com is going to go in direct fit just like our original equipment, so long as you ordered the correct side, and fix you up right.
Install your control arm. Make sure you lay the tab down flat on the bolt so you can line it up with the hole. You may have to wiggle them around there. These can be a little tough to see how you're lining them up. You just got to get that bolt started and work them around until it goes all the way through. There you go. Then we'll follow the same steps for the bolt in the rear.
Now there was nothing wrong with our old control arm, which is why we're reinstalling it. It's also why it's a good thing that we removed it by tapping the knuckle as opposed to using it with a pickle fork because we would have damaged the boot and rendered it useless. Slide the ball joint back into the spindle and start your 19mm nut. Torque the ball joint nut to 35 foot-pounds. Now once it's torqued, we'll want to add a 90-degree turn to it. You can use a torque angle finder if you have one, or you can just eyeball it like we've done there.
Remove your bungee cord and reinstall your wheel and tire. Lower the partial weight of your vehicle back onto the tires. Reinstall both of your 18mm nuts onto the studs. The reason we're going to tighten these down now is because with the weight of the vehicle on the tires, tightening these bushings down will mean that they're tightened nice and straight at ride height, which will prevent them from getting preload or twisted with the vehicle at ride height, which would cause premature wear of our bushings, meaning we'll have to do the job again sooner.
Now I'm just going to get these down nice and tight by hand, and we should be fine. If you want to torque them, the spec is 55 foot pounds, but you're going to have to remove a lot of stuff to get a torque wrench in there. Maybe you could use a crow's foot for it. We'll just get them down nice and tight with our hand tools and everything should be just fine. We'll use whatever tool you used to loosen the nut to tighten it back up. We used an 18mm socket with a flexible handle ratchet. You may have used a short wrench or a ratcheting wrench. Whatever you used to get access in there is exactly what we'll use to tighten it.
If you removed your driver side upper control arm, you'll have to lay your reservoir back into place and reinstall the two 10mm bolts. Tighten them down with your socket, ratchet, and extension. Slide the power steering reservoir back in and push it down until it clicks. Torque your lug nuts to 110 foot pounds in a cross pattern.
Thanks for watching. Visit us at 1AAuto.com for quality auto parts, fast and free shipping, and the best customer service in the industry.
Tools used
Hi, I'm Mike from 1A Auto. We've been selling auto parts for over 30 years. We're dedicated to delivering quality auto parts, expert customer service, fast and free shipping, all backed by our 100% satisfaction guarantee. Visit us at 1AAuto.com, your trusted source for quality auto parts.
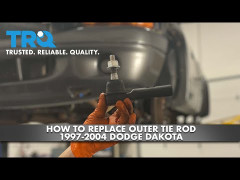
In this video, we're going to be working with our 2006 Chrysler 300. We're going to show you how to remove and replace the vehicle's inner tie rod which also requires the removal of the outer tie rod. We recommend you replace this at the same time. If you like this video, please click Subscribe. We have a ton more information on this and many other vehicles. If you need this part for your car, you can follow the link down in the description over to 1AAuto.com. Here are the items you'll need for this repair.
Using a 21 millimeter socket and a breaker bar, loosen all of your lug nuts about one turn. Raise and support your vehicle. We are using a lift to make it easier to show you what's going on, but this job can easily be done at home with a jack and jack stand. Remove your lug nuts the rest of the way by hand. Remove your wheel and tire.
Using the 24 millimeter wrench – and we've soaked both our jam nut and the nut on the end of the tie rod in penetrating oil – break the jam nut loose. We don't want to move it too far, just enough that it's off the end of the tie rod.
Using the 21 millimeter socket and a breaker bar, crack the nut on the end of your tie rod loose. Once you get it loose enough you may be able to finish removing it with a socket and ratchet. Now if you are removing and replacing the outer tie rod, you can use a pickle fork here, which sits between the spindle and the ball joint and knocks it out as you tap the fork in. However, that damages the boot rendering the old outer tie rod useless. So, in the interest in saving parts, we're going to use a hammer and hit the side of the spindle with a taper of the ball joint end goes through and release it. Remove your tie rod and count the number of turns it takes to remove it. It was just about 21 turns. We'll want to make sure that we install the new tie rod end that same number of rotations.
Now you'll notice that there's a hex cut on the end of your inner tie rod here, which is actually designed for a wrench to hold it. However, most open end wrenches are fairly weak and with a really stuck nut like we have on the end of our inner tie rod here, it's going to be a lot safer and easier to grab it with a pair of vice grips and spin this off with a 24 millimeter. We'll mark this flat with a paint marker. You could also mark it with a sharp chisel or punch, really anything that's just going to give you an indication of when it reaches the 12:00 position again. Five. Be sure to keep the tie rod itself steady, because this does pivot and can change the number of counts you have on that 12:00 position. Twenty-five, 26, 27, 28. It's about 28.
Using a pair of side cutters remove the clamp from the end of the tire rod boot. Now, you could also do this with a pair of pliers, but we're going to need the side cutters in the next step and I like to use the minimum amount of tools possible. Cut the old clamp off the inner edge of the boot. Sometimes you’ve got to work these ones a little bit to get them to break. Remove the boot from the rack.
Now you could get the appropriate inner tie rod tool or the right size wrench to get on to these flats and remove it. However in a pinch you can use a small pipe wrench. We set it over the end of the tie rod, tighten it up, and twist it off. Be very careful of this plastic insulator here. That's what's called a travel limiter and prevents the rack from sucking that end of the tie rod too far in and potentially damaging the seal. We want to be sure to reuse that when we install our new inner tie rod.
Here we have our old inner tie rod that we removed from our vehicle and our new part from 1AAuto.com. As you can see these parts have some minor aesthetic differences such as where the hex pattern lands on the inner tie rod in this taper here, but the important components are the same. We have the same threads on the end which are both the same length. It comes with a nice new jam nut which is good because this one was really stuck on there. You can see all the rust and corrosion that builds up. It has this little channel for keeping the bellow or the boot of the top situated exactly where it needs to be. We have the same hex on the inside here to help with installing.
You will have to remove this insulator and install it on the new part. What that does is it limits the travel of this part in and out of the rack so it doesn't get sucked in and risk damaging the seal on your rack.
What goes bad on these is this ball socket on the end which is what allows the tie rod to move and pivot as the suspension travels and the wheels turn left and right. Another reason you may replace this, other than having that socket worn out with in and outplay which you can feel when moving your tire at the 9:00 and 3:00 positions is these threads may become too corroded and not allow you to adjust your tie rods properly anymore, at which point you would want to cut that off, install a new one, and a new tie rod end on it, to make sure you can get easy and proper alignment angles.
Here we have our old tie rod end which we removed from our vehicle and our new part from 1AAuto.com. As you can see there are some minor aesthetic differences such as where the square channel is here. You either remove this with a wrench if it were to be stuck on while you're trying to get it off here in the tie rod, as well as having the grease fitting on this so you can service this and keep it greased, lubricated, and in good shape for longer. They have the same tapered end and threads, as well as a new nylon lock nut for our new part. The boots do look different but this has been bolted down and collapsed and it's been on there for almost 100,000 miles now. This is what all the boots look like when they're new and after you install it, it will closer to that.
Your tie rod end like most joints in your steering and suspension is a ball and socket joint. You can see that this one getting kind of tight, looks like there might be some rust building up down into that joint. Or these can develop play in them which will allow them to pop in and out or click side-to-side making your steering inaccurate and your alignment angles impossible to adjust, causing tire wear and handling issues. If you need to replace your tie rod end, this new part from 1A Auto is going to go in direct fit, just like your original equipment and fix you up right.
Make sure you change this travel limiter over from your old tie rod end onto this one. Be sure you can see that this one is a little worn here. This is the side that faced the rack. Be sure to mark that and put it in the same way. Once you've got it as tight as you can by hand, go ahead and finish tightening it up with your pipe wrench. You can see, this is just a small pipe wrench. I'm really not putting a ton of force on it. You'll feel where it stops on the end of those threads and doesn't want to go anymore. That'll be fine. Remove the new jam nut from the end.
We're going to use a new boot clamp on the end of our boot. However, if you don't have one of these, that's okay. You can get away with using a hose clamp for it. Set the teeth in and engage. Slide it all back in. Slide that on.
If you don't have a pair of cutters like this, which is what I use for the crimp tool, you can also get away with using an electrical crimper or a regular pair of side cutters. Just make sure you get on both sides of that fold and pinch it in. Get that as tight as you can without actually cutting into it. Make sure it stays secure.
Since we showed you the side cutter method of removing this clamp, we'll show you the other method, which is using a regular pair of pliers or lineman's pliers, pinching all three tabs together. You'll feel where this locks on to the end of the bevel. Slide that clamp on there and just let it go.
We're going to be replacing our old lock nut so we'll take our new one and just put a mark on one of the flats so we can count the same number of turns back on. Ours was just over 28. It's not going to matter if you're using the new one or the old one. We'll set that to about the 10:00 position, which is where mine came off. We'll count one, two, three, all the way up to 28.Now what we'll do is it was about 21 turns to get our tie rod on and again mine came off right around 9:00 or 10:00. We'll go ahead and get that going again and count 21 turns back on. Line up the stud on the end of your new tie rod end and insert it into your spindle.
Install your new nut. The new one is a 22 millimeter so we'll tighten that on with a 22 millimeter socket and ratchet. Torque the outer tie rod nut to 63 foot-pounds. Your new jam nut is 22 millimeter if you installed one, otherwise you'll use a 24 millimeter wrench and tighten it back down all the way against the tie rod end. Don't forget to grease the fitting until your boot swells, but does not break.
Reinstall your wheel and tire and get your 21 millimeter lug nuts as tight as you can by hand. Lower the partial weight of your vehicle back onto the tires. Torque your lug nuts to 110 foot-pounds in a cross pattern.
Thanks for watching. Visit us at 1AAuto.com for quality auto parts, fast and free shipping, and the best customer service in the industry.
Tools used
Hi, I'm Mike from 1AAuto. We've been selling auto parts for over 30 years! We're dedicated to delivering quality auto parts, expert customer service, and fast and free shipping, all backed by our 100% satisfaction guarantee. So visit us at 1AAuto.com, your trusted source for quality auto parts.
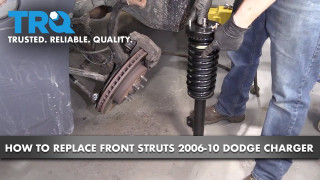
In this video, we're going to be working with our 2006 Chrysler 300. We're going to show you how to remove and replace your vehicle's front strut assembly. Now, we're doing this on the passenger side by the procedure is the same on the driver's, and we do recommend you replace these as a pair.
If you like this video, please click subscribe. We have a ton more information on this and many other vehicles. If you need this part for your car, you can follow the link down in the description over to 1AAuto.com.
Here are the items you'll need for this repair: full metric socket set, ratchet, socket extensions, breaker bar, torque wrench, 14mm x 2 nut, locking pliers, bungee cord, gloves, rust penetrant, jack and jack stands
Using a 21 millimeter socket and a breaker bar loosen all of your lug nuts about one turn. Raise and support your vehicle. We're using a lift to make it easier to show you what's going on, but this job can easily be done at home with a jack and jack stands. Remove your lug nuts the rest of the way by hand. Remove your wheel and tire.
Remove the nut on the bottom of your ball joint with a 19 millimeter socket and ratchet. Using the 19 millimeter socket and ratchet, loosen the nut on the upper ball joint and remove it. Remove the 19 millimeter nuts securing the sway bar link onto the strut, and we're going to try this with a 19 millimeter socket and ratchet. However, we may need a breaker bar and pair of vice grips. We couldn't quite get it loose with the socket and ratchet, so we're going for a 19 millimeter socket and a breaker bar, which seems to have done the trick. Now that it's loose, we'll go back to our ratchet.
Now, fortunately, ours isn't very rusty, so I'm just holding the back side of the sway bar link by hand to remove the nut. You may have to clamp it down with a pair of vice grips in order to get it to stay still while you remove the nut. We'll remove the top of the sway bar from the strut.
Using an 18 millimeter socket and a breaker bar, we'll loosen the bottom bolt for the strut. Now, the nut on the back of the strut is welded, so you shouldn't have to counter-hold it. However, if it starts spinning, you should be able to hold it steady with a 21 millimeter wrench. Once the bolt starts loosening up, you may be able to switch to an 18 millimeter socket and ratchet. The trick here is I'm putting my fingers behind the head of the bolt while I twist and pulling back at the same time to help spin it out of the bushing. Once the bolt is out of the threads, you should be able to just wiggle it out. Using a 13 millimeter socket, ratchet and extension remove the three 13 millimeter nuts on the top of your strut.
Now, we installed a strut bar into our vehicle; yours may or may not have one, but this process will be the same regardless. When you're removing the last 13 millimeter nut, you'll want to be sure to reach underneath the vehicle and support the strut with your other hand to make sure that it doesn't just drop out and damage something. Be careful not to overstretch the hydraulic brake hose. Go ahead and snap that ABS sensor off to give yourself a little more slack. Should be able to push down and remove the strut assembly from the vehicle.
Here we have our old strut that we removed from our vehicle, and our new part from 1AAuto.com. What you see here is actually a quick strut or a complete strut assembly. This means that your new part comes with a new shock or strut tube with a new spring, new billow, new bump stop, and a new strut top and bearing. This means that the entire assembly can be changed out as a unit without the need for special tools and spring compressors, which can make the job more difficult and a little more dangerous. As you can see, there are some aesthetic differences where the springs look just a little bit different, but everything should match up to the same spring rates on our vehicle so it rides just like new.
We have the same flange here to mount the stud for our sway bar link, and we have the same forked flange at the bottom here, which will sit over the bushing in our lower control arm. However, the old part has this welded nut on it and the new part does not come with this. We needed to get our hands on an M14 by 2.0 nut for this; a flange nut would be preferred. Other than that, the new strut top has the same three bolt mounting location on it and comes with a nice new set of flange nuts for the top here.
If your old struts are worn out, riding and handling poorly, creating odd weight transfer of the vehicle or bouncy or making noise, this new part from 1A Auto is going to go in direct fit, safe, and easy and fix you up right.
Reinstall the strut. Try to line up the top first and then maneuver the bottom back over the lower control arm. Reach up and start one of your 13 millimeter nuts by hand. Once you've got that started to secure the strut, reinstall the upper ball joint and its 19 millimeter nut. Now, you'll notice I'm pressing down on the strut here while I install the nut. This is because the tapered seat helps prevent the threads from spinning, making it easier to install by hand. Finish tightening up your ball joint with your 19 millimeter socket and ratchet. We'll then torque it to 35 foot-pounds and add 90 degrees.
Finish installing your new flange nuts onto the top of the strut. You may have to move it around a little to get that top one to seat where you want it. Tighten and torque the 13 millimeter nuts to 20 foot-pounds with a 13 millimeter socket and a torque wrench. Align the bottom bolt hole and install your 19 millimeter bolt. In place of the welded nut, which does not come on our new strut, we're going to use another 14 by 2 nut that we had. We'll put a 19 millimeter wrench on that; yours may vary. Then we'll tighten up the 18 millimeter bolt with a socket and ratchet. Then we'll torque it to 128 foot-pounds.
Install the upper portion of the sway bar link through the strut and start the new, this is a 22 millimeter nut. Now, this has a nylon lock on the end, so we're not going to be able to put it on by hand, so we'll grab the back side with a pair of locking jaw pliers just like we did on the bottom. Use a 22 millimeter socket and ratchet to snug it up before torquing it to 95 foot-pounds.
Reinstall your wheel and tire and get your 21 millimeter lug nuts as tight as you can by hand. Lower the partial weight of your vehicle back onto the tires. Torque your lug nuts to 110 foot-pounds in a cross pattern.
Thanks for watching. Visit us at 1AAuto.com for quality auto parts, fast and free shipping, and the best customer service in the industry.
Tools used
Hi, I'm Mike from 1AAuto. We've been selling auto parts for over 30 years! We're dedicated to delivering quality auto parts, expert customer service, and fast and free shipping, all backed by our 100% satisfaction guarantee. So visit us at 1AAuto.com, your trusted source for quality auto parts.
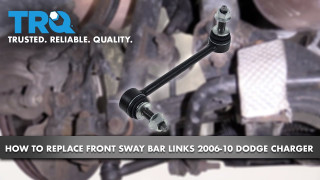
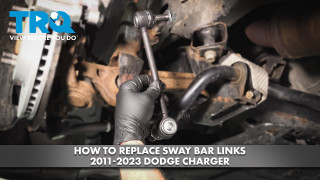
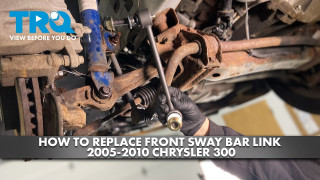
In this video, we're going to be working with our 2006 Chrysler 300. We're going to show you how to remove and replace your vehicle's front sway bar end links. Now, we're going to be doing this on the passenger side, but the procedure is exactly the same on the driver side, and we do recommend you replace this item as a pair.
If you like this video, please click subscribe. We have a ton more information on this and many other vehicles.
If you need this part for our car, you can follow the link down in the description over to 1AAuto.com.
Here are the items you'll need for this repair: full metric socket set, socket extensions, breaker bar, torque wrench, locking pliers, gloves, rust penetrant, jack, jack stands
Using a 21mm socket and a breaker bar, loosen all of your lug nuts about one turn. Raise and support your vehicle. We're using a lift to make it easier to show you what's going on, but this job can easily be done at home with a jack and jack stands. Remove your lug nuts the rest of the way by hand. Remove your wheel and tire.
Remove the 19mm nuts securing the sway bar link onto the strut and sway bar. Now, we're going to try this with the 19mm socket and ratchet; however, we may need a breaker bar and a pair of vice grips. We couldn't quite get it loose with the socket and ratchet, so we're going for a 19mm socket and a breaker bar. Seems to have done the trick.
Now that it's loose, we'll go back to our ratchet. Now, fortunately, ours isn't very rusty, so I'm just holding the backside of the sway bar link by hand to remove the nut. You may have to clamp it down with a pair of vice grips in order to get it to stay still while you remove the nut. We'll remove the top of the sway bar from the strut.
Now, we'll repeat this process on the end that goes into the sway bar. Now, this one's really stuck, so I've grabbed on to the backside of the sway bar with a pair of locking jaw pliers. We're using our breaker bar, our 19 mm socket, and our cheater pipe, to break it loose. Once it's loose, we'll switch back over to our socket and ratchet. Remove the sway bar from the vehicle.
Here, we have our old sway bar link that we removed from our vehicle and our new part from 1AAuto.com. As you can see, there are some minor aesthetic differences, but the basis of the part is exactly the same. We have the same length link. We have the joint on both ends. Clocked the same way. These are specific left and right. This is the passenger side, here. We have the same stud with the same backing. Our new one actually comes with these nice nylon locking bolts. Our new ones come with these nice nylon locking nuts, and the same hex on the end to help you if they get stuck or to make installation easier.
A bad sway bar link can cause a popping or clunking sound, depending on how bad it is, when going over bumps, because with these sockets are meant to travel smoothly in a radius. Slop in that joint can cause it to click up and down as it travels over bumps. If your vehicle has a bad set of sway bar links, then we do recommend you replace these in pairs. This new part from 1A Auto is going to go in direct fit, just like your original equipment, and fix you up right.
Install the bottom of the sway bar link back into the sway bar and start the new nut. Now, the new nut has a nylon lock on the end of it, so it's pretty difficult to spin on by hand, which means we'll go ahead and use our locking jaw pliers to secure it. The new hardware is 22 mm, so we'll use a 22 mm socket and ratchet to tighten that up. Torque the lower sway bar link nut to 95 foot-pounds. Install the upper portion of the sway bar link through the strut, so we'll grab the backside with a pair of locking jaw pliers, just like we did on the bottom. Use a 22mm socket and ratchet to snug it up before torqueing it to 95 foot-pounds.
Reinstall your wheel and tire, and get your 21mm lug nuts as tight as you can by hand. Lower the partial weight of your vehicle back onto the tire. Torque your lug nuts to 110 foot-pounds in a cross pattern.
Thanks for watching. Visit us at 1AAuto.com for quality auto parts, fast and free shipping, and the best customer service in the industry.
Tools used
Hi, I'm Mike from 1A Auto. We've been selling auto parts for over 30 years. We're dedicated to delivering quality auto parts, expert customer service, fast and free shipping, all backed by our 100% satisfaction guarantee. Visit us at 1AAuto.com, your trusted source for quality auto parts.
In this video, we're going to be working with our 2006 Chrysler 300. We're going to show you how to remove and replace the vehicle's rear shock. If you like this video, please click subscribe. We have a ton more information on this and many other vehicles. If you need this part for your car, you can follow the link down in the description over to 1AAuto.com. Here are the items you'll need for this repair.
Using a 21mm socket and a breaker bar, break all of your lug nuts loose about one turn before raising your vehicle. Now these chrome cap-style lug nuts are prone to having this chrome covering get water behind them and loosen up, so if you can't get it on well like I can't here, just give the socket a couple of taps to make sure you get good contact when removing it. Now if these are really loose or you find a lot of them in poor condition like that, it's a good idea to change out all of your lug nuts.
Raise and support your vehicle. We're using a lift to make it easier to show you what's going on, but this job can easily be done at home on a jack and jack stands. Finish removing your lug nuts. You should be able to do this by hand now. Remove the wheel and tire from the vehicle. Now this is an aluminum wheel on a steel hub, so you may have to work it back and forth a little bit to get it to free up.
Remove the two 16mm bolts at the top of your shock with a socket, ratchet, and extension. You should now be able to grab the top of the shock and compress it. Using an 18mm wrench and a 15mm socket and breaker bar, loosen and remove the bottom bolt of the shock. Once you get it loose, you may be able to switch to a socket and ratchet. Now you can wiggle the shock and remove the bottom bolt and remove the shock from the vehicle.
You'll notice on the end of the shock stud here, there's this little portion with two flat edges. Now they do make a special socket to remove that but you don't necessarily need one. We're going to use a pair of locking jaw pliers. Simply lock onto that. Be careful not to hit the actual threads. Lock that on nice and tight. Using a 15mm wrench, loosen the nut on the top of the shock. Remove the nut as well as the top washer there, and remove the shock mount from the end of your shock.
Here we have our old shock that we removed from our vehicle and our new part from 1AAuto.com. As you can see, there are some minor aesthetic differences but the parts themselves will function in the same way. We have the same length shock body and piston under this dust boot, which is new on our new part. We have a nice new solid bushing at the bottom with the eyelet for our bolt. At the top, we have the same stud, which comes with a new nut. This actually fits a variety of applications, so we have two washers here. We'll only be using one of them when we reattach it to our strut mount. When your shocks bad, they stop controlling the rate of motion in your rear suspension and can cause it to feel like it's jarring, like a very harsh movement, or it can feel bouncy because it's not limiting the number of times the suspension can travel up and down after hitting a bump, or, if the mount itself or a bushing goes bad, it can make some loud clunking going over bumps. Fortunately, this new part from 1A Auto goes in direct fit just like the original equipment and will fix you up right.
Remove the nut on the end of your new shock. Remove the washers. This is the only one we want. We'll take our shock mount, make sure the rubber is in good condition. Ours looks nice so we'll go ahead and put it back in. Slide that on. Get your new nut on as tight as you can by hand. Using your 15mm wrench, tighten that nut up. You may need to use your vice grips to keep the top from rotating while you finish tightening it down.
Now we're ready to reinstall on our vehicle. Place the top of the shock roughly where it sits in the vehicle and compress it. Line it up with the hole in the lower control arm and allow the shock to extend out, at which point we'll reinstall our bolt and the nut. Using your 18mm wrench and your 15mm socket and ratchet, we'll snug up that bottom bolt before torqueing. Torque the bottom bolt to 53 foot-pounds.
Reinstall your two 16mm bolts. Make sure you get them both lined up before you tighten either of them down. Torque those bolts to 38 foot-pounds.
Reinstall your wheel and tire. Install all of your lug nuts as tight as you can by hand. Torque your lug nuts to 110 foot-pounds in a cross pattern.
Thanks for watching. Visit us at 1AAuto.com for quality auto parts, fast and free shipping, and the best customer service in the industry.
Tools used
Hi, I'm Mike from 1A Auto. We've been selling auto parts for over 30 years. We're dedicated to delivering quality auto parts, expert customer service, fast and free shipping, all backed by our 100% satisfaction guarantee. Visit us at 1AAuto.com, your trusted source for quality auto parts.
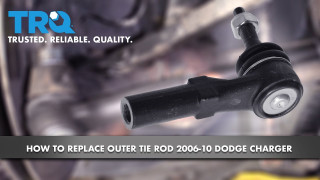
In this video, we are going to be working with our 2006 Chrysler 300. We're going to show you how to remove and replace the vehicle's outer tie rod or tie rod end. If you like this video please click subscribe. We have a ton more information on this and many other vehicles. If you need this part for your car, you can follow the link down in the description over to 1AAuto.com. Here are the items you will need for this repair.
Using a 21 millimeter socket and a breaker bar, loosen all of your lug nuts about one turn. Raise and support your vehicle. We are using a lift to make it easier to show you what's going on, but this job can easily be done at home with a jack and jack stand. Remove your lug nuts the rest of the way by hand. Remove your wheel and tire.
Using the 24 millimeter wrench – and we've soaked both our jam nut and the nut on the end of the tie rod in penetrating oil – break the jam nut loose. We don't want to move it too far, just enough that it's off the end of the tie rod.
Using the 21 millimeter socket and a breaker bar, crack the nut on the end of your tie rod loose. Once you get it loose enough you may be able to finish removing it with a socket and ratchet. Now if you are removing and replacing the outer tie rod, you can use a pickle fork here, which sits between the spindle and the ball joint and knocks it out as you tap the fork in. However, that damages the boot rendering the old outer tie rod useless. So, in the interest in saving parts, we're going to use a hammer and hit the side of the spindle with a taper of the ball joint end goes through and release it. Remove your tie rod and count the number of turns it takes to remove it. It was just about 21 turns. We'll want to make sure that we install the new tie rod end that same number of rotations.
Now you'll notice that there's a hex cut on the end of your inner tie rod here, which is actually designed for a wrench to hold it. However, most open end wrenches are fairly weak and with a really stuck nut like we have on the end of our inner tie rod here, it's going to be a lot safer and easier to grab it with a pair of vice grips and spin this off with a 24 millimeter. We'll mark this flat with a paint marker. You could also mark it with a sharp chisel or punch, really anything that's just going to give you an indication of when it reaches the 12:00 position again. Five. Be sure to keep the tie rod itself steady, because this does pivot and can change the number of counts you have on that 12:00 position. Twenty-five, 26, 27, 28. It's about 28.
Here we have our old tie rod end, which we removed from our vehicle and our new part from 1AAuto.com. As you can see there are some minor aesthetic differences such as where the square channel is here for you to remove this with a wrench if it were to be stuck on while you were trying to get off your inner tie rod, as well as having a grease fitting on this so you can service this and keep it greased, lubricated and in good shape for longer. They have the same tapered end and threads as well as a new nylon lock nut for our new part. The boots do look different, but this has been bolted down and collapsed and been on there for almost 100,000 miles now. This is what all the boots look like when they are new and after you install it will look closer to that. Your tie rod end, like most joints in your steering and suspension, is a ball and socket joint. You can see that this one is getting kind of tight. It looks like there might be some rust building up down into that joint or these can develop play in them, which will allow them to pop in and out or click side to side making your steering inaccurate and your alignment angles impossible to adjust causing tire wear and handling issues. If you need to replace your tie rod end, this new part from 1A Auto is going to go in direct fit just like your original equipment and fix you up right.
We're going to be replacing our old lock nut so we'll take our new one and just put a mark on one of the flats so we can count the same number of turns back on. Ours was just over 28. It's not going to matter if you're using the new one or the old one. We'll set that to about the 10:00 position, which is where mine came off. We'll count one, two, three, all the way up to 28.Now what we'll do is it was about 21 turns to get our tie rod on and again mine came off right around 9:00 or 10:00. We'll go ahead and get that going again and count 21 turns back on. Line up the stud on the end of your new tie rod end and insert it into your spindle.
Install your new nut. The new one is a 22 millimeter so we'll tighten that on with a 22 millimeter socket and ratchet. Torque the outer tie rod nut to 63 foot-pounds. Your new jam nut is 22 millimeter if you installed one, otherwise you'll use a 24 millimeter wrench and tighten it back down all the way against the tie rod end. Don't forget to grease the fitting until your boot swells, but does not break.
Reinstall your wheel and tire and get your 21 millimeter lug nuts as tight as you can by hand. Lower the partial weight of your vehicle back onto the tires. Torque your lug nuts to 110 foot-pounds in a cross pattern.
Thanks for watching. Visit us at 1AAuto.com for quality auto parts, fast and free shipping, and the best customer service in the industry.

PSA58902