Replaces
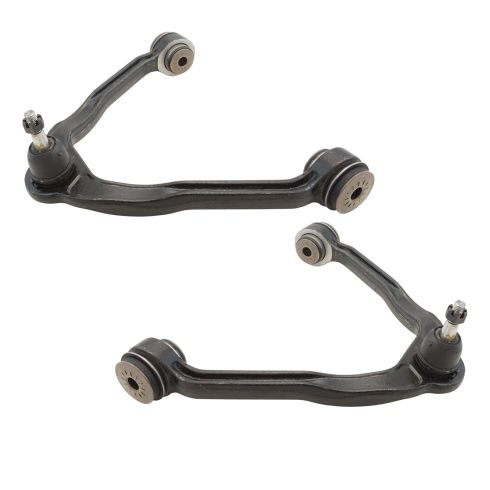
This part doesn’t fit a . Select from parts that fit.
Frequently bought together
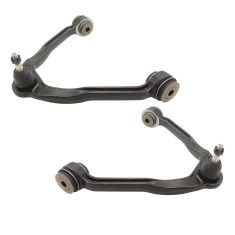
Part Details
Item Condition:
New
Lifetime Warranty
This item is backed by our limited lifetime warranty. In the event this item should fail due to manufacturing defects during intended use, we will replace the part free of charge. This warranty covers the cost of the part only.
FREE Shipping is standard on orders shipped to the lower 48 States (Contiguous United States). Standard shipping charges apply to Hawaii and Alaska.
Shipping is not available to a P.O. Box, APO/FPO/DPO addresses, US Territories, or Canada for this item.
Expedited is available on checkout to the United States, excluding Alaska, Hawaii.
Final shipping costs are available at checkout.
Created on:
Tools used
Brought to you by 1AAuto.com, your source for quality replacement parts and the best service on the Internet.
Hi, I'm Mike from 1A Auto. I hope this how-to video helps you out, and next time you need parts for your vehicle, think of 1AAuto.com. Thanks.
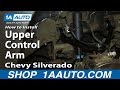
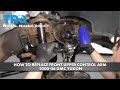
In this video, we're going to show you how to replace an upper control arm on this 2002 Chevy Suburban. We show you on the passenger side, but the driver side has the same procedure. The items you'll need are a new upper control arm from 1AAuto.com, a 10mm, 21mm, and 22mm socket and ratchet, 18mm and 21mm wrench, a marker, a torque wrench, jack and jack stands, a grease gun, a hammer, and an air hammer depending on the condition of your vehicle. After completing this procedure you will need to get a professional alignment done.
Start out by removing the hubcap. You want to remove the lug nuts. If you don't have air powered tools, you'll want to do it while the vehicle is on the ground. Loosen them preliminarily, raise the vehicle, and remove the lug nuts the rest of the way. On these brackets, you'll see a tab coming through from the upper control arm. Mark where that tab is. Remove these two 10mm bolts. Next, remove this 18mm nut, and you can see Mike uses an 18mm wrench and another wrench for some extra leverage to break it free and then removes it the rest of the way with the 18mm wrench. Hit the wheel knuckle and control arm to break them free. Then remove the 21mm nuts on either side.
Jack up your wheel, and you want to do this underneath the wheel knuckle. Remove the upper control arm nut and then remove these bolts and the bracket that's on them. Our first one pulled out no problem, this one's a bit more difficult. We tried using a hammer, that doesn't work. We tried using a wrench to help break it free, but it's in there really good. If you have this same problem, we put a nut back on it and use an air hammer to knock it out. Now that those bolts are out, you want to remove the control arm up and down while pulling out and it'll pull free.
Take your new upper control arm and push it back into place. Then push the bolts in to hold it into place. You want to make sure that you have those brackets on either side and that they're lined up. Now, angle the control arm down into the wheel knuckle. Once it's pressed down into place replace that 18mm nut. We'll fast forward as Mike tightens all of those up. Replace and tighten up those two 10mm bolts. Using a grease gun put it into place on the end of your control arm and fill it up. Put the wheel back into place and then replace each wheel lug nut and tighten them up. You want to tighten them preliminarily, lower the vehicle, and then tighten them the rest of the way. Torque each lug nut in a crossing pattern to 100 foot-pounds. Replace the hubcap and tighten up those lug nut caps.
We hope this video helps you out. Brought to you by www.1AAuto.com, your source for quality replacement parts and the best service on the Internet. Please feel free to call us toll-free, 888-844-3393. We're the company that's here for you on the Internet and in person.
Tools used
Take the center cap off. Use a straight-blade screwdriver. Use a 22-millimeter socket. Take the lug nuts off. Pull the wheel off. These bolts are pretty rusty so I'm just going to use some rust penetrant and soak those before I start. Before we take this nut off, we just want to mark this cam right here. This is for the alignment. When you go to put this back together, you want to put this in the same location so at least it's close. You're still going to need to get an alignment done afterwards, but this will get it a little bit closer. I want to get this ABS wire out of the way, our wheel speed sensor wire. Disconnect the connector up here. Just push up on that tab, slide it out and use a trim tool. Just pull up on that retainer. You can do the same over here, and right here. Sometimes these ones break, just be careful. All right. So this piece is going to break so I'm just going to disconnect it right from the arm itself. And disconnect this right here. Sometimes you can use a screwdriver and just pop that out, or a needle-nose pliers also works. You just squeeze those together. I'm just going to put some rust penetrant on this bolt right here. Let that soak a little bit. We want to take that off next. Just remove this bracket. Use a 10-millimeter socket. Remove this bolt. It's probably going to break. Yup, it broke. Well, hopefully yours doesn't break. And slide that off.
All right. Now, we're going to take this nut off using an 18-millimeter wrench. Now I'm going to leave this nut on just a couple of threads, and then we're going to break this upper ball joint free from the knuckle. I'm going to use a pickle fork to break this free. Just slide it in, in between the ball joint and the knuckle and just give it a hit. There we go. Take the pickle fork out and just push down the upper control arm a little bit. You might need a pry bar. And take the nut off and you could slide it out. And just make sure that there's not too much tension on the brake line, brake hose. I'm going to take a 21-millimeter wrench, 21-millimeter socket. Now this is old and rusty so I just had to heat up that nut to break it loose. Normally you wouldn't have to do that. And loosen it up. That nut's pretty hot right now so I'm just going to let that cool down before I take that off. Take that nut off and see if you can pry this cam off. This is just the alignment cam. Just use a pry bar and a hammer. And just pry that off. All right. This cam bolt is stuck in there pretty good so I'm just going to use some more rust penetrant, soak it down for a while.
Here we go. All right. Get that out and do the same for the other side. All right. I'm just going to take this bracket out of the way. Just use a 13-millimeter socket and you can just slide it out of the way. Don't bend it too much. Here we go. And just use a pry bar and you can pry the arm out. And take the new control arm and just line it up. You can take a rubber mallet, or a dead-blow hammer to tap it in if you need to. And get the bolt started. And take this cam and the nut. Get the nut started. Now we tighten this up. Now we want to align that mark up. What you do is take your 21-millimeter wrench and just move the bolt on this side until that lines up. And you can snug that down. And we'll do the same for the other side. All right. Now, we're going to torque this nut to 140-foot-pounds. Do the same on the front one. Take this brake hose bracket and install that. Put the bolt back in and tighten that up. Get the nut off. Put that aside. Get this lined up with the upper knuckle. And I'll use a pry bar, just pry this down. Take the nut and get the nut started.
Now, I'm going to use a 19-millimeter ratchet wrench, while I'm using the pry bar to pry it down on the ball joint. Tighten this up. All right. Now, if you have the ability, just torque this with a torque wrench, you can torque this to 37-foot-pounds. Do the best you can. And if the stud starts spinning, you can use an allen key, that's a six-millimeter hex key. But if you use the pry bar and you just pry it down, you should be able to get that without having the stud spinning. Take this brake hose bracket and line that up. Put the nut on or the bolt in and snug it up. And take the wheel speed sensor wire and reconnect that. And then we have this holder or clip. Install that. Lock that in place. Reinstall this clip and connect the connector. And push the retainer. I'm just going to find the hole where it goes. There it is. And lock that in position. And take this fitting. Install that. Snug it up with a seven-millimeter wrench.
And take a grease gun and give it a couple pumps of grease. What you can do is look at the boot as you're greasing it, once you see the boot start to move, that's good enough. And put the wheel back up. Put the lug nuts on. Now I'm going to torque these lug nuts to 140-foot-pounds in any star pattern to tighten the wheel down evenly. And just go around again, double check. Install the center cap.