Replaces


Recommended for your 2009 GMC Yukon XL 2500
Part Details
Specifications
About TRQ:
TRQ is a trusted brand dedicated to making every repair a success story by combining premium parts with easy installation. Each TRQ part is engineered by a team of automotive experts to meet or exceed OEM standards, delivering enhanced performance and maximum longevity. With rigorous in-house testing, the brand ensures superior fit and function across every product line. TRQ also provides customers with best-in-class, step-by-step installation videos—so you can complete repairs with confidence, whether you're a first-time DIYer or an industry professional.
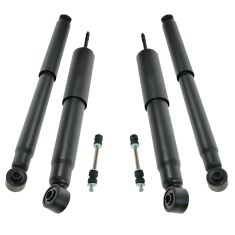
Our direct fit gas-charged strut assemblies help to restore your vehicle’s handling and ride quality to just like new.
Our direct fit gas-charged shock absorbers help restore your vehicle's handling and ride quality to just like new.
Attention California Customers:
 WARNING: This product can expose you to chemicals including Chromium (Hexavalent Compounds), which is known to the State of California to cause cancer, and birth defects or other reproductive harm. For more information, go to www.P65Warnings.ca.gov
Lifetime Warranty
This item is backed by our limited lifetime warranty. In the event that this item should fail due to manufacturing defects during intended use, we will replace the part free of charge. This warranty covers the cost of the part only.
FREE Shipping is standard on orders shipped to the lower 48 States (Contiguous United States). Standard shipping charges apply to Hawaii and Alaska.
Shipping is not available to a P.O. Box, APO/FPO/DPO addresses, US Territories, or Canada for this item.
Expedited is available on checkout to the United States, excluding Alaska, Hawaii.
Final shipping costs are available at checkout.

Created on:
Tools used
Brought to you by www.1AAuto.com, your source for quality replacement parts and the best service on the Internet. Hi, I'm mike from 1A Auto. I hope this how-to video helps you out. The next time you need parts for your vehicle, think of 1AAuto.com. Thanks.
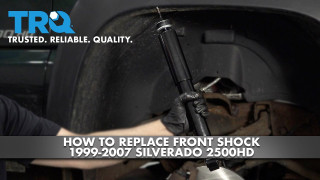
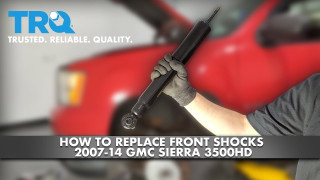
In this video, we're going to show you how to replace the front shocks on this 2002 GMC Sierra, pretty much the same as any 2000, 2006 Sierra or Silverado. Tools you'll need for the job are: Jack and jack stands. 21 and 22 mm sockets with a ratchet and a breaker bar. You will also need an additional 21 mm socket with the bar or a 21 mm wrench. A torque wrench. 15-19 mm wrenches or adjustable wrenches work as well.
Start out by just removing the caps on this vehicle. You just loosen the top of the cap and then the whole center cap comes off. Next, if you don't have the benefit of air tools, loosen the lug nuts while your truck is on the ground, then raise and support the vehicle. Remove the lug nuts and remove the wheel and tire. So, with the vehicle back down and tire off and it's supported, you support it with a jack stand and put your jack underneath the wheel on the control arm. Then use some penetrating oil right up there on the nut at the top, and then also some down here on that nut.
I've got my 15 mm wrench on there and I'm not even going to mess around with these things. You're supposed to put a wrench on here, but I'm just going to go straight to a set of locking pliers. I'm going to get them on there as tight as I can. A lot of time, it will pop and you'll start moving this bolt and then it will get to more and more and more rust. Then, you'll end up having to cut it off, but it looks like it might be coming off pretty clean. In fact, that nut does come off. I'm going to fast forward here. There is also, if you have another wrench, underneath the support where the shock goes in there is a nut on the shock, itself that you can hold with a wrench.
All right, you take your wrench. Sometimes you can get pretty lucky with these. All right, the other side goes through. The other side is starting to spin, so I'm putting a socket on there. Like I said, it's starting to spin, so you can see I have a socket with my breaker bar on there. It just kind of holds itself in place as I remove the nut. To get it loose, I have to use my breaker bar, give the bolt a tap. It's rolling out and I can pull the shock down. Now, we've got our new shocks. Take out the cushions and washers and the nut. Okay, put the washer on. I have a large. The smaller hole goes up. Have this cushion with the smaller hole down and the washer on top and our shock up in place and down on. Then, we'll start our bolt in place. We're going to let down our suspension a little bit more with the shock in. That's as far as it goes and I'll let it down just a hair more. Pull through and the nut on the other side. Okay. I'm going to jack this a smidgen back up some. I'm going to hold to the backside of my bolt.
I'm going to fast-forward as I tighten up the bottom bolt. The torque specification is probably 75 to 80 foot pounds, but as long as you get them good and tight with large wrenches, you'll be okay. Okay, I'm going to continue fast forwarding as I just tightened up that top nut. You'll see I hold the top of the stud with a wrench and then tighten up with a wrench. Also, if you look down further where the yellow begins, that's also a nut that you could hold onto with a wrench. Then, once you're there, then put your tire back on. Start the lug nuts by hand first, then tighten them up preliminarily. Then, lower the vehicle onto the ground. Tighten the lug nuts to anywhere between 110 to 120 foot pounds and then put your cap back on. Obviously, always replace shocks in pairs, so do the other side and you'll be good to go down the road nice and smooth.
We hope this helps you out. Brought to you by www.1AAuto.com, your source for quality replacement parts and the best service on the Internet. Please feel free to call us toll-free 888-844-3393. We're the company that serves you on the Internet and in person.
Tools used
Brought to you by 1AAuto.com, your source for quality replacements parts and the best service on the internet.
Hi, I'm Mike from 1A Auto. I hope this how-to video helps you out and next time you need parts for your vehicle, think of 1aauto.com. Thanks.
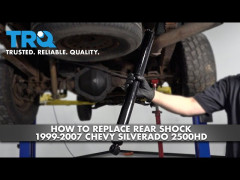
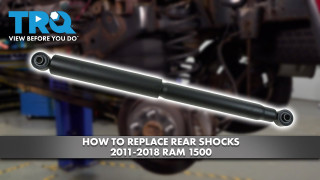
In this video we're going to show you how to replace the rear shocks on this 2002 GMC 2500. The only tools you'll need for this job are two 21mm wrenches either a large wrench or two sockets with a ratchet and a breaker bar.
You don't even have to raise the vehicle. You definitely don't have to take off the rear wheels. You don't even have to raise the vehicle you just need to secure it with blocks and you can actually just crawl underneath and replace the shocks without even lifting up the vehicle. Although lifting up the vehicle does make it a little easier.
You can see I got the truck on the lift. I also got the rear end supportive. You basically want to jack your truck up. The best place to jack your truck up is here and then you can put a safety jack stand under here on each side or you can actually put safety stands right underneath the axle tubes right here, that's probably the best place then put all the weight on the axle.
I have it supported here for two reasons, for safety and also pushing up on the axle a little bit contracts the shocks some which takes some of the pressure off of them. Basically when you have all the weight off of the axle or the axle hanging down, the shocks are actually what's holding it up. You don't want to have the axle hanging down and then just crank the shocks because then your rear end is going to fall down further.
Start by spraying penetrating oil on the bolts, this side and the other side. We're going to replace both shocks at once. Always replace shocks in pairs. Working on this little bolt first, you got to want either a breaker bar, 21mm socket. You can also use a ratchet with a pipe on it. That gives you some extra leverage. I'll use the breaker bar here and get this on the right way. It seems to come apart pretty easily. Swap the pipe around. I'll speed it up here. I take the nut off but I don't remove the bolt from the shock yet. Hope for the same results. Bolt's turning.
Here again I'll just speed it up as I'm working those wrenches and removing the nut from the end of the bolt.
Going back down here. At this step if you got the rear end, if you actually are working on the ground you can do this without even jack and jack stands. At this point be very careful, as you pull this bolt out the shock may want to go down.
Mine are in pretty rough shape. We're not even doing much still the bolt has come right out.
Just for reference, here's my old shock. If you press it down. It pretty much stays down. On the new shock, you can see it has band on it. If you press it down it actually slowly comes up.
I pull my old shock up. You can see I can just press right down and it just takes a whole lot more force on the new shock.
With the new shock, put it up there in place. You put the bolt through and the spot on the nut. Now swing this into place, and on.
From here on out I'm just going to use fast forward. Use your breaker bar and your ratchet to tighten them up. Basically tighten them up as tight as you can with that ratchet. That's good. These bolts should be probably torqued to about 70 to 75 foot-pounds. Once you have them all tighten up, obviously replace the other side. Your car would be riding smoother down the road.
We hope this helps you out. Brought to you by www.1AAuto.com, your source for quality replacement parts and the best service on the internet. Please feel free to call us toll free 888-844-3393. We're the company that's here for you on the internet and in person.

SBA60239