Replaces


Part Details
Specifications
Product Features
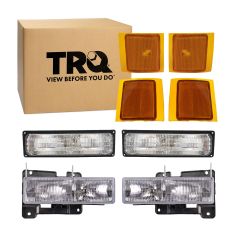
Complete Repair in One Purchase - Stop searching for parts individually and complete your repair with a customized kit or set from DIY Solutions.
High-Quality Parts from Trusted Brands - DIY Solutions' kits and sets are selected from the best automotive brands and include hard-to-find and even obsolete parts you may need for your vehicle.
Guaranteed Fit - DIY Solutions ensures its selected parts are quality-tested to guarantee fit and function.
Assemblies may include halogen or incandescent test bulbs that should be replaced before installation.
Attention California Customers:
 WARNING: This product can expose you to chemicals including Chromium (Hexavalent Compounds), which is known to the State of California to cause cancer, and birth defects or other reproductive harm. For more information, go to www.P65Warnings.ca.gov
Lifetime Warranty
This item is backed by our limited lifetime warranty. In the event that this item should fail due to manufacturing defects during intended use, we will replace the part free of charge. This warranty covers the cost of the part only.
FREE Shipping is standard on orders shipped to the lower 48 States (Contiguous United States). Standard shipping charges apply to Hawaii and Alaska.
Shipping is not available to a P.O. Box, APO/FPO/DPO addresses, US Territories, or Canada for this item.
Expedited is available on checkout to the United States, excluding Alaska, Hawaii.
Final shipping costs are available at checkout.
Created on:
Tools used
Hi, I'm Mike from 1A Auto. We've been selling auto parts for over 30 years. We're dedicated to delivering quality auto parts, expert customer service, fast and free shipping, all backed by our 100% satisfaction guarantee. Visit us at 1AAuto.com, your trusted source for quality auto parts.
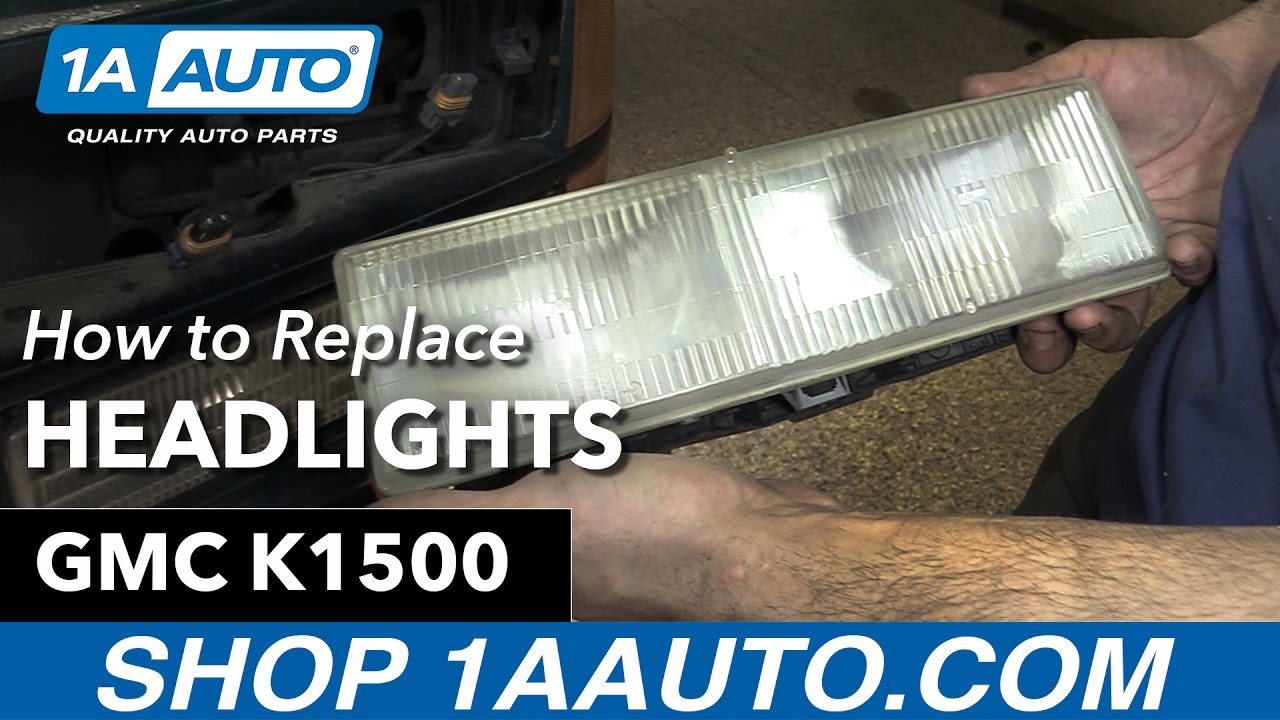
In this video, we're going to be working with our 1996 GMC Sierra. We're going to show you how to remove and replace your vehicle's headlights. If you like this video, please click subscribe. We have a ton more information on this and many other vehicles, and if you need these parts for your truck, you can follow the link down in the description over to 1AAuto.com. Here are the items you'll need for this repair.
Remove the two three-sixteenths screws securing the headlight in. These come out of the top of the grille, and we'll do that with a socket ratchet and extension. Remove the headlight from the vehicle and disconnect the headlight bulbs. Repeat these steps on the opposite side.
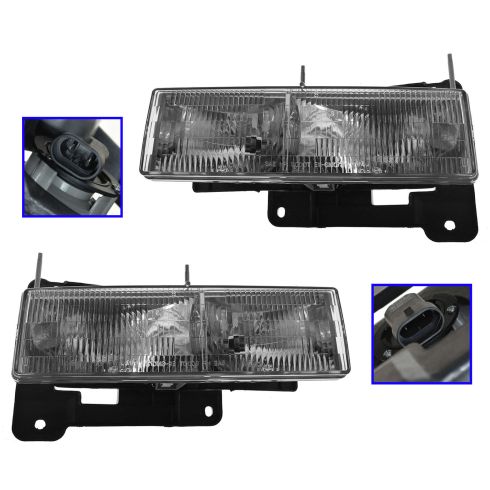
Here we have the old parts that we removed from our vehicle and the new parts from 1AAuto.com. As you can see, we have the pair here. This is also available as left or right if you only have one light damaged, but generally they get pretty cloudy like the ones down there, so we do recommend you replace them as a pair.
See, we have the same headlight. It even comes with new bulbs and new brackets. We don't need to change these. However, if you did, the headlight mounting plate is already on there. You could swap that out if you had to, but generally, it's just the light. It comes with two new bolts to secure the light in to that bucket, and we also have two new adjuster screws there. So if your old headlights are foggy, taking on moisture, cracked, or broken, this new part from 1A Auto is going to go on direct fit just like your original equipment and fix you up right.
Reconnect your headlights, reinstall them, and reinstall the three-sixteenths bolts.Repeat these steps on the opposite side.
This is a basic tutorial on how to aim the headlights on your vehicle. Find the axis of your headlights. This is usually indicated with a small dot or the headlight bulb size on the lens. If not, it's the actual center point of your headlight bulb. Transfer this mark to a vertical wall with a preferably dark color that'll allow you to back up 25 feet. Pull up and find the center line of your vehicle as well as the center line of your headline axis. Mark the wall with the height of the headlights and a straight line going across at that axis height.
Back your vehicle up 25 feet from the wall to the front edge of your vehicle's headlights. Turn your headlights on and locate the adjusting screw usually on the back side of your headlights. You'll want to rotate this until the passenger hot spot -- or focus of the beam -- is approximately two inches below the line and the driver's side is four inches below the line. We changed the heights on each side so you can still get a good beam to the off-side of the road on the passenger's side and have the driver' side low enough to not blind oncoming traffic.
Thanks for watching. Visit us at 1AAuto.com for quality auto parts, fast and free shipping, and the best customer service in the industry.
Tools used
This video is brought to you by www.1AAuto.com, your source for quality replacement parts and the best service on the Internet.
Hi, I'm Mike Green from 1A Auto. Today, I'm going to show you how to remove and replace the headlights on this vehicle. It's a 1999 Suburban. It's generally the same as a 1988 to 99 Chevy or GMC truck, as well as the '92 to '99 Suburban, Yukon, the 2-door Jimmy full sized, and the Tahoe. With that, the first thing we're going to do is open up the hood to access the headlight.
If you're looking to replace your light bulbs, locate these two five millimeter studs. Remove them with socket or a wrench. Your light comes out. You have access to the back of the headlights. You can just unplug the low beam and the high beam and replace the bulbs. If you're looking to replace the headlight assemblies, stay with us. We'll go into more detail on that. In behind there's a mounting plate; if your headlight's been damaged, normally this mounting plate is damaged also. If we want to replace the whole headlight assembly, we'll have to remove the grill.
To do that, what we do next is remove the parking light. It has four Phillip's screws that we take out. Okay, let's speed this up a little bit. You remove the light. You just click the thumbs and twist and pull the lights out. Your parking light's removed; the opposite parking light. There are ten screws which we're going to quickly show you on the grill. These screws hold the grill in, two behind the parking lights, two in the middle, two behind the opposite side parking lights, and then four up top. I got the 10 bolts out. You can see the headlights are still in. The marker lights are still in, but they are unplugged. Once those bolts are out, you can pull it forward. Just make sure everything comes apart in here. Bulbs and stuff are clear. The grill's out, separate.
You can easily unbolt your headlight assemblies. From here we're looking at the driver's side headlight assembly, we'd remove this bolt, this bolt, this bolt, and this bolt. Going to unplug; your headlight's free. This is the new headlight assembly. Okay, and quadruple time. Shops charge 50 bucks an hour for this stuff. This has got to be worth 200 bucks an hour anyways. Look at that hand movement. I don't even know if tools move that fast. Now that the light's bolted in, we can connect the headlight harnesses. Once the headlight harnesses are connected, we'll reach into the cockpit real quick. Test the low beams, click on the high beams. Oh! Everything looks good.
We can put the grill back on, just reverse your procedure. Tilt it in there. Pull the lights through first, each side. Tilt it in. There's a little harness in the center, too. Make sure that doesn't get pinched in there. Push it up in. The top, the plastic lip goes up over the top of the sheet metal. Once everything looks right, we'll bolt it back in. You're ready to go. Ten they're seven millimeter bolts. We've re-installed the grill. We need to reinstall, we need to plug in the markers and install the parking lights. We're now back in close-up. This you put in and you twist. These go in just like they came out. You get them to click as they lock into place. A shot of espresso or two.
There I am standing in front of the truck. My lips aren't moving. I am talking to you through the magic of computers. We hope this video helped you out how you can see we got our lights back in. Our grill's on and our parking lights.
Remember the parts in this video can be sourced at www.1AAuto.com, your source for quality replacement parts and the best service on the Internet. Thank you.
Tools used
Brought to you by 1AAuto.com, your source for quality replacement parts and the best service on the Internet.
Hi, I'm Don from 1A Auto. I hope this how-to video helps you out, and the next time you need a part for your vehicle, think of 1AAuto.com. Thanks.
In this video, we're going to show you how to service the headlight bulbs as well as replace the entire headlight assembly on this 1996 Chevy Tahoe. We show you on the passenger side, but the driver side is the same procedure. The items you'll need for this include new headlights from 1AAuto.com, Phillips screwdriver, and a 7mm and 10mm socket and ratchet with an extension.
You want to first remove these four Phillips screws, and we'll just fast-forward as Don does this. Pull the light out, twist the sockets counterclockwise, and pull them out. Then, you want to twist this socket out of your side marker light, and then repeat the process on the other side.
Next, you want to remove this series of 7mm bolts, and we'll just fast-forward as Don does this. There's one more 7mm bolt right here. Once those are removed, you want to just lift up this tab, pull the grille forward, and there's another one on the other side. There's another clip right in the center. Using a stick or a long screwdriver, you just want to push that tab and then pull out on that center tab. Just to give you a better look at it, it's this tab right here.
Next, you want to remove these four 10mm bolts that secure your headlight, and we'll just fast-forward as Don removes those. Now, to service your bulbs, both of them are the same. You just pull back this tab and pull the harness free, then twist the bulb out. Push the new one in, twist it clockwise to lock it, and then just reconnect your harness. If you're looking to replace the whole assembly, you just want to disconnect both of these harnesses by pulling up that tab.
Then take your new headlight and push the harnesses into place. Then push your headlight back into place and replace those four 10mm bolts. Once those are in place, take your grille and pull your parking light sockets through, and then you want to line up the tabs on the grille.
The first one you want to do is the center one, and just push down that tab and push the tab on the grilled into place until it locks. Now, line up those side ones and push those into place and we'll just fast-forward here as Don replaces those five 7mm bolts. There's four along the top of the grille, and then that one in the center just above the badge.
Now, twist your side marker light back into place. Then twist your two parking light sockets back into place, just turning them clockwise to lock them. Then push the assembly into place and replace those four Philip screws. Repeat the process on the other side.
We hope this video helps you out. Brought to you by www.1AAuto.com, your source for quality replacement parts and the best service on the Internet. Please feel free to call us toll-free, 888-844-3393. We're the company that's here for you on the Internet and in person.

LHT03063