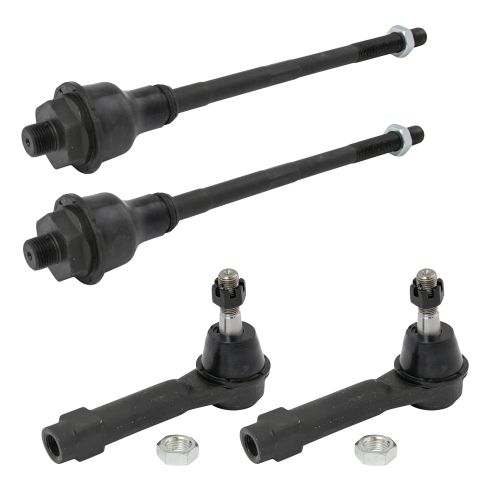
Kit Includes: (2) Front Outer Tie Rods (2) Front Inner Tie Rods
Install Tip: When replacing steering components, have a professional alignment performed afterwards. This ensures proper tracking and even tire wear.
Our steering and suspension components are pre-greased and sealed for long life and do not require the extra maintenance typically required by greaseable versions.
Item Condition:New
Attention California Customers:
WARNING: This product can expose you to chemicals including Lead and Lead Compounds, which are known to the State of California to cause cancer, and birth defects or other reproductive harm. For more information, go to www.P65Warnings.ca.gov.
Lifetime Warranty
This item is backed by our limited lifetime warranty. In the event this item should fail due to manufacturing defects during intended use, we will replace the part free of charge. This warranty covers the cost of the part only.
FREE Shipping is standard on Orders shipped to the lower 48 States (Contiguous United States). Standard shipping charges apply to Hawaii, Alaska and US Territories. Shipping is not available to Canada.
Expedited is available on checkout to the United States, excluding Alaska, Hawaii and US Territories as well as P.O. Boxes and APO/FPO/DPO addresses. Final shipping costs are available at checkout.
How to Replace Outer Tie Rod 1999-2006 Chevy Silverado
How to Replace Front Inner Tie Rod 2000-06 GMC Yukon
How to Replace Tie Rods 2001-10 GMC Sierra 2500 HD Truck
How to Replace Front Outer Tie Rod 1999-2007 Chevy Silverado
How to Replace Inner Tie Rods 2000-06 Chevy Tahoe 2nd Generation
How To Replace Outer Tie Rod 2002-06 Chevy Avalanche
How to Replace Outer Tie Rods 2000-06 Chevy Tahoe 2nd Generation
How to Replace Front Outer Tie Rod 2000-06 GMC Yukon
How to Replace Front Inner Tie Rod 1999-2007 Chevy Silverado
How To Replace Inner Tie Rod 1999-2007 Chevy Silverado 2500
Created on:
Tools used
Adjustable Wrench
Bearing Grease
Hammer
Flat Blade Screwdriver
Torque Wrench
Ratchet
Needle nose pliers
Grease Gun
1. Removing the Wheel
Loosen the lug nut covers with a 22mm socket
Pry off the center cap by hand
Loosen the lug nuts with the vehicle on the ground
Raise the vehicle with a floor jack
Secure the vehicle on jack stands
Remove the lug nuts
Pull off the wheel
2. Removing the Outer Tie Rod
Measure the distance from the boot of the inner tie rod to the edge of the outer tie rod
Make note of this measurement
Loosen the nut that holds the outer tie rod to the inner tie rod with an adjustable wrench
Remove the 18mm nut from the outer tie rod end
Strike the steering knuckle with a hammer to loosen the outer tie rod
Pull the outer tie rod out of the steering knuckle
Hold the nut that holds the outer tie rod to the inner tie rod with an adjustable wrench
Twist off the outer tie rod by hand
3. Installing the New Outer Tie Rod
Attach the grease fitting to the new outer tie rod
Tighten the grease fitting with a 7mm socket and ratchet
Twist the new outer tie rod onto the inner tie rod
Push the outer tie rod into the steering knuckle
Fasten the 18mm castle nut onto the outer tie rod
Push the cotter pin through the castle nut
Twist the cotter pin into place with needle nose pliers
Fill the tie rod with grease, using a grease gun
Measure the distance from the boot of the inner tie rod to the edge of the outer tie rod
This should be the same as the measurement noted in Step 2
Tighten the nut that holds the outer tie rod to the inner tie rod with an adjustable wrench
4. Reattaching the Wheel
Slide the wheel into place
Start the lug nuts by hand
Tighten the lug nuts preliminarily
Lower the vehicle to the ground
Tighten the lug nuts to 100 foot-pounds in a crossing or star pattern
Reattach the center cap
Tighten the lug nut covers with a 22mm socket
Brought to you by 1AAuto.com, your source for quality replacement parts and the best service on the Internet.
Hi, I'm Don from 1A Auto. I hope this how-to video helps you out, and next time you need parts for your vehicle, think of 1AAuto.com. Thanks.
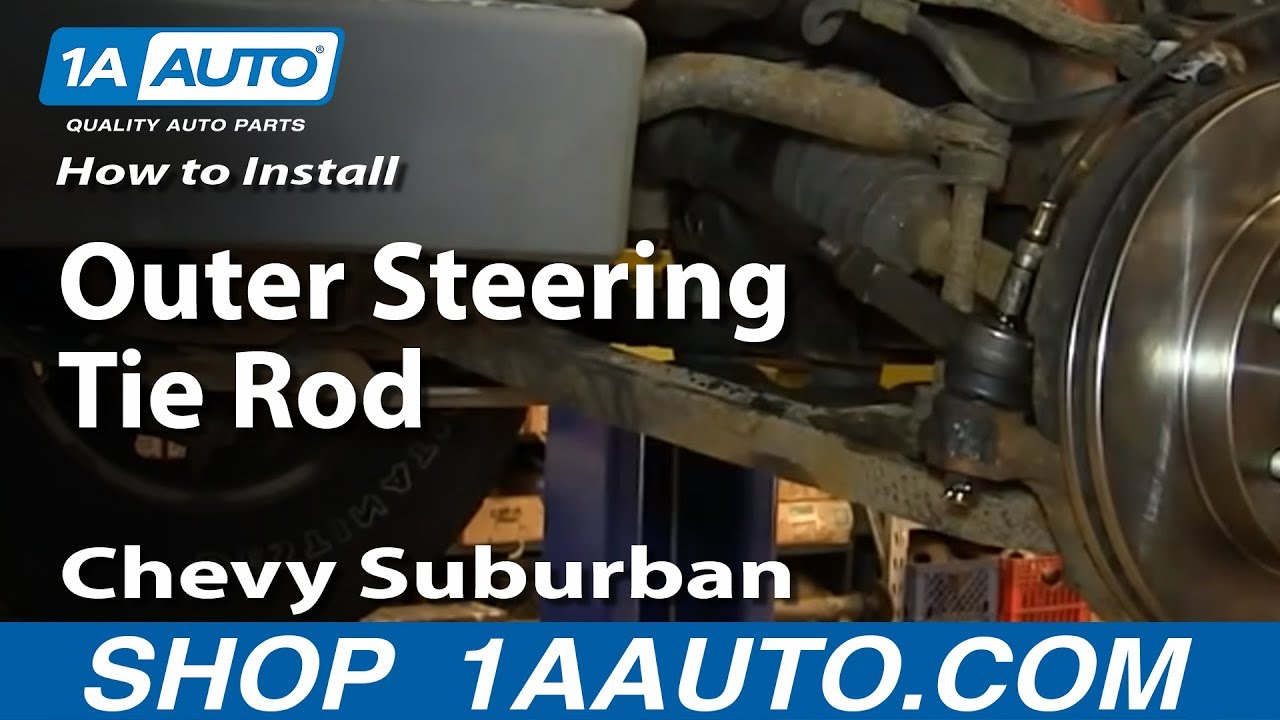
In this video, we're going to show how to replace an outer tie rod on this 2002 Chevy Suburban, and it's the same part and similar process on these Suburbans from 2001 to 2006. We show you on the passenger side, but the driver side is the same procedure. The items you'll need for this are a new outer tie rod from 1AAuto.com; 7mm, 13mm, 18mm and 22mm socket and ratchet; flat-blade screwdriver; adjustable wrench; tape measure; pliers; hammer; and a grease gun.
You want to just loosen up these 22mm caps, and then pull the hubcap free. Then, you want to loosen these lug nuts while the vehicle is on the ground, then raise the vehicle and remove them the rest of the way, unless you have air-powered tools. Then, you can do it while it's in the air.
Now you want to measure from the boot on your inner tie rod to the edge of your outer tie rod and just remember that measurement. Now, using your adjustable wrench, loosen up this nut right here, and then you want to remove this 18mm nut down here. Now just hit on your knuckle with a hammer and this is going to break up that outer tie rod and make it easier to pull out. Now just hold this nut with the adjustable wrench, pull the outer tie rod off and just twist it until it comes free. We'll fast forward as Don does this. You want to make sure that the inner tie rod doesn't spin while you're removing the outer tie rod.
Now, put the grease fitting into your new outer tie rod and just tighten that 7mm grease fitting up. Then twist the outer tie rod back onto your inner tie rod and push it down into place. Now, replace the castle nut and just tighten that up. Then push the cotter pin through and, using your pliers, just bend the ends of it. Now, using your grease gun, fill the tie rod with grease. Measure, and you should get about the same distance. That's a good preliminary alignment. You should have your car aligned after this. Tighten up the lock nut to hold it in place.
Now replace your wheel and then replace those lug nuts and tighten them preliminarily. Lower the vehicle and tighten them the rest of the way. Now torque the lug nuts in a crossing pattern to 100 foot-pounds. Replace the hubcap and tighten up those caps.
We hope this video helps you out. Brought to you by www.1AAuto.com, your source for quality replacement parts and the best service on the Internet. Please feel free to call us toll-free, 888-844-3393. We're the company that's here for you on the Internet and in person.
Tools used
Adjustable Wrench
Torque Wrench
Hammer
Socket Extensions
Rust Penetrant
Jack Stands
18mm Socket
7/8 Inch Wrench
Socket Driver
Wheel Chocks
Ratchet
Floor Jack
1/2 Inch Impact Gun
22mm Socket
You want to keep in mind when you're doing this job after you're done, you're going to want to go to a local garage and have the vehicle aligned so you don't have premature tire wear. Take the center cap off. I'll just use a straight blade screwdriver, just get behind here, slide it off. Take the lug nuts off. Use a 22-millimeter socket. Gonna take the wheel off. [inaudible 00:00:34] off this jam nut. I'm going to use a 7/8 wrench. And just take some rust penetrant, this thing is a little bit rusty so let that soak a little bit. Gonna take a 18-millimeter socket, take this nut off. And take a hammer and just hit the bottom of the tie rod to release it from the knuckle. Just like that.
Now when I take off the tie rod, just count how many turns you have. So 1, 2, 3, 4, 5, 7...21, 22 and write that number down. Now I'm going to take a large adjustable wrench and loosen up the inner tie rod end. And loosen this up and just slide it off. Take a little thread locker, put it on the threads before you put the new one on and line it up. And then use my adjustable wrench to tighten this up. If you have the ability to use a torque wrench and torque this, you want to torque this to 74 foot-pounds. And take the outer tie rod, one, two, and then count the turns that you counted before. Three...21, 22. Take the jam nut not off...I mean the castle nut off and slide it in the knuckle. Slide the stud part into the knuckle. Put the nut on. Just gonna use a pry bar, pry down on the outer tie rod in to prevent the stud from spinning, and just snug this up a little bit. Use the 18-millimeter socket. And torque this to 37 foot-pounds. And if the hole doesn't line up for the cotter pin, just tighten the castle nut until it lines up. Little more. Should be good. Put the cotter pin through. And take my cutters and just bend this over then just trim the excess.
Tighten up this jam nut. I'm going to use a 13/16 wrench, and if you have the ability to torque it, torque it to 36 foot-pounds. There's a grease fitting right here. Just take a grease gun and give it a couple pumps. And I really give it a couple of pumps until I see the boot move a little bit. And that's good. Put the wheel back on. And the lug nuts. And now I'm gonna torque these lug nuts in a star pattern or cross pattern to 140 foot-pounds to tighten the wheel down evenly. And just go around again, double-check. And put the center cap on.
Tools used
Adjustable Wrench
35mm Socket
Torque Wrench
Tie Rod Fork
Jack Stands
Grease Gun
Rubber Mallet
Tie Rod Puller
7mm Socket
Lug Wrench
Ratchet
Floor Jack
Needle nose pliers
1. Remove the wheel
Loosen the lug nuts.
Raise and secure the vehicle.
Remove the wheel.
2. Remove the tie rod assembly
Remove the tie rod bolt.
Use a pickle fork and hammer to separate it.
Use an adjustable wrench and a fitted wrench to remove the tie rod assembly.
3. Install the new tie rod assembly
Adjust your new tie rod assembly to match the old one for a preliminary alignment.
Mount the new tie rod assembly and tighten it in with a wrench.
Tighten the nut on the tie rod stud to 65 ft lbs.
Install the cotter pin.
Use a 7 mm wrench to install the grease fitting
With a grease gun, grease the inner and outer joints.
4. Put the wheel back on
Preliminarily tighten the lug nuts.
Lower the car and torque the lug nuts to 120 ft lbs using a star pattern.
Brought to you by 1A Auto.com, your source for quality replacement parts and the best service on the internet. Hi, I'm Mike Green. I'm one of the owners of 1A Auto. I want to help you save time and money repairing and maintaining your vehicle. I'm going to use my 20-something years experience restoring and repairing cars and trucks like this, to show you the correct way to install parts from 1A Auto.com. The right parts, installed correctly, that's going to save you time and money. Thank you, and enjoy the video.
In this video I'm going to show you inner and outer tie rod replacement. This truck actually just needed the inner, but if you're replacing the inner, you might as well replace the outer as well. These tie rods fit this whole generation of GM trucks and SUV's - trucks from 98 - 06 and SUV's from 99 - 07. The tools you'll need are a jack and jack stands, a 22 mm lug wrench or socket and ratchet. You'll need either a 35 mm wrench or a 12 inch adjustable wrench that can go to 35 mm and then you'll need a second adjustable wrench as well, a tie rod removal tool, a grease gun, torque wrench, and pliers. The clunking noise was the inner tie rod. You can see here, when I shake the tire back and forth you'll see the inner tie rod move but that steering arm inside doesn't move, so you know there's play in there and it needs to be replaced.
Start out by raising and securing the vehicle on a jack stand and then remove your cap and wheel. We're going to remove this bolt. We've got a ratchet. If you don't have a breaker bar, use a ratchet and a piece of pipe. The bolt should come off pretty easily. Take the bolts off most of the way. I'm planning on replacing the outer tie rod as well, so I'm going to use a pickle fork to separate it. The best way to go about this is to get the wrench on it from underneath and push. That should break her free. I'm just going to speed up as I pull that out. You want to make sure that your outer tie rod spins with the wrench so the whole assembly spins and you don't shorten or lengthen the tie rod -- the inner and outer tie rod assembly.
There's your whole assembly out. If you can see here, I've got my old assembly, inner tie rod and outer tie rod, and I want to measure right from the edge of this surface here right to the end. I'm taking my new inner tie rod and outer tie rod and I put them together, just to compare. This will give you a good preliminary alignment. We'll put this nut a little closer. We can put it together now. It will be a good preliminary alignment until you can get your vehicle to a shop where you can get a real alignment.
I'm just leaving my nut right there and spinning my outer tie rod off. The nut marks the place where your tie rod was and then taking off that outer tie rod just makes it easier to get the inner one on. That allows me put my inner tie rod on. Speed it up here as I use the wrench to tighten the tie rod up. Then I can put my outer tie rod right back on and go right up to the nut. Then I'll just fast-forward here as I put that outer tie rod back on the inner tie rod. Now I'm just taking the nut or just getting the outer tie rod in place. Take the nut off the new tie rod, and I'm just going to get some of the debris off the steering knuckle there, and then you can push on the stud on the tie rod and get it lined up with the steering knuckle, and then push it up and in, and start your nut back on.
We'll tighten this up to 65 foot-pounds. Pull a little tighter here and we can get this cotter pin through. We'll fast-forward here as we install the cotter pin and bend the end over and then use a 7 mm wrench and install our grease fitting. We'll take a wrench screw up here. The other one holds the outer tie rod and just tighten up the block nut. Now you want to use a grease gun and grease both the joint for the outer tie rod and the inner tie rod.
Use some more fast-forward here. As you put the wheel and tire back on, start all the lug nuts one by one by hand first, then use your wrench to preliminary tighten them, then you can lower the vehicle back down on the ground, torque the lug nuts to 120 foot-pounds. I'm using a crossing pattern and then I do it one more time, go around all eight and make sure they're tight. Then you can put your center cap back on and you should be all set.
We hope this helps you out. Brought to you by www.1AAuto.com, your source for quality replacement parts and the best service on the internet. Please feel free to call us toll-free, 888-844-3393. We're the company that's here for you on the internet and in person.
Tools used
Torque Wrench
Gloves
Hammer
Rust Penetrant
Wheel Chocks
Floor Jack
Safety Glasses
Pliers
22mm Socket
Now one of the first things you're gonna wanna do before you start any job is to make sure you're safe as possible. You wanna have safety glasses and hand protection at all times. The next thing you're gonna wanna do is safely raise and support your vehicle so that your wheels are off the ground. Next, if there's a center cap, remove the plastic center cap and that will expose your lug nuts. Remove all 6 using a 22-millimeter socket. Remove your wheel. Now that we have a nice clear view of our tire rods, I'm gonna spray down this area right here. This is the adjustment area. Use a little bit of penetrant. That's gonna help you along. Using some nice long pliers, I'm gonna grab right onto this and I'm gonna turn it clockwise. That'll break free this jam nut. Okay, that broke free. Let's remove the nut that holds the outer tie rod end to the knuckle.
Now we're gonna hit right here on the knuckle to break our outer tie rod end free from the knuckle. Turn your outer tie rod end counterclockwise and count the amount of times it turns around as you remove it. One, two, three and so on. Okay. Write down that corresponding number so you can remember. We have our outer tie rod end. Let's go ahead and put that on. And we're gonna count it in the same amount of threads that we counted the original one off. That was one, two, three and so on. Okay. Just bring this so it's close. Get that nut off of there. I'm gonna put this on there. Let's bottom that out. Now we're gonna torque this nut to 48 foot-pounds. All right. So now that we have that torqued, we need to pay special attention to where the slot on the castle nut lines up with the hole in the stud. If it doesn't line up, you need to continue tightening until it does. Okay, so that looks pretty good. Let's try it.
That slides right through. Spin it over. The cotter pin's gonna ensure that there's no way that this nut can come loose. Now it's gonna be time to tighten up your jam nut. To tighten this we're gonna turn it counter clockwise. When you torque it, you would wanna torque it to 37 foot-pounds if you have the ability. Let's see here. Okay. Just make sure that it's nice and snug. By the time you're finished, make sure your outer tie rod end is nice and parallel to the ground or at least as parallel as it can be. Now let's get the wheel back up on here. Okay. Now with the wheel barely on the ground so it can't spin, we're gonna torque the lug nuts to 140 foot-pounds. Torqued. If you have a center cover, put it on there now. Now that you've finished your service, go ahead and take it for a road test and make sure you get it down to a local reputable alignment shop.
Tools used
Adjustable Wrench
Torque Wrench
Hammer
Rust Penetrant
Pry Bar
18mm Socket
Grease Gun
7/8 Inch Wrench
Pickle Fork
Side Cutters
8mm Socket
22mm Wrench
Drill
Cotter Pin
Ratchet
1/2 Inch Impact Gun
22mm Socket
Before you start, you wanna be aware that after you're done this job, you're gonna wanna go to an alignment specialist so that you can have the vehicle aligned so you don't wear out the tires prematurely.
I'm gonna remove the wheel. Use a 22-millimeter socket. Take the lug nuts off. And take the wheel off. I'm gonna loosen up the jam nut. You can use a 22-millimeter wrench or a 7/8 wrench. Just get that loose. That's good. I'm just gonna spray a little rust penetrant on here. And use an 18-millimeter socket, take this nut off. And if the nut doesn't come off and the stud starts spinning, you can use an 8-millimeter socket to hold that stud from spinning, and then just use the wrench to take the nut off. Now you can take a hammer and just give a tap on the bottom of the tie rod, or take a pickle fork and separate it this way. Just if you use a pickle fork, it's probably gonna rip the boot right here. I'm just gonna give it a hit right here. There we go. And now we're gonna take the outer tie rod off. As we unscrew this, just count the threads. So 1, 2, 3, 4, 23, 24. So write that number down. And when you go to put it back together, you're gonna count them to put the other one in the same position that that one was in.
Now I'm gonna take off the inner tie rod end. I'm gonna use a large adjustable wrench because I don't have a wrench that's big enough to fit this. Slide this over and loosen it up. And eventually we'll get that off. Take the inner tie rod end and get this started. Now we're gonna tighten this up with the adjustable wrench. If you have the ability to torque this, you wanna torque this to 74-foot-pounds. Just do the best you can. That's good. Then you wanna take a grease gun and hook it up to this grease fitting and give it a couple pumps. You can do it until you start seeing the boot move a little bit, then you know there's plenty of grease in there. And take the new tie rod end. Get this started. Make sure you count 1, 2, 3, 4, 5, 22, 23, 24 and line this up in the knuckle. Take the castle nut, get that started. Now, what you can do is to prevent the stud from spinning, you can take a pry bar, just pry in between the knuckle and pry down on the tie rod, use an18-millimeter socket and tighten this up. And tighten this to 37-foot-pounds. And then just check to see where the hole is for the castle nut. And if you need to, you can snug it up a little bit more to get it to line up. And that that hole lines up. Now take the cotter pin, slide it through, actually we'll slide it through this way and take some side cutters and just bend it. Tap it out of the way, and then trim off the excess. And we'll snug up the jam nut and tighten that to 50-foot-pounds. Put the wheel back on and the lug nuts. I'm gonna take these lug nuts down to 140-foot-pounds, and I'm gonna do it in a cross pattern to tighten the wheel down evenly. Just go around again. Double-check.
Tools used
Torque Wrench
Hammer
Pry Bar
Jack Stands
18mm Socket
Pickle Fork
Socket Driver
Wheel Chocks
22mm Wrench
Straight Cutters
Floor Jack
3/8 Inch Impact Gun
22mm Socket
Tools used
Torque Wrench
Hammer
Rust Penetrant
Pry Bar
18mm Socket
7/8 Inch Wrench
Pickle Fork
Side Cutters
22mm Wrench
Cotter Pin
Ratchet
1/2 Inch Impact Gun
22mm Socket
Before you start, you wanna be aware that after you're done this job, you're gonna wanna go to an alignment specialist so that you can have the vehicle aligned so you don't wear out the tires prematurely.
I'm gonna remove the wheel. Use a 22-millimeter socket, take the lug nuts off. And take the wheel off.
I'm gonna loosen up the jam nut. You can use a 22-millimeter wrench or a 7/8 wrench. Just get that loose. That's good. I'm just gonna spray a little rust penetrant on here. Gonna use an 18-millimeter socket, take this nut off. And if the nut doesn't come off and the stud starts spinning, you can use an 8-millimeter socket to hold that stud from spinning and then just use the wrench to take the nut off. Now you can take a hammer and just give a tap on the bottom of the tir rod or take a pickle fork and separate it this way. Just if you use a pickle fork, it's probably gonna rip the boot right here. So I'm just gonna give it a hit right here. There we go. And now we're gonna take the outer tie rod off. As we unscrew this, just count the threads. So 1, 2, 3, 4, 23, 24. So write that number down and when you go to put it back together, you're gonna count them to put the other one in the same position that that one was in.
And take the new tie rod end. Get this started. Make sure you count. One, 2, 3, 4, 5, 22, 23, 24. And line this up in the knuckle. Take the castle nut. Get that started. Now what you can do is to prevent the stud from spinning, you can take a prybar. Just pry in between the knuckle and pry down on the tie rod. Use an 18-millimeter socket and tighten this up. And tighten this to 37 foot-pounds. And then just check to see where the stud...where the hole is for the castle nut and if you need to, you can snug it up a little bit more to get it to line up. And that hole lines up. Now take the cotter pin, slide it through. Should slide through this way. And take some side cutters and just bend it. Just tap it out of the way. And then trim off the excess. And we'll snug up the jam nut. And tighten that to 50 foot-pounds.
Put the wheel back on. And the lug nuts. Now we're gonna tighten these lug nuts down to 140 foot-pounds and I'm gonna do it in a cross pattern to tighten the wheel down evenly. And just go around again, double-check.
Tools used
Side Cutters
Torque Wrench
Flat Blade Screwdriver
Rust Penetrant
13/16 Inch Wrench
Pry Bar
Sledge Hammer
18mm Socket
Cotter Pin
7/8 Inch Wrench
1/2 Inch Impact Gun
22mm Socket
You wanna keep in mind when you're doing this job, after you're done, you're gonna wanna go to a local garage and have the vehicle aligned so you don't have premature tire wear.
Take this center cap off. We'll just use a straight blade screwdriver. Just get behind here, slide it off. Get the lug nuts off. Use a 22-millimeter socket. Now take the wheel off.
Loosen up this jam nut. I'm gonna use a 7/8 wrench. And just take some rust penetrant, this thing's a little bit rusty. So let that soak a little bit. Now take a 18-millimeter socket. Take this nut off. And take a hammer and just hit the bottom of the tie rod to release it from the knuckle. Just like that. Now I'm gonna take off the tie rod. Just count how many turns you have. So 1, 2, 3, 4, 5, 7, 21, 22. And write that number down. And take the outer tie rod, one, two. And then count the turns that you counted before, 3, 21, 22. Take the jam nut off. I mean, the castle nut off. And slide it in the knuckle. Slide the stud part into the knuckle. Put the nut on. Just gonna use a pry bar. Pry down on the outer tie rod end to prevent the stud from spinning. And just snug this up a little bit. It's the 18-millimeter socket. And torque this to 37-foot-pounds. And if the hole doesn't line up for the cotter pin, just tighten the castle nut until it lines up. Little more. Should be good. Put the cotter pin through. And take my cutters and just bend this over. And just trim the excess. Tighten up this jam nut. I'm gonna use a 13/16 wrench. And if you have the ability to torque it, torque it to 36-foot-pounds.
Put the wheel on. And the lug nuts. And now I'm gonna torque these lug nuts in a star pattern or cross pattern to 140-foot-pounds to tighten the wheel down evenly. And just go around again. Double-check. And put the center cap on.
Tools used
Side Cutters
Torque Wrench
Gloves
Hammer
Rust Penetrant
Wheel Chocks
Copper Anti-Seize
Floor Jack
Safety Glasses
Pliers
22mm Socket
Now one of the first things you're going to want to do before you start any job is to make sure you're safe as possible. You want to have safety glasses and hand protection at all times. The next thing you're going to want to do is safely raise and support your vehicle so that your wheel is off the ground. Next, if there's a center cap, remove the plastic center cap and that'll expose your lug nuts. Remove all six using a 22-millimeter socket. Remove your wheel.
Now that we have a nice clear view of our tie rods, I'm going to spray down this area right here. This is the adjustment area. Use a little bit of penetrant. That's going to help you along. Using some nice long pliers, I'm going to grab right onto this and I'm going to turn it clockwise. That'll break free this jam nut. Okay, that broke free. Let's remove the nut that holds that outer tie rod end to the knuckle. Now we're going to hit right here on the knuckle to break our outer tie rod end free from the knuckle.
Turn your outer tie rod end counter-clockwise and count the amount of times it turns around as you remove it. One, two, three, and so on. Okay. Write down that corresponding number so you can remember. Now it's going to be time to get the inner tie rod end off of here. Here's the new inner tie rod end. And if you were to look right along this edge right here, that's the area we're going to need to grab onto, and then turn this counter-clockwise to break it free and eventually remove it. So we'll come right under here with our nice long pliers and get it off of there. There we go.
There it is friends. Now it's going to be time to install our new inner tie rod end. You might notice that there's no grease fitting to be able to grease this. Really there is. The grease is going to come right through that hole right there and that'll happen through here, starting at this point right here at this fitting. Put grease here, it comes right through and then of course it fills up the boot on the inner tie rod end. All right. I put some thread locker on here. I'm just going to go ahead and start this thing by hand. Now that we have that, as far as we can get it by hand, let's go ahead and snug it up with our pliers. Bottomed out. Just give it a teeny bit more. Awesome. Let's remove that jam nut. Let's put a little bit of copper never seize on the inner tie rod end threads, and then we'll just work that jam nut up the inner tie rod end quite a bit here. Now that we have the threaded area coded, we have our outer tie rod end, let's go ahead and put that on. And we're going to count it in the same amount of threads that we counted the original one off. That was one, two, three, and so on.
Okay? Just bring this so it's close. Put that node off of there. Put this on there. Let's bottom that out. Now we're going to torque this nut to 48 foot-pounds. All right. So now that we have that torqued, we need to pay special attention to where the slot on the castle nut lines up with the hole in the stud. If it doesn't line up, you need to continue tightening until it does. Okay. So that looks pretty good. Let's try it. That slides right through, just pin it over. The cotter pin is going to ensure that there's no way that this nut can come loose. Now it's going to be time to tighten up your jam nut. To tighten this, we're going to turn it counter-clockwise. When you torque it, you would want to torque it to 37 foot-pounds if you have the ability.
Okay. Just make sure that it's nice and snug. By the time you're finished, make sure your outer tie rod end is nice and parallel to the ground or at least as parallel as it can be. Now it's going to be time to get the grease fitting out of here. Use your 8-millimeter. There it is. Let's clean off around the area. Grab your new grease fitting. We'll start it right in there by hand, and then we'll snug it up, nice and tight. Let's give it a little grease
Now let's get the wheel back up on here. Okay. Now with the wheel barely on the ground so it can't spin, we're going to torque the lug nuts to 140 foot-pounds. Torqued. If you have a center cover, put it on there now. Now that you've finished your service, go ahead and take it for a road test and make sure you get it down to a local reputable alignment shop.
Tools used
Adjustable Wrench
Torque Wrench
Hammer
Rust Penetrant
Liquid Thread Locker
Brake Parts Cleaner
7/8 Inch Wrench
21mm Socket
Pickle Fork
Metal Cutters
Paper Towels
7/8 Inch Socket
Cloth Rags
22mm Socket
PSA54815
In Stock
Product Reviews
Loading reviews
4.29/ 5.087
87 reviews
5 Stars
4 Stars
3 Stars
2 Stars
1 Star
61
9
7
1
9
great service
Larry
January 23, 2017
After a terrible experience with another online parts company I was very pleased with the service and the product I received from this supplier.
No Grease Zerks
steven
January 25, 2017
Need to exchange these as they came with no Grease Zerks. I would never put on tie rods that I cannot add grease.
William
February 5, 2017
Great replacement product. Only downside to this product is having to drill out the grease fitting hole.
Average
Joseph
February 10, 2017
The threads are weak. Ended up buying moog rods from elsewhere
tie Rod Ends
Ricky
July 6, 2017
They had fast delivery and the fit was great on my 2001 Suburban. My son put them in and have had them on for about a month. with no problems. Price of parts was the lowest that we could find. Suburban has 210,222 miles on it and still going.
Tie Rod
Jonathan
July 13, 2017
Hello 1aauto,
Thank you for my tie Rod. It was easy to put on thanks to your video. You guys are #1.
Aloha from Hawaii,
Jon
G
October 20, 2017
Shopping for products on 1aauto was a breeze I was able to do the shopping myself without a mechanic. Just put the info about vehicle and keyword on what I was looking for. Delivery was on tine and to my surprise they were the right parts thanks AAUTO. The ladies guide to ordering very inexpensive auto parts.
Tie rods
Marcus
November 2, 2017
Fast shipping great parts. Good quality and easy to install.
Tie rod ends
Mark A
November 20, 2017
Great deal everything went together perfectly .
Would recommend product.
Great kit!
C
March 18, 2018
Great kit just wish the ball joints came with a grease fitting on them but with the warrenty from 1aauto Ill just replace them if they ever need it
Tie rods.
michael
May 4, 2018
Garage wanted $465 for tie rods and installation. Less than $40 and with guidence of your videos it took about 45 minutes! I look forward to the next project and the satisfaction of saving so much money. If it wasnt for 1 A auto my 2001 Yukon would have been junked a long time ago. I Just because of cost to have repaired.
Awesome company
Buck
May 21, 2018
Love A1 auto i saved so much money purchasing auto parts through this company and learned alot from their online videos that gave me the confidence to do the mechanical work on my car myself. Once again thx A1 auto you guys are the best!
Good
G
May 28, 2018
Great fit good price very easy to change. Good quality for the price.
Quick delivery, Perfect fit....
RICHARD
June 30, 2018
All of the above plus the best price anywhere for this part.
Great! What a deal!
G
July 9, 2018
This was a direct fit. Not issues at all. And for the price? Of course I recomend this products
Nice
S
July 18, 2018
These are great tierods for the money. I wish they had a zert for grease on the outer but in reality they probably will outlast my Yukon anyway. Very easy to change
Tie rod ends
Kenneth
August 1, 2018
Fit perfectly and even came with the nut and cutter pin.
Great company
L
August 9, 2018
We happened upon 1A Auto on YouTube when my boyfriend was working on his Ford diesel. My truck was currently out of service to me. We started looking up parts and how to videos on the website and found it was very affordable and easy to replace the parts we needed. My tie-rods came very quick, and the how to video made it super fast and easy to replace them. Overall a great company. User friendly and they thought about the DIYers!
Exactly what i needed
J
August 13, 2018
Just like most of the parts i get from 1aauto it was exactly what I wanted. Great quality part and fast shipping made this repair quick and easy. Knowing there is a video for all my parts lets me know if i am ever stuck. I can review the expert video and keep moving forward with my repair
4 piece set of tie rod ends
Raymond
August 25, 2018
great price and fast shipping first time purchase but not the last thank you 1aauto
Patty
September 21, 2018
Everything we ordered was accurate and very pleased with the product
Just as described
V
September 28, 2018
Ordered tie rods and ends, estimated time of arrival was a day early, and was the correct aftermarket replacement
Great quality
T
October 6, 2018
Great quality. Easy install.
Will order again if needed. Fast shipping and free
Oscar
November 13, 2018
Good product and fast shipping every happy with the parts and videos on how to do it your self very helpful
Fit like a glove!
G
January 5, 2019
Recently installed in my GMC DENALI after noticing it was needing some TLC. The parts fit perfectly. I would not hesitate to order from this company again.
Tie rods
S
February 3, 2019
Tie rods fit perfectly. They arrived quickly as stated. And the price was the best I could find. Very satisfied with my purchase.
Tie rod ends
D
February 27, 2019
Great, accurate product. Fast shipping! Will definitely shop again.
Tie Rods
dan
March 4, 2019
Descent price for the product. They do not come with grease fittings, nor a pre-drilled hole to insert a grease fitting. You have to drill a hole into the cap to install a grease fitting, risking admittance of metal shavings into the ball joint.
Chevy tahoe tie rods
Anthony
March 25, 2019
Great all around shipping was fast and easy to install with the help of their videos. Thanks 1aauto!!
Thank you
David
March 28, 2019
Yes this part definitely helped my vehicle thank you so much free shipping and 48 hours later I was riding again
Perfect set
Austin
March 31, 2019
Standard GM tie rod design, jam nut 18/21 I forget, adjusting sleeve 13mm. Aligned and drives fine.
jason
April 17, 2019
1Aauto shipped it fast ! Part looked just like the old one just new and fit perfectly! Very happy with my purchase! Will be buying more parts in the future! Thanks
Exactly what you should expect
E
June 12, 2019
Great product with great shipping time. Product was exactly as described and an exact fit which made for an easy install.
2005 Chevy Avalanche
R
June 18, 2019
Solid and sturdy, just a quality product. I just installed it in my 2005 Avalanche and so far so good.
C
July 24, 2019
Fast delivery and the parts were a exact fit.will order again
Pleased
L
July 26, 2019
Item just add described still purchase from again.
Perfect fit
Dick
August 5, 2019
High quality, best price, perfect fit, delivery was quicker than I expected
Great
C
September 11, 2019
Great fit fast and convenient service
Tie rods
Kenneth
September 29, 2019
I ordered the tie rods and ends. Shipment was quick and help video explaining how to repair was spot on.
Front end
Antonio
October 22, 2019
Parts fit perfectly thanks
A
October 27, 2019
Price and very well-built
M
November 30, 2019
Doesnt come with outer tie rod zirc fittings
Easy install
Kevin
March 2, 2020
Worked great
Very Little Grease, No Grease Fittings
Nicholas
March 9, 2020
Let's be real, these are inexpensive tie rods. The outer tie rod does NOT have a grease fitting. I pulled back the boot on the outer tie rod and found only a fingertip of black grease! That's not acceptable for longevity, so I packed it as best as I can until I have time to drill in a grease fitting. Grease fittings would add, what, 10 bucks total to the price? It's really necessary for longevity, so add the fitting. The inner tie rods on my Tahoe, anyway, don't need a grease fitting because there's already one that's part of the steering rod it screws into that's designed to grease this bearing. The inner bearing also only had a fingertip of grease which is, again, not acceptable for longevity. Other than the lack of grease, these seem on the surface about as good as any other tie rods. The bearings were stiff but movable as they should be. Time will tell how long they last. The factory ones made it 191K. These are easy to change and I have alignments for life with Firesto
Parts Order
D
May 11, 2020
I started ordering parts from this company earlier this year and I cant say Ive been completely satisfied everything always fits in the customer service is great. And the prices are extremely affordable
Great product
Mat
June 27, 2020
These tie rods came in a good amount of time, and also were very easy to install. I have had very good luck with them so far and would recommend them for anyone with a 03-06 Chevy Silverado 1500. I would definitely advise anyone looking for replacement tie rods to purchase these, also great company always had good experiences with them!
D
August 4, 2020
Great product arrived on time I used 1aauto for all my parts wounding choose any were else but here
Perfect Fit
Daniel
August 7, 2020
As Advertised.
Shorty
Ron
August 17, 2020
Just put these things on took it to the tire store thought the tires were bad cause its shaking so bad turns out the tire rod ends are all shot their junk
Tie Rods
Ron
September 28, 2020
Was very easy to install only thing i would of liked was grease fitting on the outer ends but price and everything else was great
Very good budget parts.
Louis
October 8, 2020
These are not high performance parts. That being said 1A Auto is offering good budget replacement parts for the do it your selfer. I'd like to see a grease fitting on the outer tie rod end, but they were easy to install and more importantly they are reliable parts and get the job done.
As described.
M
October 18, 2020
Exactly was described, good quality, great price, fast delivery
Good value
Micah
October 25, 2020
Ordered kit due to a bad pitman arm, figured while I was at it Id replace the tie rods. Wish it came with grease fittings, but they are progressed. Very happy with my purchase.
Great parts great price fast delivery
Rick
December 2, 2020
Ordered from here a few times always the best price I can find. Never had a problem with parts or delivery. 10+
Disappointed
Mitchell
December 4, 2020
Purchased inner and outer tie rod kit less than a year ago, both sides have gone out already
5 stars
victoria
March 12, 2021
Priced right. Easy return policy. Super fast shipping. Big thumbs up!
Great Website
L
March 12, 2021
I have always had good luck with 1AAuto. This product didnt fit my truck, but without a doubt they made it right and it was a painless return. I love ordering from here. Always get great product and quality and cant beat the price. And the shipping is fast.
Perfect fit
Carlos
March 17, 2021
Easy installation with the help of the videos from 1 a auto !
Inner and outer tie rods didn't last 1 year :(
G
March 17, 2021
I was excited to get these seeing they had good reviews but holy cow they didn't last 6,000 miles!! I was getting the alignment checked and the tech had me watch him shake the wheel so I could see for myself the ball joints on the tie rods moving like crazy. Alignment on average is $95 so how is it even worth it having to replace these every 6000 miles and paying for alignment over and over.
great service
Dylan
April 7, 2021
Ive ordered from 1AAuto A lot and every time Ive ordered Ive gotten great service and quality parts never late and always on time I only order from 1AAuto for all of my vehicle parts since I have found them a few years ago thanks for the great service guys
Saved me a lot of money
Quincy
April 12, 2021
Perfect fit. Looks great
Junk Parts
Taylor
April 27, 2021
Much like some others here, these tie rods are junk. They didn't last a year. Sitting at my tech's shop and he just showed me on the lift how much play they had. Absolute garbage. I've trusted 1A on some stuff before, but I'm loosing faith in them.
??
Anthony
May 21, 2021
The correct parts quick, at a good price. How long they will last remains to be seen. So far I haven't had any problems with any of the parts that I have purchased.
Very Statisfied
Michael
June 18, 2021
Very satisfied, came in on time,
Tie Rods
Dana
June 28, 2021
Exactly what I ordered at a good price. Will order again.
Robert
June 29, 2021
Good quality parts. Will buy from them again.
They only lasted me about 3,000 miles and failed.
Kameron
July 4, 2021
Had them professionally installed and got an alignment 4 months ago. Ive put maybe 3,000 miles on them and theyre completely shot. Had them replaced with moog and right off the bat I can feel the difference. I recommend spending more money unless you want to buy something thats going to fail really fast.
Good parts at good prices.
Sean
July 19, 2021
Great economy parts. They really tightened up the suspension on my truck.
Alignment
STAVON
July 27, 2021
Wheel alignment check no more side to side driving everything straight A1.
Don't Bother...
Ben
August 9, 2021
I ordered these parts in October of 2020. July of 2021 and both inner tie rods are completely worn out. Replace left inner tie rod and it spun freely in my hands... I'm sure the right will be the same... they should be completely solid and not spinning at all. They would not give me a refund because I was outside of their 60-day return policy. They did send me replacement parts but why would I put this junk back on my vehicle? I'll be replacing with Moog parts and avoiding TRQ at all costs in the future. There's a reason they're cheaper than everything else...
Horace
August 12, 2021
I was able to change out the parts but I am still having trouble the parts do not look the same as the ones I replaced. I do not know it that's the reason or not. I am satisfied with the fast delivery I just don't think the parts match what I need.
Taul
September 12, 2021
I wouldnt buy these seem like they ware out quick on 22 wheels
Raul
September 12, 2021
Not worth it maybe good for a year until needs replacing
Great parts good price
Eric
September 25, 2021
Parts fit fast shipping will order from you again for sure
David
October 7, 2021
No way to grease outer ends.
great purchase from 1-a auto
Dan
December 16, 2021
great and easy install
Keith
December 19, 2021
Inner and outer tie rod solve my front end steering problem got a wheel alignment and it steers like when I first bought the truck so Im giving a 5
C
January 10, 2022
Been on the truck for over a year. Holding up well. Easy install. Correct part
Works as expected
Nick
January 26, 2022
Fit as expected on my 2003 Silverado 1500
Will continue to do business with 1A
Allen
April 13, 2022
Good products easy installation
Ruben
April 13, 2022
looks good
David
May 25, 2022
Fit as should.
Awesome
Paul
November 29, 2022
Great service, an parts.
Exact replacement
greg
December 29, 2022
Fit great no issues!
Inner outer tie rods
John
February 6, 2023
Grease zeros would be helpful
02 Escalade tie rods
Ethan
March 22, 2023
Perfect fit rides great! Fixed my issue on my Escalade easily
Michael
June 5, 2023
Low price and on time
Customer Q&A
What's the specific grease and fittings need to apply grease in the tie rods?April 5, 2016
Lance B
10
A standard ball joint grease can be used on all the front end steering components. This is available at any local auto parts store
April 6, 2016
Brian F
Do these come with the grease fittings that are in the video or do they need to be ordered separate?January 18, 2017
D J
10
From what we may see, the outer tie rod ends will be sealed from our vendor, and do not require grease to be added during routine maintenance. We do use multiple vendors however, and if our vendors offer an opening on the outer tie rod, the grease fitting will be included. You will not have to purchase them separately.
January 18, 2017
Alex P
What type steel is it made from?March 24, 2017
Chad C
10
It is most likely made of a mild steel MS which is most commonly used in tie rods. EN8 EN19 and sometimes stainless steel SS is used
March 24, 2017
Gary C
10
We do not have the specific steel type available at this time, but they are made designed to OE specifications in terms of materials.
March 24, 2017
Alex P
Hi. I need to replace inner/outer tie rod ends on my 2005 silverado 1500 and the part number from gmc is
Inner- 15295861
Outer- 19289163
Could you send me a link with those tie rods?September 7, 2017
Denis E
10
While we have a cross reference for the inner tie rod ends, https://www.1aauto.com/tie-rod-pair/i/1asfk00231?f=605546&y=2005 we are unable to successfully locate the outer tie rod end based off of the OE number you provided. Do you have a 2WD model or 4WD model?
I know these say that they will fit my truck but the current ones I have look a bit different from what you are selling. mine dont have a pin through them and they have a hexagonal shape after the threads on the male part. any reason why they are difJuly 15, 2018
J Z
10
That could just be design difference from OE to aftermarket. Can you please provide your full year, make and model so we can try to verify fit?
July 16, 2018
T I
10
We purchase these the appearance if different but they fit
September 12, 2019
C R
10
Need to make sure its compatible since not manufacturing facility make the same
October 29, 2019
M I
10
The pins are there to make sure that the hex nut doesnt back out, my old ones and the new ones I ordered have the pin. 2004 Tahoe
April 9, 2020
Dekindre D
10
The hexagonal shape on the end of the shank is for using a wrench or socket, In the event of the nut being siezed to the threads this allows to to hold the ball joint in place.
December 4, 2020
Mitchell N
Will this fit a 2000 Chevy Silverado rear wheel drive?December 28, 2018
C H
10
This will only fit the 4 wheel drive application.
December 28, 2018
Peter L
What brand is this part?January 23, 2019
Jesus Q
10
This item is made by our 1A Auto house vendor and is built to the same OE specifications as the original.
January 23, 2019
Emma F
I like the price (4 piece gmc 2006 sierra 1500 tie rod kit) I see good reviews but who is the manufacturer, is it a reliable and quality OEM,? I do not want to buy parts that could jeopardize my safety. Your input is welcomeApril 4, 2020
David D
10
1A Auto's house brand parts are manufactured by various aftermarket companies specifically for us and built to your vehicle's exact OEM specifications. Please let us know if you have any other questions.
April 4, 2020
Peter L
What brand are these tie rods?April 12, 2020
Ariel P
10
Thank you for the inquiry. 1A Auto's house brand parts are manufactured by various aftermarket companies specifically for us and built to your vehicle's exact OEM specifications. Please let us know if you have any other questions.
April 12, 2020
Christa R
10
Dont know what brand it is but i had them installed over 2 yrs ago and they work perfectly fine no problems whatsoever. Hope this helps.
April 12, 2020
Buck D
will this fit on the 06 Chevy Silverado 2wd?May 1, 2020
Shakuille R
10
Thank you for your inquiry. This will be the correct fit for that vehicle as long as it does not have rack and pinion steering from the factory. Please let us know if you have any further questions.
May 1, 2020
A C
what is the major difference between the $55.00 and the $200 tie rod kits?September 14, 2020
Jenny G
10
Thank you for your inquiry. If you are able to provide us with the part numbers we would be happy to check further into the issue for you.
September 14, 2020
Emma F
are the inner the same for driver and passenger side??October 28, 2020
John M
10
Yes
October 28, 2020
Bryan A
10
Yes. They are the same on both sides.
October 28, 2020
L A
10
Yes, the inner are the same and the outer are the same as well.
October 28, 2020
Christa R
the inner tie rod will if fit both driver and passenger side? They look the same!!October 28, 2020
John M
10
They will fit both sides depending on your vehicle.
October 28, 2020
Corey M
Is this the 18mm inside tierod?December 7, 2022
John D
10
Actual Measurements are not listed or available. Our parts are exact replacements for your vehicle's OEM parts. As long as your vehicle is listed to fit, these parts will directly fit and function like the originals.
December 7, 2022
Andra M
I just noticed these dont have a grease fitting how does this work?March 12, 2023
William J
10
They are used to add grease later during inspections to ensure the moving parts are greased. Install them and leave them on. You need a grease gun to add grease.
March 13, 2023
A P
10
Our steering and suspension components are pre-greased and sealed for long life and do not require the extra maintenance typically required by greaseable versions.
March 14, 2023
Jessica D
Customer service
877-844-3393
Monday - Friday 8:00am - 9:30pm ET Saturday - Sunday 8:00am - 4:30pm ET