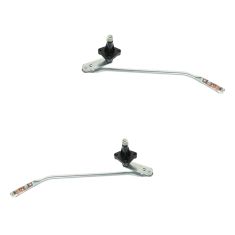
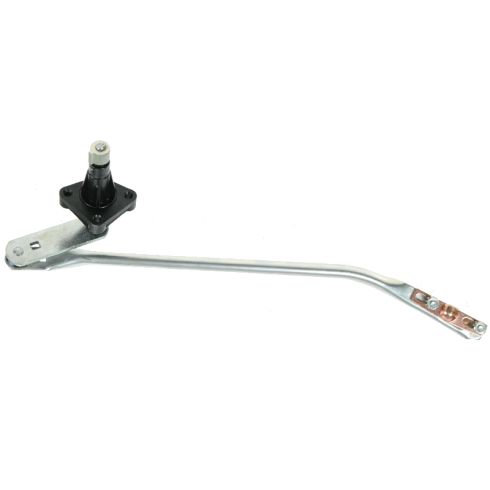
Replaces


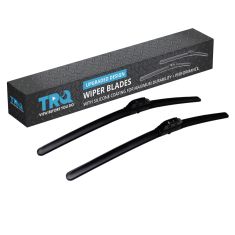
Recommended for your 1990 GMC C6000 Topkick
About TRQ:
TRQ is a trusted brand dedicated to making every repair a success story by combining premium parts with easy installation. Each TRQ part is engineered by a team of automotive experts to meet or exceed OEM standards, delivering enhanced performance and maximum longevity. With rigorous in-house testing, the brand ensures superior fit and function across every product line. TRQ also provides customers with best-in-class, step-by-step installation videos—so you can complete repairs with confidence, whether you're a first-time DIYer or an industry professional.
Attention California Customers:
 WARNING: Cancer and Reproductive Harm - www.P65Warnings.ca.gov.
Lifetime Warranty
This item is backed by our limited lifetime warranty. In the event that this item should fail due to manufacturing defects during intended use, we will replace the part free of charge. This warranty covers the cost of the part only.
FREE Shipping is standard on Orders shipped to the lower 48 States (Contiguous United States). Standard shipping charges apply to Hawaii, Alaska and US Territories. Shipping is not available to Canada.
Expedited is available on checkout to the United States, excluding Alaska, Hawaii and US Territories as well as P.O. Boxes and APO/FPO/DPO addresses. Final shipping costs are available at checkout.
Created on:
Tools used
Brought to you by 1AAuto.com, your source for quality replacement parts and the best service on the Internet. Hi, I'm Mike Green. I'm one of the owners of 1A Auto. I want to help you save time and money repairing and maintaining your vehicle. I'm going to use my twenty-plus years experience restoring and repairing cars and trucks like this to show you the correct way to install parts from 1AAuto.com. The right parts installed correctly, that's going to save you time and money. Thank you and enjoy the video.
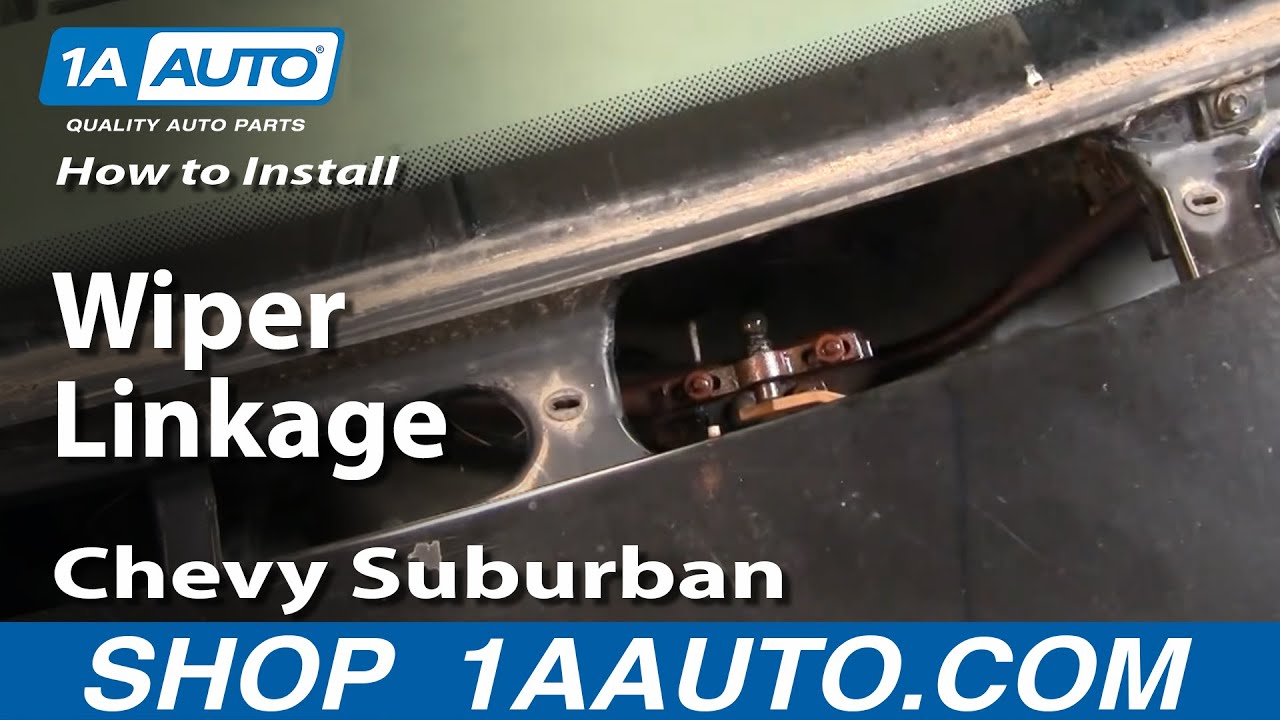
In this video we're going to show you how to access and replace the wiper transmissions on this 99 Suburban. Help you with that squeaking noise from your wipers. Same as this generation Suburban, Tahoe, Yukon, as well as the trucks. Tools you'll need are pretty simple: flat blade screwdriver, a Phillips screwdriver, and an 11mm socket and ratchet. To remove the windshield wiper arms it's pretty easy. You flip the arm up and there's a little tab right here. That pulls up and then you can just work your hands under there and pull it up and off. The same thing for the other side. After you have removed the wiper arms, you're going to remove six Phillips screws. One there, one in that round hole there (you probably can't see, but it's in there), one in there, one in there, and then finally one right there. So, I'll remove those six. So, on these corner ones, once you pull it up, there's this little grill here. You just pull that back up and off. The screw comes out with it. After you've pulled those covers back on the sides there's two more screws underneath on the edges. There are two more screws right here along the edge to remove. Once those screws are out, pull it up over the wiper mechanisms, and don't forget to disconnect your windshield washer hose right here. Just for orientation, there is the steering wheel. Here is your linkage where it hooks to the wiper motor.
Right here is your wiper arm transmission and then over here is your other transmission. We're going to start out by putting some penetrating oil on those bolts. Now that I've let my penetrating oil sit on there for a little bit, loosen it up. The driver's side linkage will come off. Now the passenger side linkage comes off. Here is our transmission. These are 11mm bolts, going to press on there. Once you have it unbolted, just press it down through, then right up and out. There is your linkage out of the vehicle. Also, the passenger side, the same thing. Remove these three bolts. From the other side, going to pull it right out. And there is your passenger side linkage out of the car. On these wiper transmissions you can see the new 1A Auto part versus the old. It's all the same, but everything is a whole lot tighter on the new ones. It has new bushings down here with some grease in them. That's really going to help tighten it up and stop the squeaking. Same thing with the driver's side. Squeeze a bolt right in and fit just perfect. As you can see, I've cleaned up the stud on the wiper motor. Before I put my transmissions back on, I'm going to put some regular old bearing grease right on here. I'm going to place my passenger side in here first. The arms do go up towards the top of the vehicle. I'll put it up in and I'm just going to put one bolt in for right now. Just start it. Same thing over here, lay my other side in.
Speed up through me kind of fumbling around trying to get this routed right. Get it roughly in place, put one bolt in. You'll need to re-use your original bolts because they are self-threading. You want this one to go right on that inside ball on this truck. We'll just tighten them up a little bit because we're actually going to align them first. You want it popped right on there. Tighten it up a little bit. It is okay if they are sliding a little bit. I've got my wiper arms back on and I can take them back off to put the grill on, but you can see without those transmissions tightened you can move your arms back and forth a little bit. You're just getting them right where you want them as far as their parked position. Then you can tighten them up. Then, after you have them tightened up, it's a good idea to run them a couple times just to see if they go down back where you want them. I'm actually going to adjust this one down just a little bit more. Once you have your wiper arms where you want them, you want to tighten up the transmissions. Then, I'm kind of fast-forwarding through putting the grill back on just because of the YouTube ten minutes. You want to put the two screws in that you can reach underneath the hood. Put those on, then lower the hood. Put your corner screws that are underneath on first, then put the corner bezels or trim back on, and tighten up all the rest of the screws. You should be good to go with some nice, quiet, new wipers that are working correctly. Obviously, once the grill is back on, then you put the wiper arms back on as well.
We hope this helps you out. Brought to you by www.1AAuto.com, your source for quality replacement parts and the best service on the Internet. Please feel free to call us toll-free 888-844-3393. We're the company that's here for you on the Internet and in person.
Tools used
Brought to you by 1AAuto.com, your source for quality replacement parts and the best service on the Internet.
Hi, I'm Don from 1A Auto. I hope this how-to video helps you out, and next time you need parts for your vehicle, think of 1AAuto.com. Thanks.
In this video, we're going to show you how to replace the wiper linkages on this 1996 Chevy Tahoe and it's the same part and process on these Tahoes from '95 to 2000. The items you'll need are new wiper transmission linkages from 1AAuto.com, a Phillips screwdriver, a flat-blade screwdriver, a 10 millimeter, and an 11 millimeter socket, and a ratchet.
First, using a flat-blade screwdriver, just pry up this clip and pull the wiper arm up and off. Do the same for the other wiper arm. Next, you want to remove this Phillips screw from either side of your vehicle. This panel just pulls off. Repeat the process on the other side. Then remove this Phillips screw and the Phillips screw in the same spot on the other side. We'll just fast-forward as Don does this. Now, pull off your weather strip. Then, remove these six additional Phillips screws. We'll fast-forward while Don does this. Now, pull the cowl up and forward. Now you just want to pull your washer hose off and slide the cowl out.
Now, loosen these two 10 millimeter nuts on the driver's side linkage. Once you've done that, you can push it right off of its stud. Remove these three 11 millimeter bolts, and we'll just fast forward as Don does that. Now, you can pull your driver's side linkage up and out. Now loosen the two 10-millimeter nuts on the passenger side linkage, and we'll fast-forward as Don does this. Then, push that off the stud and remove these three 11 millimeter bolts. Now, the passenger linkage will pull up and out.
On the left, are the old wiper linkages; on the right, are the new ones from 1A Auto. You can see they're identical and they're going to mount exactly the same. Now, on your passenger side wiper linkage, just loosen up the 10 millimeter nut on the outside and remove the one on the inside. Then feed the wiper linkage back into place. Push it back onto that wiper motor stud and replace that 10 millimeter nut. We'll just fast-forward as Don tightens up both of those 10 millimeter nuts. Now, push the linkage post up into place and replace those three 11 millimeter bolts. Now, loosen up the two 10 millimeter nuts on your driver's side wiper linkage and feed it back into place. Pull the linkage post up into place and push the other end onto the wiper motor stud and then replace those three 11 millimeter bolts. We'll fast-forward as Don tightens those up and then, tightens those two 10 millimeter nuts on the other end of the linkage.
Now, put your cowl panel back into place and reconnect the washer hose. Then, line it up and replace those two Phillips screws on either side of the cowl panel and then replace the six screws in the center of the cowl panel. Now, replace those two side panels and the Phillips screw that holds them into place. Push the weather strip back on and then close your hood. You want to line up that line with the slot. Push the arm back onto the post. Push the tab in and put the arm down, then repeat the process for the other arm and then you're all set.
We hope this video helps you out. Brought to you by www.1AAuto.com, your source for quality replacement parts and the best service on the Internet. Please feel free to call us toll-free, 888-844-3393. We're the company that's here for you on the Internet and in person.
Tools used
Brought to you by 1AAuto.com, your source for quality replacement parts and the best service on the Internet.
Hi, I'm Don from 1A Auto. I hope this how-to video helps you out, and the next time you need a part for your vehicle, think of 1AAuto.com. Thanks.
In this video, we're going to show you how to replace the driver's side wiper linkage on this 1996 Chevy Tahoe. The items you'll need for this is a new driver's side wiper linkage from 1AAuto.com, a Phillips screwdriver, a flat blade screwdriver, a 10mm and 11mm socket and ratchet.
First, using a flat blade screwdriver, just pry up this clip, pull the wiper arm up and off. Do the same for the other wiper arm.
Next, you want to remove this Phillips screw from either side of your vehicle. Then this panel just pulls off, and repeat the process on the other side. Then remove this Phillips screw and the Phillips screw on the same spot on the other side. We'll just fast-forward as Don does this. Now pull off your weather strip and remove these six additional Phillips screws. We'll fast-forward while Don does this. Now pull the cowl up and forward, and now you just want to pull your washer hose off and slide the cowl out.
Next, loosen up these two 10mm nuts. Once you've done that, you can push it right off that stud. Then remove these three 11mm bolts. Now we'll just fast-forward as Don does that. Now you can pull your driver's side linkage up and out.
In the back, is the old wiper linkage; up front is the new driver's side wiper linkage from 1AAuto.com. You can see they're identical, and they're going to fit exactly the same. Now loosen up the two 10mm nuts on your driver's side wiper linkage. Feed it back into place.
Pull the linkage post up into place, and push the other end onto the wiper motor stud. Then replace those three 11mm bolts. Now tighten up those three bolts. Then the two 10mm nuts, you can actually adjust the linkage a little bit. If you want at this point, you could put the wiper blade back on, adjust it so it parks correctly, and then tighten those nuts up.
Now, put your cowl panel back into place and reconnect the washer hose. Then line it up and replace those two Phillips screws on either side of the cowl panel. Then replace the six screws in the center of the cowl panel. Now replace those two side panels and the Phillips screw that holds them into place. Push the weather strip back on. Then close your hood.
You want to line up that line with the slot, push the arm back onto the post, push the tab in, put the arm down, and then repeat the process for the other arm. Then you're all set.
We hope this video helps you out. Brought to you by www.1AAuto.com, your source for quality replacement parts and the best service on the Internet. Please feel free to call us toll-free, 888-844-3393. We're the company that's here for you on the Internet and in person.
Tools used
Brought to you by 1AAuto.com, your source for quality replacement parts and the best service on the Internet.
Hi, I'm Mike from 1A Auto. I hope this how-to video helps you out, and next time you need parts for your vehicle, think of 1AAuto.com. Thanks.
In this video, we're going to show you how to replace the passenger's side wiper linkage on this 1996 Chevy Tahoe. The items you'll need for this include a new passenger side wiper linkage from 1AAuto.com, Phillips screwdriver, a flat blade screwdriver, and a 10mm and 11mm socket and ratchet.
First, using a flat blade screwdriver, just pry up this clip, pull the wiper arm up and off, and do the same for the other wiper arm. Next, you want to remove this Phillips screw from either side of your vehicle. Then this panel just pulls off, and repeat the process on the other side. Then remove this Phillips screw and the Phillips screw on the same spot on the other side. We'll just fast-forward as Don does this.
Now pull off your weather strip and remove these six additional Phillips screws. We'll fast-forward while Don does this. Now pull the cowl up and forward, and now you just want to pull your washer hose off and slide the cowl out. Next, loosen up these four 10mm nuts. We'll fast-forward as Don does this. Now pull both of the linkages from the wiper motor stud and then remove these three 11mm bolts around the passenger's side linkage post. Now pull the wiper linkage out.
On the right is the old wiper linkage; on the left is the new one from 1A Auto. You can see they're identical and they'll fit exactly the same. Remove one of the 10mm nuts, loosen up the other one on your new wiper linkage, and then feed it back down into place. Then push the linkage onto the wiper motor stud, pull the post up through, and replace those three 11mm bolts.
Then tighten the 10mm nuts, push your other wiper linkage on, and make sure you have it lined up in the center. Then tighten those two 10mm nuts. Now, put your cowl panel back into place and reconnect the washer hose.
Then line it up and replace those two Phillips screws on either side of the cowl panel. Then replace the six screws in the center of the cowl panel. Now replace those two side panels and the Phillips screw that holds them into place. Push the weather strip back on. Then close your hood.
You want to line up that line with the slot, push the arm back onto the post, push the tab in, put the arm down, and then repeat the process for the other arm. Then you're all set.
We hope this video helps you out. Brought to you by www.1AAuto.com, your source for quality replacement parts and the best service on the Internet. Please feel free to call us toll-free, 888-844-3393. We're the company that's here for you on the Internet and in person.
Tools used
Hi, I'm Mike from 1A Auto. We've been selling auto parts for over 30 years. We're dedicated to delivering quality auto parts, expert customer service, fast and free shipping, all backed by our 100% satisfaction guarantee. Visit us at 1AAuto.com, your trusted source for quality auto parts.
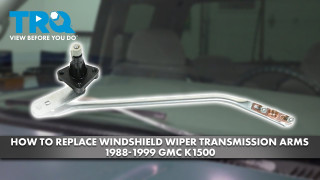
In this video, we're going to be working with our 1996 GMC Sierra K1500. We're going to show you how to remove and replace your vehicle's wiper transmission. This is actually two individual pieces in this vehicle, one for the passenger side and one for the driver's. We're going be to replacing the passenger side, but the process will be the same for the driver's. If you like this video, please click "subscribe." We have a ton more information on this truck as well as many other makes and models, and if you need these parts for your vehicle, you can follow the link down in the description over to 1AAuto.com. Here are the items you'll need for this repair.
Use some small pieces of painters tape to make a straight line with your wiper blade. This will help us position the arms back on without needing to do trial and error. Using the flat blade screwdriver, pry out on the tab on the top edge of the wiper arm at the pivot. Remove the wiper arm from the pivot. Do the same thing on the opposite side.
Remove the weather strip from the top of the firewall. Remove the three Phillips-head screws securing the cowl to the truck on both sides. There's one down on this opening. There are three, both in the same positions on either side of the vehicle. Once you get the first three screws removed, lift up and remove this corner panel that goes around the hinge. There's a fourth Phillips-head screw under there you'll also need to remove. Remove the three screws from each corner of your cowl.
Once that's done, you can remove all four of the Phillips-head screws along the front of the cowl. Pull back and lift up to remove the cowl. You'll need to disconnect the washer hose over here on the driver's side. Remove the cowl from the vehicle.
Loosen the 10 millimeter nuts on the wiper linkage. There's no need to remove these entirely. If you're doing the driver’s side arm, you can stop here and move on to removing the other portion on the other end of the arm. However, for the passenger side, you'll need to loosen this.
Remove the three 11 millimeter bolts securing the pivot end of the wiper transmission to the truck. Lower the pivot into the cowl. Slide it up and out of the next opening.
Send the arm back into the truck. Line up the pivot and the three holes and reinstall your three 11 millimeter screws.
Snap the arms back on to the wiper, tighten them back down with your 10 millimeter socket and ratchet. Make sure they're in the same place they were removed from.
Reconnect your windshield washer hose, and lay the cowl back into place. Reinstall the four screws in the center section of the cowl. Reinstall the two short screws on the end. Once the rear one's in, you can reinstall the plastic cover. It simply slides in and drops down. Reinstall the longer screw on the outer edge here. Repeat these steps on the opposite side. Reinstall the weather strip onto the top edge of the cowl.
Now, I know we had mentioned using the painters tape to align these earlier, but it turns out these wipers are keyed, which means they'll only go on one way. Simply pull out the tab and slide them back on. Lock the tab back into place. Lay the wiper down. Remove the tape.
Thanks for watching. Visit us at 1AAuto.com for quality auto parts, fast and free shipping, and the best customer service in the industry.

WWA10163