Replaces


Part Details
Specifications
Product Features
TRQ side mirrors and mirror components are designed to match the function, fixture, and performance of the original version for easy installation. TRQ mirrors are DOT certified, comply with all federal safety standards, and are independently lab tested to ensure our products comply with all government regulations. All products are fit and road-tested in our Massachusetts R&D facility to ensure we deliver on our promise of Trusted Reliable Quality.
Exact fit - To obtain proper fit and function confirm your vehicle has the exact mirror options listed.
Attention California Customers:
 WARNING: This product can expose you to chemicals including Lead and Lead Compounds, which are known to the State of California to cause cancer, and birth defects or other reproductive harm. For more information, go to www.P65Warnings.ca.gov.
Lifetime Warranty
This item is backed by our limited lifetime warranty. In the event that this item should fail due to manufacturing defects during intended use, we will replace the part free of charge. This warranty covers the cost of the part only.
FREE Shipping is standard on Orders shipped to the lower 48 States (Contiguous United States). Standard shipping charges apply to Hawaii, Alaska and US Territories. Shipping is not available to Canada.
Expedited is available on checkout to the United States, excluding Alaska, Hawaii and US Territories as well as P.O. Boxes and APO/FPO/DPO addresses. Final shipping costs are available at checkout.
Created on:
Tools used
Hi, I’m Mike from 1A Auto. We’ve been selling auto parts for over 30 years!
We're going to swap out the mirror glass on this driver's side mirror. I'm going to just turn out here. I'm going to put some masking tape on it so that if it breaks while I'm removing it, the masking tape will catch the pieces, or, if your mirror is already broken, the masking tape will help hold the pieces together. You just peel some off. Cover the mirror with it. Any type of masking tape will do. You can also use duct tape.
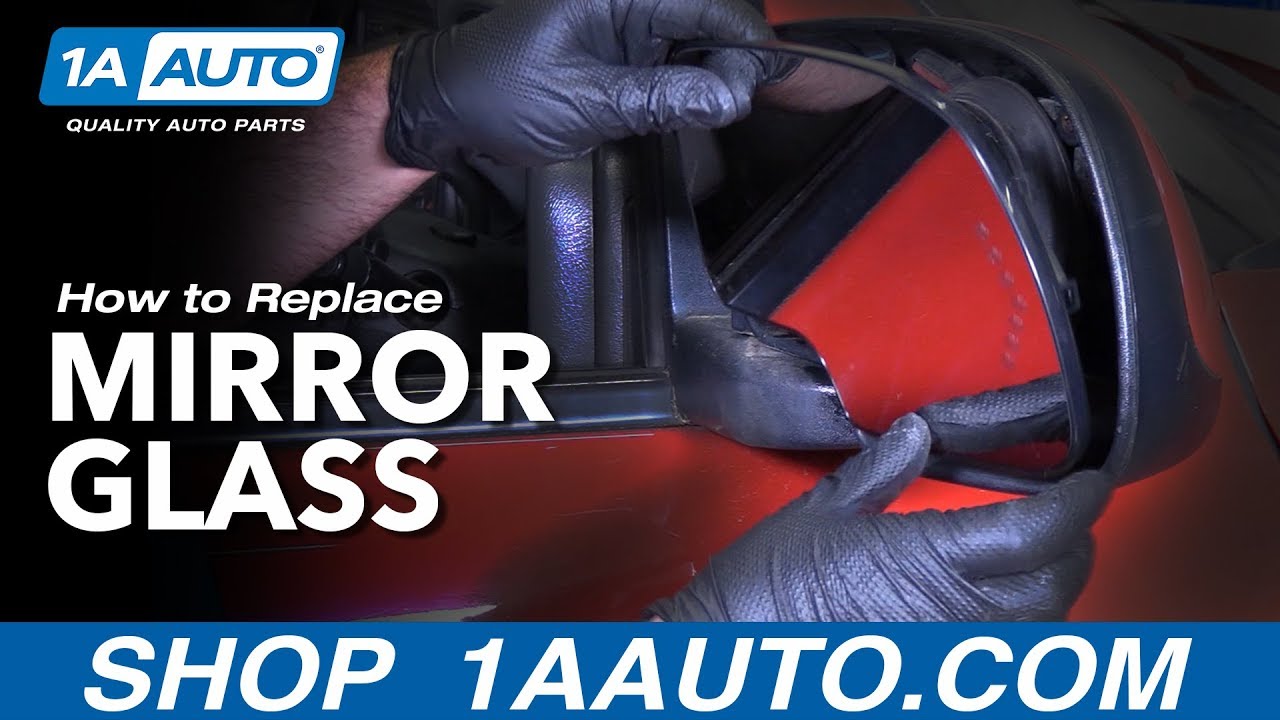
This is our new replacement mirror. It's hard to see what you're working with when you're trying to get the mirror off here. There are some clips around the inside of it that I'm going to use a right angle pick and a flat blade screwdriver to try to pop these off, and pull this mirror glass assembly off. Let me put this down. I'm going to push the mirror glass in as far in at the top as it will go so I can try to get underneath it. Try to work these clips loose.
Basically, just trying to pry it up and off of the clips. Once you pry it up and off the clips, you can go in and unplug it. This is for the turn signal part. I'm going to pop that out. There is some little locks here. I'm going to use a small pick to push the lock in, and there's a lock on both sides, so I'm trying to push it in. To make this clip easier to remove, I'm going to spray a little bit of glass cleaner on there. You can use this or water displacement oil. They just get filled up with dirty, and they get jammed up. Sometimes, if you help, if you spray that in there, it helps to get them apart, and you can try to push in. There's a lock on each side. I've got a pick on one side.
Let me see if I can take another pick, wedge it out. There we go. The heated mirror connectors are just those [inaudible 00:03:21] connectors. They should pull right off. Just wiggle them back and forth. There's our glass.
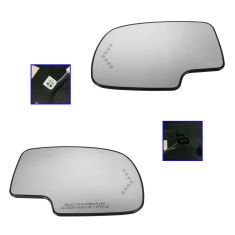
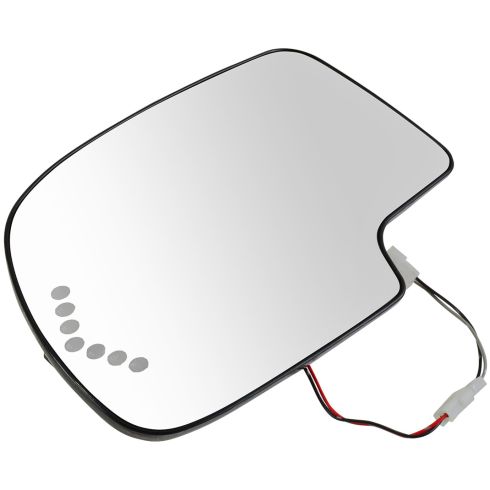
Here's the original mirror we pulled from our vehicle. It has a turn signal integrated. It's heated. This is the brand new one from 1A Auto. It also has the turn signal in it. It's heated. It's of similar design. It should work great and fit great for you.
I'm going to take some glass cleaner and just clean some of this dirt out of here. This way, when I put the new mirror on, I know it'll clip into place and won't be held up by any pieces of dirt. I'll take our new one, and I'll plug it in. This is keyed. It will only go in one way.
There's a little tab and then a matching part of the connector. I'm going to push it in, and then run this wire on the outside edge here and plug in the heated part. Doesn't matter which orientation you plug these wires in. They're probably going to rest in the way they came off, but there's no polarity to them. These connectors fit a little bit loosely, so I'm just going to take some needle-nose pliers and just crush them down a little bit so they can fit tighter. Pop the wiring up into place, and this will clip onto the motor part. Put our mirror back in place.
We'll check our turn signal operation. You hit the hazard switch. Those will work just like the original. The job is complete. Passenger side is the exact same procedure.
Thanks for watching. Visit us at 1AAuto.com for quality auto parts, fast and free shipping, and the best customer service in the industry.
Tools used
Hi. I'm Mike from 1A Auto. We've been selling auto parts for over 30 years.
What's up, guys? I'm Andy from 1A Auto. If you recently replaced your mirror glass and you're getting a distorted or a funhouse look in the glass, I'm going to show you what causes that and how to property install the mirror glass.
So on the back of the mirror glass there's all these clips, right here. And those are going to clip all around this ring here, and then there's also these little spacers right here that go in between here. So if you're installing this mirror glass, all those clips have to be pressed all the way on to this retainer, and if you're installing it you're holding the glass like this. When installing it, you push it on from the outside. You're not going to get all those clips installed.
So, when those clips are not completely installed and the mirror is bowed like that. That's what gives you that funhouse look.
All right, with the new mirror you're going to make sure that this gasket is in there if your mirror comes with one. Make sure none of the old gasket is on this mounting bracket here. We want to line this up right with that to make sure that goes on securely and make sure those clips get lined up in there. Make sure the wires are out of the way if your mirror has wires. You're going to take a rag and push in the center of the glass, and you're going to make sure it clips in. And you can push it pretty hard just be careful.
And your mirror should be installed properly and you should not have that funhouse look or that distorted look. You should be good to go.
Thanks for watching. Visit us at 1aauto.com for quality auto parts, fast and free shipping and the best customer service in the industry.

MGA07156