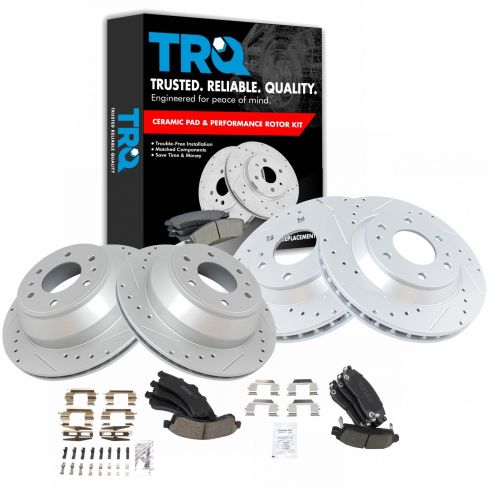
1APBS00330-Chevrolet GMC Buick Olds Isuzu Front & Rear Ceramic Performance Brake Pad & Rotor Kit TRQ Performance BKA12278

Replaces
2004 GMC Envoy Front & Rear Ceramic Performance Brake Pad & Rotor Kit TRQ Performance BKA12278

Product Reviews
Loading reviews
4.92/ 5.0
13
13 reviews
Good job
June 11, 2018
The rotor and pads I purchased fit exactly right. I am please with the products received.
Feedback
July 13, 2018
A good quality product at a fair price I got the rite size parts the first time I would recommend this product to anyone
Love these brake kits!!
October 2, 2018
I didn't know much about this manufacturer but have found plenty of good reviews online so I gave them a shot. I've now replaced my own brakes, my buddy's brakes and also brakes for two other people and I highly recommend these sets for quality and performance at an affordable price point. Rotors have gotten so cheap that it is easier to replace them instead of turning them and the pads and clip always fit like OEM.
great customer service and price
October 9, 2018
I received the parts in just a few days, but one part was incorrect, so they sent out shipping label for return and sent me new part in a few days, I had to purchase new part then they credited my account in less than a week for the incorrect part. I will purchase parts from them again, fast shipping easy return and great price. hope this helps.
Nice
July 18, 2019
The stopping power is pretty great after 10k miles and the brakes are quiet without fading. They came with some casting imperfections and they do have some oxidization on them so I know the zinc coating wont hold forever but theyve held up through one winter with no complaints. The pads do produce a fair amount of dust for ceramics but its a great price and its a quality looking rotor and pad.
A-1 ATUO
August 14, 2019
I really like ordering from a1auto never had a problem with the delivery always on time And I like the prices really decent I've never had any problems With the parts that I bought
Look no further!
December 19, 2019
This complete performance ceramic brake pad and rotor kit, is an exact OEM replacement and fit, as well as new hardware all the way around. I installed this just in time for 6" of snow to test out the cross drilled and slotted design in wet, icy, and dirty braking conditions. my brakes now outperform my ABS System and tires! These things STOP incredibly! The protective coating on the rotors has held up against all the rock salt, liquid salt brine, and whatever other chemicals my city puts down on the road to fight the winter weather. I will order again.
March 1, 2020
I ordered brake rotors for my trailblazer their site made it easy and the price affordable enough so I upgraded to drilled and slotted rotors. My parts arrived exactly as stated in the email. Great upgrade to my rig
Great product as always
March 22, 2020
I operate a small auto repair shop and have always used the brake kits from 1aauto when available. The price and quality of the vented rotors and ceramic pads are well worth the little extra money and still beat the local auto parts stores. I have used several of these kits and never once had any issues with them or complaints from any customer.
This particular order was mistakenly not shipped out due to a computer issue between PayPal, however. 1aauto jumped all over it and made it right by shipping fedex overnight to keep my customer happy. Great customer service, great products and great price. Highly recommend 1aauto and these brake kits.
Brake Set
April 10, 2020
We were very happy with the product. Customer is pleased. Performance is great. Thank you for having a great product for a great price!
brake Kit
March 18, 2021
Everything fit as it should, never been disappointed with a purchase from here
July 12, 2023
Great look. Perfect fit. Reasonable price. Fast shipping
Great price, performance, looks.
January 7, 2024
Phenomenal kit, good price & quality of parts, loving the braking power, comes with all hardware & grease which was a time saver instead of going & purchasing some, 5/5 kit, I'll be purchasing some more kits/parts from 1AA.
Customer Q&A
Will these fit my 2007 trailblazer ss ?
November 13, 2017
10
Thank you for your question, but no these will not fit your 2007 Trailblazer SS model.
November 13, 2017
Tim K
Will these fit my 05 trailblazer 4 wheel drive?
February 4, 2018
Will this work for a 2008 Chevy trailblazer?
March 14, 2019
10
This part will not fit your vehicle. We may have a part that is listed to fit.
Please enter your vehicle's year make and model in the search bar at the top of the page. This will display parts guaranteed to fit your vehicle.
March 14, 2019
T I
GMC is a registered trademark of General Motors Company. 1A Auto is not affiliated with or sponsored by GMC or General Motors Company.
See all trademarks.


