Replaces
Part Details
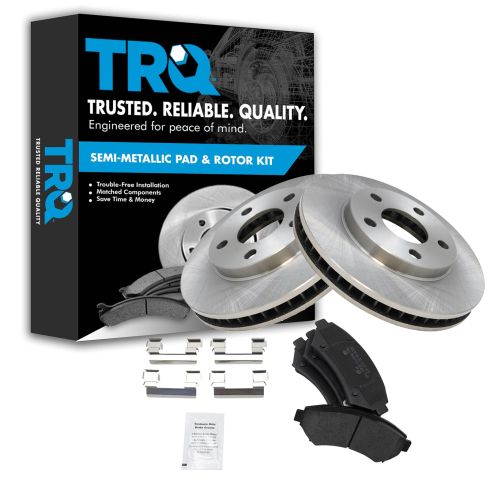
TRQ brake kits are designed to restore your brake system to like-new performance. TRQ brake pads are positive molded, thermal scorched, chamfered, and utilize a multi-layer shim for enhanced performance and service life. TRQ rotors have a non-directional finish that reduces the break-in period for new rotors as well as reducing vibrations throughout the rotor’s lifecycle. All products are fit and road-tested in our Massachusetts R&D facility to ensure we deliver on our promise of Trusted Reliable Quality.
Product Features
Premium Positive Molded Brake Pads Features and Benefits
Item Condition:
New
Attention California Customers:
 WARNING: This product can expose you to chemicals including Lead and Lead Compounds, which are known to the State of California to cause cancer, and birth defects or other reproductive harm. For more information, go to www.P65Warnings.ca.gov.
Lifetime Warranty
This item is backed by our limited lifetime warranty. In the event that this item should fail due to manufacturing defects during intended use, we will replace the part free of charge. This warranty covers the cost of the part only.
FREE Shipping is standard on orders shipped to the lower 48 States (Contiguous United States). Standard shipping charges apply to Hawaii and Alaska.
Shipping is not available to a P.O. Box, APO/FPO/DPO addresses, US Territories, or Canada for this item.
Expedited is available on checkout to the United States, excluding Alaska, Hawaii.
Final shipping costs are available at checkout.


Created on:
Tools used
Brought to you by 1AAuto.com your source for quality replacement parts and the best service on the Internet. Hi, I'm Mike Green. I'm one of the owners of 1A Auto. I want to help you save time and money repairing or maintaining your vehicle. I'm going to use my 20 plus years' experience restoring and repairing cars and trucks like this to show you the correct way to install parts from 1AAuto.com. The right parts installed correctly, that's going to save you time and money. Thank you and enjoy the video.
In this video we'll be showing you how to replace the front back pads and rotors on this Buick Century same as LeSabre, Grand Prix, Bonneville, Montana, Chevy Venture, Olds Silhouette, Olds Intrigue. The tools you'll need are some metric sockets, a 15 mm and a 19 mm, a torque wrench, jack and jack stands, a way to lift and secure your car and a large C-clamp. After we have raised and secured the car and now we can remove this stutter cap with a screwdriver. This hubcap comes off. We're just loosening up the plastic caps. Then using either your lug wrench or 19 mm, remove the tire. You can make it easier on yourself, turn your wheels this way, allows easier access to these bolts. Now using a 15 mm wrench we're going to remove these two bolts here. These two bolts are your slider bolts. You want to make sure you clean them up, put a little bit of grease on them before you put them back in. Pry your caliper right up and off. It will get stuck on the brake shoes a little bit. All I did there was I put my screwdriver in there and pushed the piston back in to get it off some.
Here are my old brake pads. See they're pretty thin. Most often when you replace your brakes you want to replace the rotors too. To get the rotors off, you've got to take off your old pad and bracket here, which is two 15 mm bolts again. Take the bracket off. Just shake a little bit and pull. It comes off. A new rotor from 1A Auto goes right on there. Put our pad bracket right back on. Make sure you get them started really well. I'm just going to use my impact wrench to get them a little in there. I'm going to torque them to 75 foot pounds. Now I'm going to put my new pads back in. This one has a wear marker. This little tab starts hitting the rotor as your brakes wear down. Have that on the outside and the wear marker pointing behind where the wheel is going to rotate. Here's my outer one. Take my socket here. There's my inner. Now we need to take our caliper here and force our piston back in. You need a large C-clamp like this. I just have the C-clamp right in the cylinder here. Prop it up here so you can see it.
I just tighten it slowly and that piston goes back into the caliper. The caliper can go back down on. Pull these little boots in. Right here's my two caliper bolts cleaned up. Put a little bit of wheel bearing grease on them. This one has a bushing on the end, that's the lower one. Just make sure that goes. Leave that one there. My boot's not really lined up. Make sure you get your boots lined up where they should be. Push the bolts in. I'm just going to tighten these up gentle with the torque impact wrench. Now I'll torque them 75 foot pounds. Now mount the tire back up. Now what I'll do is I'll put the lug nuts on. I'll lower the car back down and torque them to 75 foot pounds and then put the hubcap on and everything. Take it for a test drive. One thing you want to make sure you do after you've done the front brakes, you want to pump the brakes a bunch of times before you test it and then when you road test it, you want to make sure that the first time you do it, just do it in your driveway and make sure it'll hold the car in drive first, then go five miles an hour, press the brakes, make sure it stops and then take it out on the road for a road test.
We hope this helps you out. Brought to you by www.1AAuto.com your source for quality replacement parts and the best service on the Internet. Please feel free to call us toll free 888-844-3393. We're the company that's with you on the Internet and in person.
Tools used
Brought to you by 1AAuto.com, your source for quality replacement parts and the best service on the Internet.
Hi, I'm Mike from 1A Auto. I hope this how-to video helps you out, and next time you need parts for your vehicle, think of 1AAuto.com. Thanks.
In this video, we're going to show how to service the front brakes on this 2000 Buick LaSabre, pretty much the same for any 2000 and 2005. It ends up this vehicle has very good brakes on it so we do just take them apart and put them back together for you. New brakes are available at 1AAuto.com.The tools you'll need are jack and jack stands, 15mm and 19mm sockets, ratchet with a pipe or breaker bar for some extra leverage on some of those bolts, large flat blade screwdriver, wire brush, some grease, a large C-clamp and a torque wrench.
On this LeSabre, you want to remove this center hub cap. Just pull firmly and you want to loosen the lug nuts. If you don't have air tools, you'll want to loosen your lug nuts with the wheel on the ground then raise and support the vehicle and then remove the lug nuts and the wheel the rest of the way. I'll fast forward here as I use a 19mm socket with an impact wrench and remove the lug nuts and the wheel and tire and then just turn the suspension so I can get a good look at the brakes.
It would appear that the brakes have been done recently on this vehicle. I can tell because here's the metal of the brake pad, here's the brake pad itself and then here's rotor and you can see there's a good probably 3/8 of an inch of pad there, which is plenty of life. Then on the outer pad, it's same thing. It's nice and thick. For the rotors, you want to try and do an inspection, run the back of your fingernail along them and you'll feel very, very small grooves but you shouldn't feel any large grooves. Then the condition of the rotors up here looks pretty good, a little bit rusty but not too bad, still nice and thick. It looks like these brakes are good but we'll show you how to take them apart and put them back together just so you have the information.
To get the brakes apart, first you're going to remove two 15mm bolts, here and here. You should be able to use a 15mm socket with a ratchet and these should come apart with some force but they should come apart pretty easy. I'll speed it up here as I loosen the top one and take both of those bolts out and I'll show you them in a minute. The bolts are actually the items that the caliper slide on, as well. So, I'll show a little close-up to you. These are slides. When you take them apart you want to note their condition. These probably should be cleaned up and put a little bit of grease onto them. We'll speed it up here again as I just finish removing the upper bolt out of the top. Take a large screwdriver, put it right in here, and pry out, and that actually forces the piston back into the caliper a little bit. You can see I use a screwdriver to pry out on the caliper a little bit and that loosens it up enough so I can get the caliper up and off. Then I hang it up on the strut. I'll show you that right there. Brake pads, really easily, just pry out. As I said, there's plenty of life left in these pads. For the back one, do the same thing. It pulls right out the back side.
If you did need to replace the rotor, you'd want to remove these two bolts here. I'm using my socket again and a ratchet, use a breaker bar or a piece of pipe. A piece of pipe helps you get some extra leverage and just push nice and firm until you start getting them loose. I fast forward here as I use the ratchet and pipe to loosen up the top one and then take both of the bolts out. Now your rotor comes right off.
Now, we're going to show you how to put the brakes back together. As you can see, there's a nice new hub on this vehicle that actually turned out to be what the car needed so we actually did a hub replacement and you can see that video on our other videos. We decided to do this brake video to help you out as well while we were doing the hub. The rotor goes back on. Before you put this caliper bracket back on, take a wire brush and make sure these are all nice and clean. In particular, you're cleaning the grooves where the brake pads sit and slide. This part goes between the rotor and the steering knuckle. The bolt goes to the steering knuckle first then into the caliper bracket. Start my lower one. Start my upper one. Speed it up here as I just preliminarily tighten those two bolts up. Now we'll torque these to 80 foot-pounds.
Bring your caliper down. You'll need a large C-clamp and put it into the piston and this just resets the piston all the way back into the caliper. Just make sure it's on the flat part of the back side, that it's not on the hose or anything. As you tighten it up, it forces the piston back into the caliper. I'll just speed it up as I back the C-clamp off and remove it. Put it down, and make sure your hose isn't twisted. You might want to pull these grommets in a little bit, put your caliper down on, and make sure those aren't bunched up. Here are my slides. I cleaned them up, and put a light coat of grease on them. The lower one came out with this sleeve so I took that off, cleaned it all out, put a little grease on the inside and the outside of it. Put our brake pads back on. The back one just slides right in. This front one you push down in a little bit diagonally. Put it in. Put the top one back in first. Start it a little bit. Now do our bottom one. I'll fast forward again as I just preliminarily tighten those bolts. Torque these to about 50 foot-pounds. I apologize for the low volume. Fifty foot-pounds is what you want to torque those to.
Speed it up here as we put the wheel and tire back on and then just the lug nuts by hand and then tighten them preliminarily with an impact wrench. Torque your lug nuts to 100 foot-pounds using a star pattern. We'll speed up the tape as we torque up the lug nuts.
Anytime you take the brakes apart, make sure that you pump your pedal a whole bunch of times until it gets firm and then do test stops from 5 and 10 miles an hour, make sure the brakes are working correctly before you road test your vehicle.
We hope this video helps you out. Brought to you by www.1AAuto.com, your source for quality replacement parts and the best service on the Internet. Please feel free to call us toll-free, 888-844-3393. We're the company that's here for you on the Internet and in person.
Tools used
Tools used
Brought to you by, 1AAuto.com, your source for quality replacement parts and the best service on the internet. Hi, I'm Mike Green. I'm one of the owners of 1A Auto. I want to help you save time and money, repairing and maintaining your vehicle. I'm going to use my twenty plus years experience, restoring and repairing cars and trucks like this, to show you the correct way to install parts from 1A Auto.com. The right parts, installed correctly, that's going to save you time and money. Thank you, and enjoy the video.
In this video, we're going to replace the front brakes on this 1998 Chevy Venture, same as any 1997 to 2005 Venture of the Transport, Montana, and old Silhouette. The brakes on this vehicle actually are in good shape, so I show you the new brakes from 1A Auto but I actually just take off the old ones and put the old ones back on. Tools you'll need, flat blade screwdriver, both the regular and a large size, 19 millimeter socket and ratchet or your tire iron, jack and jack stands, a 15 millimeter socket, large C clamp and a torque wrench. OK, start by removing the wheel. Use a screwdriver to pry off your center cap. The wheel lug nuts are 19 millimeters. If you're using hand tools, you'll want to have the vehicle on the ground. Loosen up the lug nuts, then raise it up and secure it and remove them the rest of the way. I'm going to use air tools. OK. We'll speed it up here, while I take that tire off and I will use fast forward sometimes for this monotonous stuff.
OK, at this point you can actually inspect your brakes. OK, right here you can see, that's the rotor over there on the left as I turn it. OK, so this is your inner brake pad and right in the middle you can see is a little, I guess it's an indent in the pad. That's kind of your wear indicator. You can see there is quite a bit of life left on that pad. Then you can also see, here is your outer pad and this little tab here is your wear indicator. That actually is what makes a squeaking noise when it gets close to your disc. So, if you're inspecting, you want to inspect both sides because sometimes pads can wear unevenly, and while this side may look great, the other side may be worn. You always want to replace, if you're going to replace brakes on one side, you always replace them on the other side as well. Before we take it apart, we want to force the piston back in here, and you can do it one of two ways. You can take a nice big screwdriver like this, and slowly pry your caliper out. This is not the way I like to do it. I actually like to use a C clamp, which I'll show you later. But that at least will loosen up your brakes so that the caliper comes off easily.
Now you want to remove these two 15 millimeter bolts. Again, I'm going to use air tools, but they will come off easily enough with regular hand tools. OK, you want to make sure when you put these back in, clean them off and put just a little bit of bearing grease on them. Now your caliper comes right off. Put that up there. Here are your pads. So you can remove the pads by prying the inner ones right out. And these ones come right out. Now your rotors, these actually like I said, the brakes on this vehicle look pretty good. But if you want to replace them, easy enough. What I've done up here, is I actually used a wire tie and just secured my caliper up here because you don't want to have it hang free or fall and then possibly damage your brake hose. Now there are two more bolts, right here and here, and we'll remove those. Again, 15 millimeter. I'll use air tools, but they're easy enough to get off with any kind of tools. That allows this bracket to come off. You can leave the bolts right there if you want to, and then the disc comes right off. Like I said, brakes on this vehicle are the same, but I just want to show you, new parts from 1A Auto, are the exact same as the original. They're going to go on, fit correctly, with no problems. So, if you do need to replace your discs, you know you can get a good replacement set from 1A Auto.
OK and again, like I said, the pads on this vehicle, while they are not new by any means, they still got life left on them, so they're not really worth replacing. But if you were to replace them, you can see the new ones from 1A Auto are exactly the same as the old ones. They're going to fit in there with no problem. What I like to do actually, is before I install new ones, I use a wire brush and wire brush out these stainless steel slides here and just apply, just a little dab, a little bit of grease to the ends of the pads here, and that will keep everything sliding back and forth well. So, we put it back together here ... OK, this does go on the rotor side ... got to tighten these up preliminarily with the air gun ... Now I'm going to use the torque wrench to tighten them up to 80 foot pounds. OK, pads with just a little bit of grease on the ends. Your outer one has a little wear tab on it, which is this tab right here, and then the inner one. OK, now I'm going to pull my caliper down here. If you are putting new pads on, you want to force this cylinder all the way back into the caliper. I do that by using a big C clamp here. You probably should check your master cylinder.
Make sure that your fluid is not over, is not too full. This will force some fluid back into the master cylinder. You can see, as I tighten up, you can see this cylinder go back into the caliper. Now take your caliper and put it back down on here. Make sure that you get these boots in the right place. Here are my pins. See I cleaned them off and just applied a light coat of wheel bearing grease. Just going to use our air tools to start these bolts. Then we're going to torque them to 35 foot pounds. Now that doesn't sound like a lot you say, well if it's the brakes you should be tightening them more, but these don't really absorb any of the braking power. The caliper squeezes the rotor and then presses against this big bracket here. These bolts really just hold the caliper in place. So they don't have to be that tight. Switch to a shorter socket for up here. Put our tire back on.
OK, so I'm going to speed it up here. Put the lug nuts on by hand first, and then I'll use my air ratchet and just tighten them up a little bit preliminarily. Then lower the vehicle onto the ground, and I need a torque wrench to torque them to 100 foot pounds. You'll see I'll use a star pattern. So we go cross, cross, cross and cross. Another very important thing, before you drive your vehicle, make sure that you pump the brakes first. Start it up, pump the brakes four or five times. Then make sure the car holds itself in gear, and then do a stop from like five miles an hour, and then a stop from ten miles an hour before you go out and road test it. Because you need to work the fluid back into those calipers. And then finally, put the center cap back on and you should be all set.
We hope this helps you out. Brought to you by www.1AAuto.com. Your source for quality replacement parts and the best service on the internet. Please feel free to call us toll free 888-844-3393. We're the company that's here for you on the internet and in person.