Replaces
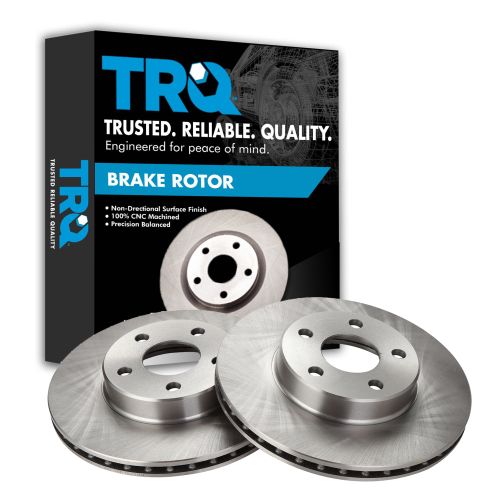
1994 Pontiac Grand Am Front Driver & Passenger Side 2 Piece Brake Rotor Set TRQ BRA77161

BRA77161
This part doesn’t fit a . Select from parts that fit.
Specify your vehicle's year, make and model to guarantee fit.
This part doesn't fit a . Select from parts that fit.
Buy in the next and
Orders must be placed by 2pm ET
Recommended for your 1994 Pontiac Grand Am
Part Details
- (1) Front Driver Side Brake Rotor
- (1) Front Passenger Side Brake Rotor
- 48 mm
- 1.89 in
- 0.55 in
- 14 mm
- 19 mm
- 0.75 in
- Vented
- Vented
- 2 Piece
- 10.20 in. (259mm)
- Cast Iron
- 2.28 in
- 58 mm
- 5 Lug
- 3.94 in
- 100 mm
- No
- Conventional
- No
- Smooth
- 259 mm
- 10.20 in
- 5
- 20 mm
- 0.79 in
- No
- Standard Replacement
Specifications
- Driver & Passenger Side
- Front
About TRQ:
TRQ is a trusted brand dedicated to making every repair a success story by combining premium parts with easy installation. Each TRQ part is engineered by a team of automotive experts to meet or exceed OEM standards, delivering enhanced performance and maximum longevity. With rigorous in-house testing, the brand ensures superior fit and function across every product line. TRQ also provides customers with best-in-class, step-by-step installation videos—so you can complete repairs with confidence, whether you're a first-time DIYer or an industry professional.
Product Features
TRQ brake rotors are manufactured using premium G3000 casting alloy to reduce noise while braking and enhance service life. TRQ rotors have a non-directional finish to minimize the break-in period for new rotors and reduce vibrations throughout the rotor’s lifecycle. TRQ recommends replacing brake pads when you replace rotors to ensure even wear and improved component performance. All products are fit and road-tested in our Massachusetts R&D facility to ensure we deliver on our promise of Trusted Reliable Quality.
Attention California Customers:
![]() WARNING: This product can expose you to chemicals including Lead and Lead Compounds, which are known to the State of California to cause cancer, and birth defects or other reproductive harm. For more information, go to www.P65Warnings.ca.gov.
WARNING: This product can expose you to chemicals including Lead and Lead Compounds, which are known to the State of California to cause cancer, and birth defects or other reproductive harm. For more information, go to www.P65Warnings.ca.gov.
Lifetime Warranty
This item is backed by our limited lifetime warranty. In the event that this item should fail due to manufacturing defects during intended use, we will replace the part free of charge. This warranty covers the cost of the part only.
FREE Shipping is standard on orders shipped to the lower 48 States (Contiguous United States). Standard shipping charges apply to Hawaii and Alaska.
Shipping is not available to a P.O. Box, APO/FPO/DPO addresses, US Territories, or Canada for this item.
Expedited is available on checkout to the United States, excluding Alaska, Hawaii.
Final shipping costs are available at checkout.


Created on:
Tools used
- Remove hub cap or center cap if you have it. While your car is still on the ground, use your lug wrench to loosen your lug nuts. Jack up and secure your car with jack stands. Remove the lug nuts with your lug wrench. Remove the wheel and set aside.
- Use a screwdriver to force the pistons back in. Remove the three 3/8 Allen bolts to remove the calipers. Clean out the Allen bolts if needed. Use a wire tie to fasten the caliper out of the way. Use your screwdriver to pry out your brake pads. Pull off the brake rotor. Hit the rotor with a rubber mallet or hammer if necessary. Take care not to damage the lug studs.
- Clean new rotor with brake cleaner. Insert your new pads into the front brake caliper. Compress the front brake caliper piston with a c-clamp to reset the pistons. Mount the front brake caliper and torque the 3/8 Allen bolts in as tight as they will go by hand.
- Make sure to use a star pattern when putting your wheel lugs back on. Tighten to 75 ft lbs. Replace hubcap/center cap.
- Before driving the car again, start it up and pump the brakes a few times to get the pistons in the brakes in place. Test the brakes in your driveway before taking the car onto the road. Set your rotors by evenly braking from 30mph to 10mph, 50mph-30mph and finally 70mph to 40mph. This is best done on a straight back road without any traffic.
Brought to you by 1AAuto.com-- your source four quality replacement parts and the best service on the Internet.
Hi, I'm Mike Green. I'm one of the owners of 1AAuto. I want to help you save time and money repairing and maintaining your vehicle. I'm going to use my 20-plus years experience restoring and repairing cars and trucks like this to show you the correct way to install parts from 1AAuto.com. The right parts installed correctly. That's going to save you time and money. Thank you and enjoy the video.
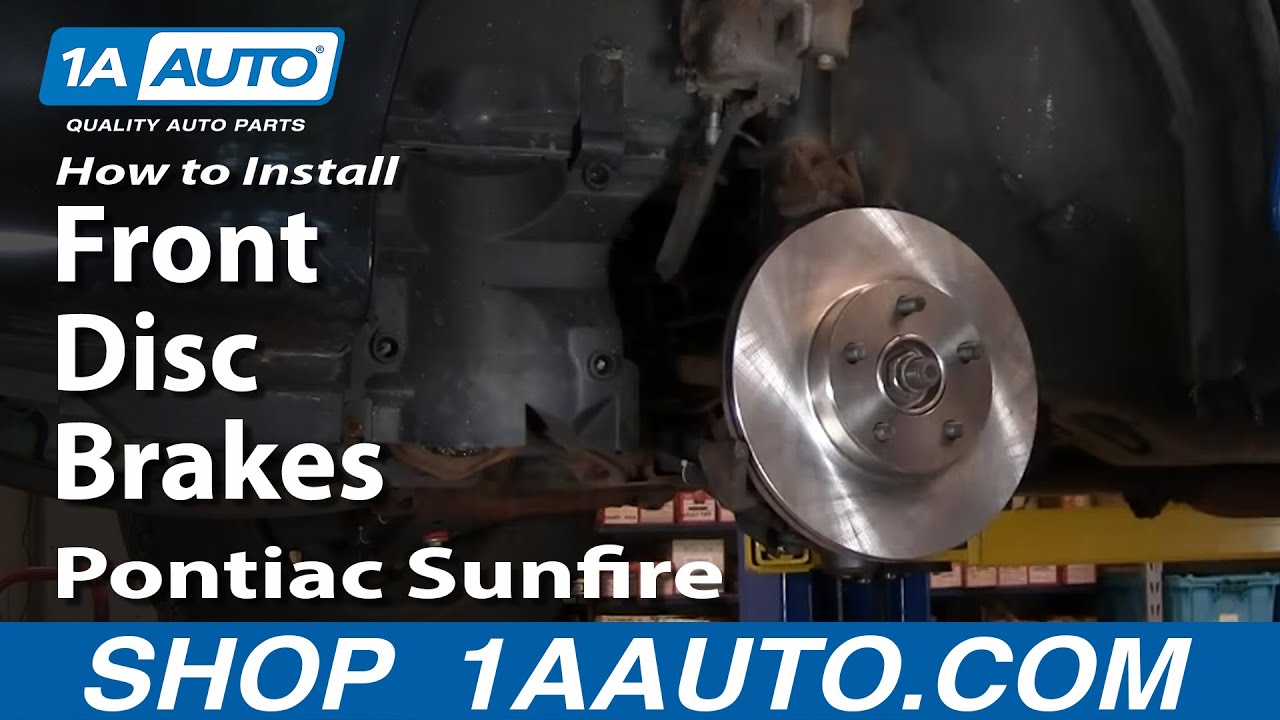
In this video we'll be redoing the front brakes on this '97 Pontiac Sunfire. Same as any '92 to '05 Cavalier or Sunfire, and really similar for just about any car with front disc brakes. You may have some tools that will be different, but this is the basic procedure to do ... replace your front brake pads and rotors. The tools you'll need for these j-body cars is a 3/8 inch Allen wrench, and if you have a longer one, that's best. A 19 millimeter socket and ratchet to remove your wheels and tires, a flat blade screwdriver and a large c-clamp.
So I've taken the wheel off and I've turned the wheel so you can easily access the back of the caliper and, this is typical of most cars, so if you don't exactly have a Sunfire and you're watching this, you're going to remove two Allen, these 3/8 inch Allen bolts. One here, okay, and one right up here. The first you might have seen it on the lower one. Having determined it, you want to make sure that you've a little screwdriver. Just clean that out a little bit. Okay. Now if you have a nice big Allen 3/8"� Allen wrench like this, usually you can get enough leverage to get those bolts off. If you have a smaller one, a little trick for you, or just to make it easier, just put the Allen wrench on there. You take a larger wrench and put it on like that, that gives you the leverage, and you just pull nice and easy. Don't tug and don't jerk on it, just pull nice and easy and it'll come off. That just provides you some more leverage.
Knock those bolts out. Maybe go back to your wrench. Use it to pry a caliper off. You're going to want to get it going. So here's your caliper And now the shoes will come right out. This inside one is just held on the back by some clamps. Then this outer one has these clamps holding it here. You basically just kind of need to pull it. You're pushing it this way out of the caliper and then sliding it up. You've got a caliper out and up there and a disc, really easy, just work them right off. You can see, nice new rotors from 1aauto.com is the exact same as the original. It goes right on. What I actually like to do is I put a one nut on, just to hold it in place. It just makes it that much easier to get the caliper and pads on.
Really the only special tool you're going to need in this repair is a big c-clamp like this. What you have to do is, the caliper, okay this is the piston. As you're brakes wear the piston, kind of, comes out of the caliper, and you can see if up above, there. What you need to do is take a c-clamp, again, put it in, and basically just work the caliper piston back in, actually just required, you can see the piston going back on in. It goes in. Here's the new shoes from 1A Auto, and the smaller one is the inside one. These clips go inside that round forward the caliper and then this clips on. So here is your caliper, and then this one goes, kind of, upside down right inside, and then push it - push that clip right in. Now it's held in place. This one goes this way and basically just, kind of, pull it right down. Then you're going to put it right down in. You can see the big part of the shoe you want to have go down in there and this, see here. Make sure your bolts are out. Everything's all lined up good. Now you can just tighten up, start with one of these bolts in and tighten up your caliper bolts.
A couple of notes while I'm getting these bolts going. First, when you use your c-clamp and clamp the piston, you're going to be forcing brake fluid back into your master cylinder, so if you've recently filled your master cylinder, you're just going to want to probably actually reach in there and scoop a little bit of fluid out or else your master cylinder's overflowing goes everywhere. Second is, be very careful the first time you drive your car because when you first hit the brakes it's going to have to fill this up again and push the brakes together, so you want to basically pump your brakes a few times before you get going. Then even when you get going, just be very careful. Just go five or 10 miles an hour the first time and test your brakes and make sure they're working. Make sure there's nothing in front of you. Don't go out and drive on the road until you're confident that your brakes are all working fine.
Now, like most people, I don't have the proper bit for a torque wrench, so I have this long 3/8"� Allen wrench and I'll basically pull as hard on that as I can. That's probably good enough, but I'll also, just for good measure, take a wrench out here and just pull it a little tighter. Now we can put our wheel back on and make sure the brakes are working and we'll be good to go. My lug nuts are on there and tighten up a little bit. Now I'm just tightening them 75 foot pounds. I use a star pattern. I put the lug nut covers on and just use my socket and my hand and tighten them up. A couple notes while I'm finishing up. Just make sure you check your brake fluid. Pump your brakes a couple times. Make sure you get the calipers to re-seat.
We hope this helps you out. Brought to you by www.1AAuto.com, your source for quality replacement parts and the best service on the Internet. Please feel free to call us toll free, 888-844-3393. We're the company that's here for you on the Internet and in person.
Tools used
- Loosen the lug nut caps with a 19mm socket Pull off the center cap by hand Loosen the lug nuts with the vehicle on the ground Raise the vehicle with a floor jack Secure the vehicle on jack stands Remove the lug nuts Pull off the wheel
- Turn the rotor by hand or turn the steering wheel to turn the rotor Check the thickness of the brake pads Check the brake pad wear indicator Check for gouges on both sides of the rotor
- Loosen the two 3/8 inch Allen bolts from the brake caliper Pry the brake pads into the caliper with a flat blade screwdriver or a pry bar to push in the pistons Pull the caliper aside Pry the brake pads out of the caliper with a flat blade screwdriver
- Slide off the rotor If the rotor won't come off normally strike it with a hammer to loosen it
- Use a large C-clamp to push the pistons back into the caliper Remove the two 3/8 inch Allen bolts from the brake caliper Clean the caliper bolts with a wire brush Apply white grease to the bolts Slide the bolts into the caliper
- Slide on the new brake rotor
- Apply white grease to the brake pads Snap the brake pads into the caliper Put the caliper on Tighten the two 3/8 inch Allen bolts to between 30 - 35 foot-pounds of torque
- Turn the wheel straight Slide the wheel into place Start the lug nuts by hand Tighten the lug nuts preliminarily Lower the vehicle to the ground Tighten the lug nuts to 100 foot-pounds in a crossing or star pattern Reattach the center cap Tighten the lug nut covers with 19mm socket
- Pump your brakes repeatedly until they feel firm Test your brakes at 5 miles per hour and then 10 miles per hour Road test the vehicle
Brought to you by 1AAuto.com, your source for quality replacement parts and the best service on the Internet.
Hi, I'm Mike from 1A Auto. I hope this how-to video helps you out, and next time you need parts for your vehicle, think of 1AAuto.com. Thanks.
In this video, we're going to show you how to service the front brakes on this 2000 Chevy Cavalier. It's pretty much the same as any Cavalier from this generation. We're going to show you the right hand or passenger side. The left hand, the driver's side's, the same, and we always recommend you service your brakes in pairs. For these front brakes you'll need new pads and rotors from 1AAuto.com, jack and jack stands, 19 millimeter socket with a breaker bar, 3/8 inch Allen wrench with a pipe for some leverage, a large screwdriver or a small pry bar, a large C-clamp, brake or white grease, and a torque wrench.
Use the 19 millimeter socket to loosen the caps. This vehicle has a wheel cover, so you loosen the caps first, and then you can pull the wheel cover off and then with the same 19 millimeter socket, you'll probably want to loosen the lug nuts with the wheel on the ground. Then raise and support the vehicle, and remove the lug nuts the rest of the way, and remove the wheel and tire.
Now turn the wheel so you have easy access to the brakes. Check on the brake conditions. See the inner pad has plenty of life left. It's the same with the outer. Then, you check the condition of the rotors. Run the back of your finger along the outside, as well as the inside. Make sure they're nice and smooth and no deep grooves or anything. These brakes are in fine shape so we'll just take them apart and put them back together to show you.
Two 3/8 Allen bolts hold the caliper to the caliper bracket. I've got a 3/8 Allen key, and then I just use a pipe, or you could use another wrench, and use a little bit of extra leverage and get the bolt started. Here I'll just fast forward as we remove those bolts the rest of the way. Use a large screwdriver or pry bar and pry the caliper out. That forces the piston back in some and gives you extra room just to be able to pull the caliper right up and off. The inner pad's just held in with a couple clips. It pulls out towards the outer pad and then up and out. Then the outer pad is held in with more sturdy clips. Actually what you need to do is force the pad away from the caliper, and then pry it up and bring it up and out of the caliper.
The rotor should come right off. Use a hammer if you need to.
Now we're going to use a large C-clamp to reset the piston and the caliper. You can see, as we tighten the clamp, it forces the piston back in. We did detect some uneven wear on the pads, so we're going to force the bolts out. So, Don just uses the 3/8 Allen wrench, kind of twists them back and forth, and pulls on the bolts. You push on one end with your thumb as you're twisting it back and forth, and then grab the other end and pull them right out. We'll use some white grease. We basically took a wire brush, cleaned them up a little bit first, and then took some white grease, put it on there, and then they should slide right back into the caliper nice and easy. Reinstall the rotor. The rotors from 1A Auto are going to fit just like the original. You can see we are just reinstalling the original because, like I said, they're in good shape.
Put a little bit of grease on the backside of the inner pad, and then fit that down into the caliper, and snap the clips into the piston. Do the same thing, put a little bit of grease on the outer pad. The grease just keeps them from squeaking a little bit. It's a little bit of insurance against that. Then, snap that outer pad down in. Just make sure your pad stays put and then put the assembly right down on. Then, use your 3/8 Allen wrench and start the bolts in. I'll fast forward here as we take care of tightening those up. Those bolts should be tightened up to about 30 to 35 foot-pounds.
Turn the wheels back straight, put the wheel and tire back on, install the lug nuts by hand first, and then tighten them preliminarily. Put the vehicle back down on the ground. Tighten the lug nuts to 100 foot-pounds using a star pattern to tighten them. Then put your hub cap or whatever back on, and just tighten those plastic nuts with the socket itself by hand.
Last but not least, always make sure you pump the brake, get a nice firm pedal before road testing.
We hope this video helps you out. Brought to you by www.1AAuto.com, your source for quality replacement parts and the best service on the Internet. Please feel free to call us toll-free, 888-844-3393. We're the company that's here for you on the Internet and in person.

BRA77161
877-844-3393
Monday - Friday 8:00am - 9:30pm ET
Saturday - Sunday 8:00am - 4:30pm ET
Specify your vehicle's year, make and model to guarantee fit.
This part doesn't fit a . Select from parts that fit.


