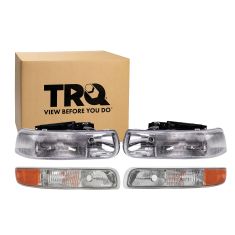
2004 Chevrolet Tahoe Headlight Assemblies
15
2
10
10
-
Notify When Available
VIDEO
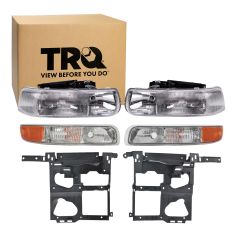
 $119.95Save 31%List $174.95 Save $55.00
Guaranteed to Fit 2004 Chevrolet Tahoe
Guaranteed to Fit 2004 Chevrolet Tahoe
VIDEO
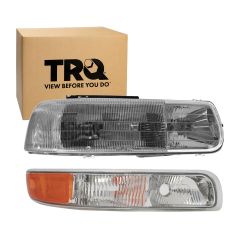
Brand: TRQ - LKA56013$119.95Save 31%List $174.95 Save $55.00Guaranteed to Fit 2004 Chevrolet Tahoe
Guaranteed to Fit 2004 Chevrolet Tahoe
-
Notify When Available
VIDEO
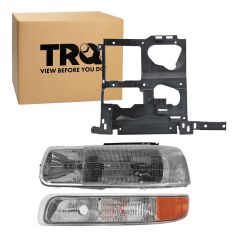
 $89.95Save 31%List $129.95 Save $40.00
Guaranteed to Fit 2004 Chevrolet Tahoe
Guaranteed to Fit 2004 Chevrolet Tahoe
VIDEO
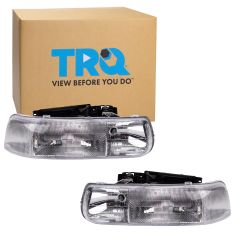
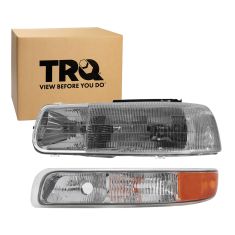
Brand: TRQ - HLA95294$89.95Save 31%List $129.95 Save $40.00Guaranteed to Fit 2004 Chevrolet Tahoe
Guaranteed to Fit 2004 Chevrolet Tahoe
-
Notify When Available
VIDEO
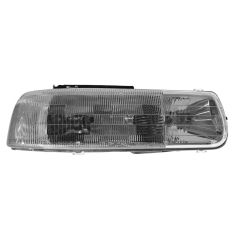
Replaces 2004 Chevrolet Tahoe Passenger Side 2 Piece Lighting Kit TRQ LKA55875
Brand: TRQ- LKA55875$75.95Save 33%List $113.95 Save $38.00Guaranteed to Fit 2004 Chevrolet Tahoe
Guaranteed to Fit 2004 Chevrolet Tahoe
VIDEO
Brand: TRQ - LKA55875$75.95Save 33%List $113.95 Save $38.00Guaranteed to Fit 2004 Chevrolet Tahoe
Guaranteed to Fit 2004 Chevrolet Tahoe
-
Notify When Available
VIDEO
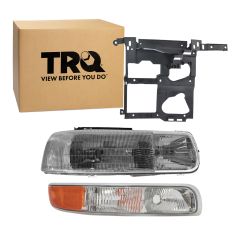
$75.95Save 33%List $112.95 Save $37.00Guaranteed to Fit 2004 Chevrolet Tahoe
Guaranteed to Fit 2004 Chevrolet Tahoe
VIDEO
Brand: TRQ - LKA55876$75.95Save 33%List $112.95 Save $37.00Guaranteed to Fit 2004 Chevrolet Tahoe
Guaranteed to Fit 2004 Chevrolet Tahoe
-
Notify When Available
VIDEO
Replaces 2004 Chevrolet Tahoe Driver & Passenger Side Headlight Mounting Pin 2 Piece Set TRQ HLA94579
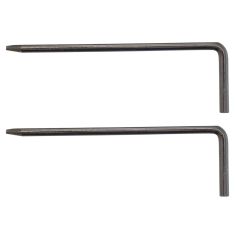
Brand: TRQ- HLA94579$29.95Save 25%List $39.95 Save $10.00Guaranteed to Fit 2004 Chevrolet Tahoe
Guaranteed to Fit 2004 Chevrolet Tahoe
Replaces 2004 Chevrolet Tahoe Driver & Passenger Side Headlight Mounting Pin 2 Piece Set TRQ HLA94579
VIDEO
Brand: TRQ - HLA94579$29.95Save 25%List $39.95 Save $10.00Guaranteed to Fit 2004 Chevrolet Tahoe
Guaranteed to Fit 2004 Chevrolet Tahoe
-
Notify When Available
VIDEO
$219.95Save 34%List $330.95 Save $111.00Guaranteed to Fit 2004 Chevrolet Tahoe
Guaranteed to Fit 2004 Chevrolet Tahoe
VIDEO
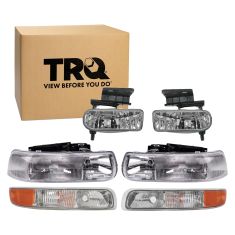
Brand: TRQ - LKA56014$219.95Save 34%List $330.95 Save $111.00Guaranteed to Fit 2004 Chevrolet Tahoe
Guaranteed to Fit 2004 Chevrolet Tahoe
-
Notify When Available
VIDEO
$205.95Save 34%List $309.95 Save $104.00Guaranteed to Fit 2004 Chevrolet Tahoe
Guaranteed to Fit 2004 Chevrolet Tahoe
VIDEO
Brand: TRQ - LKA56015$205.95Save 34%List $309.95 Save $104.00Guaranteed to Fit 2004 Chevrolet Tahoe
Guaranteed to Fit 2004 Chevrolet Tahoe
-
Notify When Available
VIDEO
$150.95Save 34%List $227.95 Save $77.00Guaranteed to Fit 2004 Chevrolet Tahoe
Guaranteed to Fit 2004 Chevrolet Tahoe
VIDEO
Brand: TRQ - LKA55900$150.95Save 34%List $227.95 Save $77.00Guaranteed to Fit 2004 Chevrolet Tahoe
Guaranteed to Fit 2004 Chevrolet Tahoe
-
Notify When Available
VIDEO
$49.95Save 39%List $81.95 Save $32.00Guaranteed to Fit 2004 Chevrolet Tahoe
Guaranteed to Fit 2004 Chevrolet Tahoe
VIDEO
Brand: TRQ - HLA87199$49.95Save 39%List $81.95 Save $32.00Guaranteed to Fit 2004 Chevrolet Tahoe
Guaranteed to Fit 2004 Chevrolet Tahoe
-
Notify When Available
VIDEO
$149.95Save 34%List $226.95 Save $77.00Guaranteed to Fit 2004 Chevrolet Tahoe
Guaranteed to Fit 2004 Chevrolet Tahoe
VIDEO
Brand: TRQ - LKA55901$149.95Save 34%List $226.95 Save $77.00Guaranteed to Fit 2004 Chevrolet Tahoe
Guaranteed to Fit 2004 Chevrolet Tahoe
loading...