Replaces
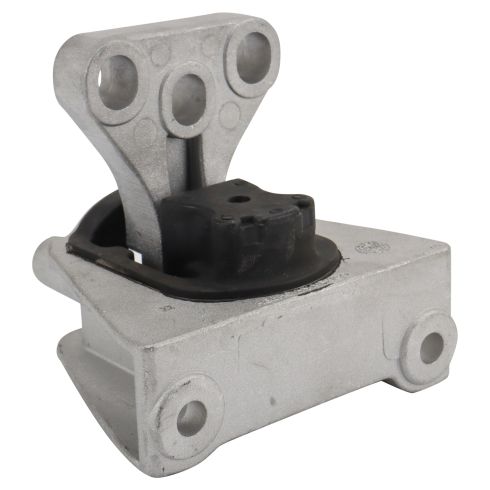
Part Details
About TRQ:
TRQ is a trusted brand dedicated to making every repair a success story by combining premium parts with easy installation. Each TRQ part is engineered by a team of automotive experts to meet or exceed OEM standards, delivering enhanced performance and maximum longevity. With rigorous in-house testing, the brand ensures superior fit and function across every product line. TRQ also provides customers with best-in-class, step-by-step installation videos—so you can complete repairs with confidence, whether you're a first-time DIYer or an industry professional.
Attention California Customers:
 WARNING: This product can expose you to chemicals including Lead and Lead Compounds, which are known to the State of California to cause cancer, and birth defects or other reproductive harm. For more information, go to www.P65Warnings.ca.gov.
Lifetime Warranty
This item is backed by our limited lifetime warranty. In the event that this item should fail due to manufacturing defects during intended use, we will replace the part free of charge. This warranty covers the cost of the part only.
FREE Shipping is standard on orders shipped to the lower 48 States (Contiguous United States). Standard shipping charges apply to Hawaii and Alaska.
Shipping is not available to a P.O. Box, APO/FPO/DPO addresses, US Territories, or Canada for this item.
Expedited is available on checkout to the United States, excluding Alaska, Hawaii.
Final shipping costs are available at checkout.


Created on:
Tools used
Hi, I’m Mike from 1A Auto. We’ve been selling auto parts for over 30 years!
I'm going to support the engine by using a floor jack and a piece of wood on the oil pan. Just have to put a little bit of light tension on it. You don't have to lift the car off the wheels with this. The upper torque rod is held on with three bolts: this one here, here, and here. You should have new ones on hand before you replace this. I'm using a 17 millimeter socket and extension and a large breaker bar. These have a lot of torque to them.
This one here, you can loosen this A/C line if yours isn't super rusty. Ours looks really rusty. I don't want a mess with it. There's some give to this, but be careful because if you pry on that too much, you could break the seal in the hose in here and then you lose all your refrigerant and your A/C won't work. But there should be enough space in here. I can sneak this in here and break this free.
To get to this one, it doesn't quite go straight but this is flexible plastic. You can go in here and break this free. With those broken free, I'll switch to a ratchet to make taking them out a lot quicker. Pull this bolt. It's like a little counterweight thing out. This bolt is a lot longer. Pull it out of here. Should be the slightest torque arm out.
Right now we're going to replace this lower engine mount that we had removed the torque arm to get to. You can find both of these brand new at 1aauto.com. So when we go to reassemble this, we'll have a new one in here as well. Now spray some rust penetrant on this before I try to remove it. Spray some over here on the little ground cable, some in here, and remove this ground strap bolt.
It's a 10 millimeter head bolt. Put that to the side. I'm going to need a 19 millimeter deep socket to get this nut off. Put that on there. Again, using the large breaker bar take this off. I'm going to use the same socket on this 19 millimeter. This bolt head here is a 17 millimeter head. Remove that. To get these broken free a bit, I'm going to spray some rust penetrant in here. I get on the threads, make it a little easier for them to come out.
Switch to a ratchet. Makes taking them out quicker. When you're removing this brace between the engine and the engine mount, just be aware that this bolt fits through here. It is actually captured. There's a little bubble here so it can't go through. As you start to loosen this, this will get to a certain point, it won't want to loosen any further.
Then you just have to be super careful because these are steel. Of course the engine is aluminum, and you can pull the threads out of here if you're not careful. I've actually damaged the threads a little bit, so I'm going to repair those. I've got a 14 by 1.5 tap, and I'm going to carefully just clean the threads up because I didn't strip them out totally, but the bolt is difficult to thread in, so I just want to get it started. It might help to put a little bit of oil in here so it spins.
Since there's not a lot of clearance here, I'm just going to use this adjustable wrench. Just gently turn this in. I want to try to get it set up on the threads first. This is going in pretty well. All I'm attempting to do is to clean up the threads that are already there. They haven't all pulled out. But the starting threads were kind of mashed, and I want to make sure that the bolt threads in there easily. That feels pretty good. I'll take it out.
It did clean out some junk that was on the threads. There is stuff that's in the hole. You should get access to compressed air. Just take a rag and the compressed air gun and do this. Get the bolt from the backside. Same thread, but you can see that this one threaded in really easily, and now this one threads in nice and easy too.
To avoid removing this aluminum brace, I'm just going to remove these two bolts and the two lower bolts holding this on and slide it out. Start with some rust penetrant. Let's spray some down here. There's a bolt in the back. I've got a 14 millimeter socket and a universal joint because I need to work around these lines in here, and I can't quite get a straight shot. Spray some more rust penetrant and try to work it down into the threads. It's nice and loose. Pull them up by hand.
Use a 17 millimeter socket and a swivel. To get down in here, again, on this bolt. We'll go after the rear bolt. Its power steering lines a little bit in the way. I'm going to pull up on the power steering reservoir to kind of loosen the line up. That bolt is loose. This one was really rusted in here. I just had to keep working it in and out and adding penetrating oil. It feels like it's finally coming loose now. Yeah, there it is. I'm just going to use our magnet to reach down there and grab it. Yeah, that was pretty rusty. That's why it was so hard to remove. No more bolts in here. This should slide out of here robust.
I'm going to lift up on the engine just to slightly try to give myself some more space, take that engine mount out. You basically just have to kind of lift up on the engine a little bit, maybe move the engine down, but fiddle your way and get this thing out of here. Otherwise, you have to take off the other bolt that's holding this aluminum part on and it's a little more difficult.
There's the engine mount. It's our original engine mount from our vehicle, our brand new one from 1aauto.com. So brand new one actually comes with this little aluminum part already installed. We're going to reuse it because the bolt that's in here is captured and is kind of stuck on here with the rust, so it's a little tricky to remove, but this bolt's in good shape so we're going to reuse this one.
I'll take this one off before we install it. As you can see, it's the same style design, solid rubber, that's just a little coating of rubber from manufacturing, same mounts on the top and the bottom. This would fit the vehicle and work great for us. This is a 17 millimeter head on this bolt. Try to remove it on the bench here. Removing this first will also make installation easier because you're not trying to mess with this plate on here. We'll just take it off.
I can see the original one. There's a pin that needs to line up. It'll line up and work perfectly for us. We're only reusing it because this bolt's already stuck in here and it's just easier to leave it in here. But if you need to, it comes the brand new one.
We're going to loosen this bolt on this aluminum brace to give us a little more wiggle room when installing them out. Use a 14 millimeter socket, extension, and a ratchet. I'm not going to fully remove it, just loosen it up. That gives me a lot of movement there now. Take a new engine mount and slide it into place. It's lined up.
Reinstall this front bolt. Reach down. Take the extension and the 17 millimeter socket and just thread it in there to get it started. Go for the rear bolts. I had to actually move the mounts to line it up. While everything's still kind of loose, I'm going to get these two bolts caught to this aluminum brace. I'm going to use a punch to help me line up these bolt holes.
I'm just going to snug these down. I'll snug down the other two mount bolts. Tighten this one on the fender, the aluminum brace. Torque these two bolts 36 foot-pounds. Yes, I'm using an extension and a universal joint, but it's very difficult to get in here, so do the best of what you can. The bolts that are down here go from the mount to the frame rail of 47 foot-pounds. This top bolt that goes into the side near the fender, 36 foot-pounds.
So just test fitting our little aluminum bridge piece here. Looks like I need to lower the engine on the jack. I can get this one started. I'm just going to thread it in by hand. There's other bolts in here. Thread that in by hand. Looks pretty level. I'm going to use this big punch to help line this up, pull the engine over, if I can get it to kind of catch on the little pin that's in there. That worked.
I've got our new bolts. Thread it in there. Just get it snug right now, switch to 19 millimeter for those, tighten this one down. The torque on these is 52 foot-pounds. Same for this one here. Don't forget to put the ground strap back on. That doesn't take much torque. Just snug it down.
Now we're going to install the torque arm. The nut under here is captured. It's in a slotted hole. This hole is slotted too. These are going to line up over here so it's going to install that way. I'm going to put some white grease down here, just to help it slide into place. I've got this lined up. Just had to push it kind of hard, and will find its spot.
Take that really long bolt and wiggle it around until you find the nut. Thread it down. Just tighten this bolt in. Torque these to 47 foot-pounds. Same one for this one. Lower the jack and take it out from under the car.
Thanks for watching. Visit us at 1AAuto.com for quality auto parts, fast and free shipping, and the best customer service in the industry.
Tools used
Hi. I'm Mike from 1AAuto. We've been selling auto parts for over 30 years!
We're going to support the engine by using a floor jack and a piece of wood on the oil pan. Just have to put a little bit of light tension on it. You don't have to lift the car off the wheels with this.
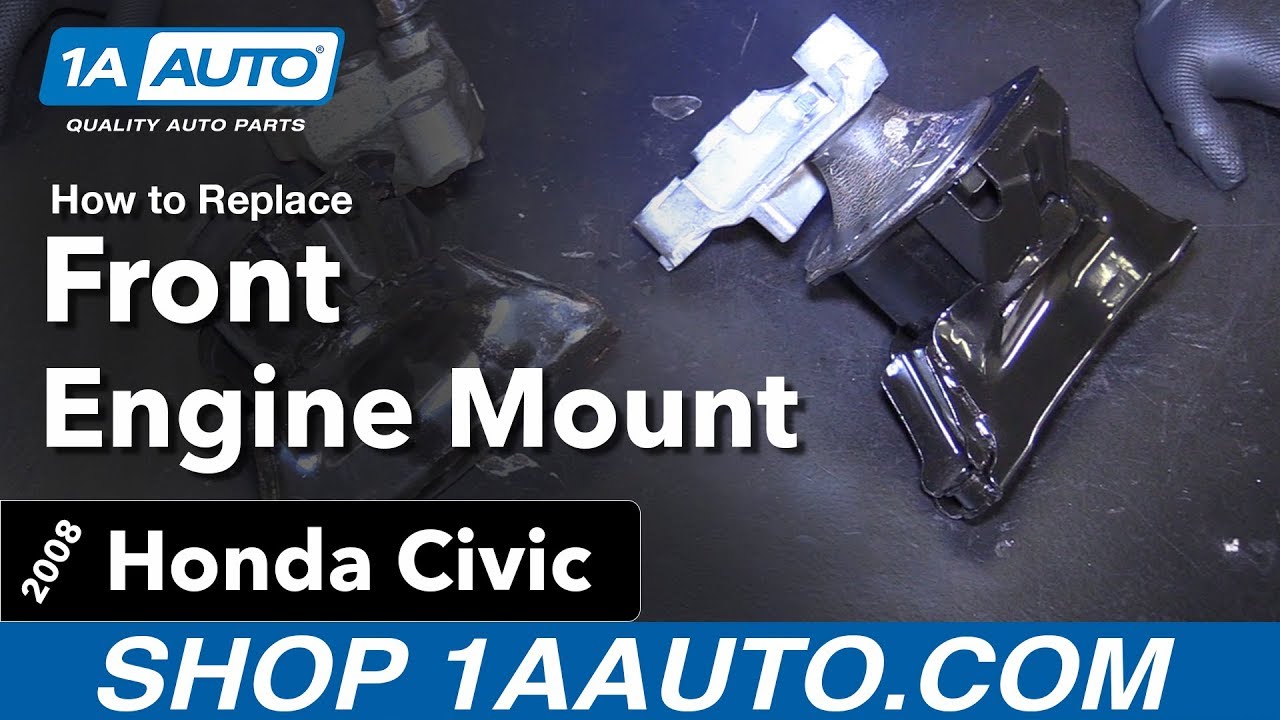
The upper torque rod is held on with three bolts. There's one here, here and here and you should have new ones on hand before you replace this. Use a 17 millimeter socket and extension and a large breaker bar. These have a lot of torque to them. So this one here, you can loosen this A/C line if yours isn't super rusty. Ours looks really rusty, I don't want to mess with it. There's some give to this but be careful because if you pry on that too much you could break the seal on the hose in here and then you lose all your refrigerant and your A/C won't work. There should be enough space in here I can sneak this in here and break this free. To get to this one. It doesn't quite go straight but this is flexible plastic. You can go in here and break this free.
With those broken free, I'll switch to a ratchet to make taking them out a lot quicker. Pull this bolt and this little counter weight thing out. This bolt's a lot longer. Pull it out of here. You should be able to slide this torque arm out.
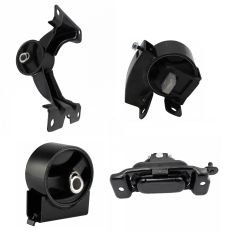
Here's the original torque arm from our vehicle and our brand new one from 1AAuto.com. It’s the same style with the plastic and the rubber bushing inserts. It comes with this aluminum bar here. This should fit in place and work great for you.
Now we're going to install the torque arm. The nut under here is captured, it's in a slotted hole. This hole's slotted too. These are going to line up over here so it's going to install that way. I'm going to put some white grease down here just to help it slide into place. Get this lined up. I just had to push it kind of hard. I'm going to find that spot. Take that really long bolt and wiggle it around till you find the nut. Thread it down, tighten this bolt in. Torque these to 47 foot-pounds. It’s the same one for this one. Lower the jack and take it out from under the car.
Thanks for watching. Visit us at 1AAuto.com for quality auto parts, fast and free shipping, and the best customer service in the industry.
Tools used
Hi, I’m Mike from 1A Auto. We’ve been selling auto parts for over 30 years!
Open the hood. Pull the release inside. Find the secondary safety release under your hood. On our Civic, we've got two spots we can put the proper on. One here or we put it in the service position. Open it further and use that one. Going to replace this transmission mount here.
I'm just going to disconnect the negative terminal battery before I start touching anything. This is a 10 millimeter on this car. Just loosen it up. Just put this aside. After the negative terminals been disconnected, use a 12 millimeter wrench to remove the positive terminal. This terminal is live, so try not to touch the wrench to any other metal while you're removing it. This is just on here on plastic. Pull the cable over. Then spray some rush penetrant on here. It's a little rusty. Using a 10 millimeter deep socket.
So if the deep socket isn't deep enough, just take a ratcheting wrench or a box wrench, whatever you have handy. You don't have to loosen them off fully. That one popped out. Once their loose enough, you can kind of move this around. Like this one popped out of the little hook. So now it's unhooked, and you can maneuver this one. Take the whole bracket and mount out. There's a plastic cover on here. We can just pull it off, and then reach in. Probably want to wear some gloves because batteries can have acid on them. Just pull it right out and put this aside.
There's a third bolt down here that's hidden by the battery. With the battery out, we can get to it. It's 10 millimeter. It comes to 10 millimeter socket and ratchet to remove it. Now remove this one up here. Remove this 10 millimeter bolt in the backside. There's a plastic cover on the ECU. It's got two little tabs here. If it's kind of loose, it'll pop right out. Slide the cover off. Then we're just going to gently pull this over. There's three connectors. They're locked so you got to push in the lock and then pull this open like that at the same time. It'll kind of push it off. Do this for all three of them. Pull the ECU right out.
Take some small needle nose pliers push in these little tabs. Pull this harness out of this bracket. There are three clips on the outside of this fuse panel box that are holding it to a bracket, not the ones that are holding the cover on. There's two in the back, one in the front. So you actually push it outwards so that the tab. We're going to flip it outwards. Do it with my thumb here and then lift up on this. It'll come loose. I'm going to do the two on the back same way. If you're having troubles getting your fingers in there, you can use a flat bladed screwdriver, and with one hand lift up on the box and unlock it. Same with this one here. There's one. Here's the other one. Okay. Just have to work at it a little bit. Lift up on the box. Just kind of gently pick it up and off the bracket. Try not to pinch the EC wires too much. That can sit like that.
Now you can get to this 10 millimeter bolt that's back here. I'm going to remove that. Use just a socket and ratchet. There we go. I'm going to move this back. Make sure it doesn't clip back into place though. There's a 10 millimeter bolt here holding the other side of that bracket. Slide this bracket out. Part of it is clipped around this air intake tube. Pop it off of the little grommet. Pull the bracket out. Before you remove this engine mount, have new hardware on hand for these two studs and bolts and this bolt. There's one here and then towards the back of the car. So I have new ones of those on hand.
Going to remove this steel brace that's on the top. It's got three bolts holding it. They are 14 millimeter. Start with these. Get them broken free. Push the ECU cable aside. Just sort of gently push this this way. I can reach the bolt there. Just be careful moving all these around because there are wires inside. You don't want to break the wires. I like to break all the bolts free before I start removing them. So now that I've got the other two broken free, I can take this one out completely. Pull that bolt out. Move this back. Pull that bracket right out of there. We can use a floor jack and a piece of wood to support the transmission. Don't really need to jack up on this very much right now. This just to hold it up as we swap them out, but I want to get it in position so we're ready. That's perfect like that.
Before you remove this mount, make sure you have your engine supported on your floor jack, which we've already done. Spray some rust penetrant on here. Try to get some down in here and there's one in the back that's hard to see. These are 17 millimeter. Going to start with the bolt. This wrench, this ratchet and extension might not be big enough. Might be too much torque. Well, that worked. Pull that bolt out. Switch to a 17 millimeter deep socket. Get to these nuts that are on the studs. You need a longer ratchet sometimes for leverage. Engine might drop down a tiny bit. That's okay. It is supported with the floor jack. Pull that nut off. All right.
So I'm actually going to lift the engine up with the floor jack a bit. There we go. Take that nut off. There's a little steel dampener piece that's going to come off in there. So that's nice and free from the engine. Now we'll work on getting it free from the body. I'm using a longer ratchet for leverage. I'm also using the deep socket for a little extra height, but you can use a regular socket and a longer extension. Break this free. Now there is a second one. It's in the back. It's a lot harder to see, but it basically looks just like the one in the front. You can slide this down and you can feel it get on there. The same. Break it free. Pull that out. Should be able to lift the mount up and off the studs where it mounts the engine/transmission. Pull it right out of the engine compartment.
These are original transmission mount from the vehicle, and our brand new one from 1AAuto.com. See it's the same design. Same style of rubber mount with the aluminum piece that's molded in the middle. Same mounting holes. This will fit in out vehicle and work great for us. Before I put our new transmission mount in, I'm going to go in here and take a rag and just wipe some of this junk out of here that's been collecting. Just so I know that the engine mount will sit nice and flat on the frame rail.
Take our new one and just kind of maneuver it in. Put it over the studs first. Holes are slotted so you do have some play. I would get the outer bolts caught first. These bolts. Then we'll worry about these bolts over here. So take your hardware and get that back in. I'm just going to snug it down, and I'm not going to torque it yet. Back one’s are going to be a little trickier because it's hard to see. Going to have to kind of feel for it. I can just see the hole from up here, but I need to kind of hold this harness out of the way, and then maneuver my hand down in here.
Reach down here with our extension and socket, and just kind of get it threaded by hand first because you can feel it thread in and not cross thread. With the bolt started, now I can just snug it down. Don't forget to reinstall the steel dampener. It just sits on top. We'll take our bolt. I can see that the hole is lined up nicely. I'll drop our bolts in there. Start it. Thread it by hand because this is aluminum. This bolt is steel. Don't want to cross thread it. Get it threaded down. I'll use my socket and ratchet to draw the transmission mount up. I'm just going to snug this down. Come back and torque it afterwards.
We're going to install these flange nuts. Take your deep socket and ratchet, snug these up. I'm going to lower the jack and pull it out from underneath the car. Then we're done with that for now. Going to torque these bolts on the frame rail. It's a 47 foot pounds. Get that out of the way. We torque these to 54 foot-pounds. Going to put this little brace back in so that the two bolts go into the mount. You should be able to tell that the bolts that came out of it; they're real clean. There's no corrosion on them because they were steel going into aluminum. Put this in place. Get one of these caught. Should thread them in by hand so you don't cross thread them. Move this out of the way. Get the bracket lined up.
Sometimes, if you turn it backwards like you're going to thread it out, you can help find the thread. You can kind of feel it. Just like that. Then it should thread right in. Push the fuse panel over. Grab this bolt here. Going to tighten these up. Going to torque these to 28 foot-pounds. Now we're going to put our ECU bracket back in place. This under here. This air intake tube has a little grommet that it's going to push onto. Just like that. This is going to sit. Move these harness connectors out of the way. Capture this bolt inside of the fender here. Snug this one down. Just have to tighten it until you feel it stop. Then a little bit more, and that'll be tight.
Pick this box up. This can actually go back onto its mounts. This is got to push that back up. That sits just like that. Get this little 10 millimeter bolt in here that mounts it. Might have to move the bracket a bit just to thread it in. Tighten this down. Clip the harness back in where it mounts here.
Reinstall the ECU. You can't really mess up the connectors because they don't reach. So they only go where they reach. Try to push them on evenly. Get them kind of closed, and these little bars are going to go in and catch, uh, pins there on each side of the connector. As you do that, they're going to lock in place. Those are locked into place.
Position it on the bracket. Don't forget to reinstall the plastic cover. It just slides over. And it's got these two little tabs that are going to go in here. That's going to sit like that. Now I can reinstall all the bolts. You have to move around a little bit, get it started. Just get it tight, and an old quarter turn wash should do it. ECU's reinstalled.
I'm going to reinstall our battery. If you have a plastic cover, now you can reinstall it. Got the battery tight on and the hooks attached, so you can reach down, hook this in. Kind of just like that. Do the same for this side. Use a 10 millimeter deep socket to tighten these.
Reinstall the positive terminal. Yours might look different. This car's had the terminal replaced. But the idea is the same. Put that over there, that go up on there. Take 12 millimeter and tighten this up. You don't have to over tighten these, just tighten it and then give it a good tug. Make sure it doesn't wiggle or come loose. You can kind of see how they bend as they tighten. Take our negative terminal. Just go back on here. Tighten this one up. This is a 10 millimeter. There's a possibility that the original positive terminal is also a 10 millimeter. Make sure that's nice and tight. The battery's replaced. When you're all done, just close the hood.
Thanks for watching. Visit us at 1AAuto.com for quality auto parts, fast and free shipping, and the best customer service in the industry.