Replaces
Part Details
About TRQ:
TRQ is a trusted brand dedicated to making every repair a success story by combining premium parts with easy installation. Each TRQ part is engineered by a team of automotive experts to meet or exceed OEM standards, delivering enhanced performance and maximum longevity. With rigorous in-house testing, the brand ensures superior fit and function across every product line. TRQ also provides customers with best-in-class, step-by-step installation videos—so you can complete repairs with confidence, whether you're a first-time DIYer or an industry professional.
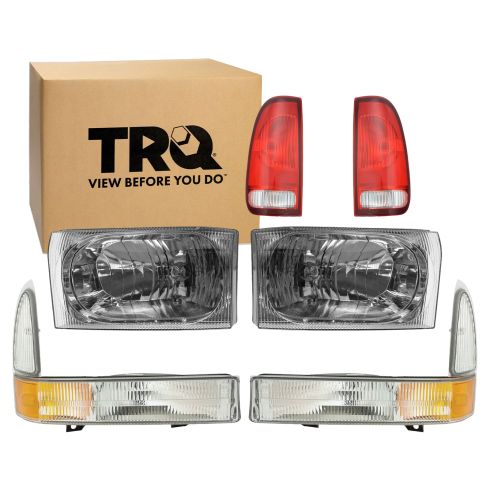
Assemblies may include halogen or incandescent test bulbs that should be replaced before installation.
Attention California Customers:
 WARNING: This product can expose you to chemicals including Chromium (Hexavalent Compounds), which is known to the State of California to cause cancer, and birth defects or other reproductive harm. For more information, go to www.P65Warnings.ca.gov
Lifetime Warranty
This item is backed by our limited lifetime warranty. In the event that this item should fail due to manufacturing defects during intended use, we will replace the part free of charge. This warranty covers the cost of the part only.
FREE Shipping is standard on orders shipped to the lower 48 States (Contiguous United States). Standard shipping charges apply to Hawaii and Alaska.
Shipping is not available to a P.O. Box, APO/FPO/DPO addresses, US Territories, or Canada for this item.
Expedited is available on checkout to the United States, excluding Alaska, Hawaii.
Final shipping costs are available at checkout.


Created on:
Tools used
Brought to you by 1AAuto.com, your source for quality replacement parts and the best service on the internet.
In this video we're going to show you how to remove and reinstall the taillight, whether you need to replace a broken taillight or you're just looking to replace a bulb. We're working here on a 2003 F250, same as any super duty truck of this era. The only tool you'll need is an 8mm wrench or socket with ratchet.
Okay, pretty straight forward. On the backside here there's two bolts that you need to remove. These bolts are 8mm. Speed it up here as I use an 8mm socket with a ratchet to remove those two bolts. Okay, once you have those bolts out pull down. The bulbs twist counterclockwise to disconnect. To service the bulb just pull it out, push it back in. The same up here. The new taillight from 1A Auto, if your taillight loses a battle with a 2x4 or fire wood, which happens on my truck a lot get a nice new light from 1A Auto. It goes right in. Everything goes right together. There are a couple line-up tabs. You just kind of want to get the bulbs in. Watch those line-up tabs. Get them in place.
Okay, we'll speed it up here as I put those two 8mm bolts back in. When you tighten them up you don't want to over tighten them, because you are just tightening speed screws into plastic, so make them firm but not too tight.
We hope this helps you out. Brought to you by www.1AAuto.com, your source for quality replacement parts and the best service on the internet. Please feel free to call us toll free, 888-844-3393. We're the company that's here for you on the internet and in person.
Tools used
Brought to you by 1AAuto.com, your source for quality replacement parts and the best service on the Internet.
Hi, I'm Mike from 1A Auto. I hope this how-to video helps you out, and next time you need parts for your vehicle, think of 1AAuto.com. Thanks.
In this video, we're going to take you through servicing the parking light, the lower parking lights, underneath the headlight as well as the side marker lights. You may need to do this if you've had a little fender bender, or if they're just cloudy and dull and you want to change them and make them look nice. The only tool you'll need is a Phillips screwdriver.
First you're going to find two screws underneath. One there and then one right back in there. Okay, I'm going to fast-forward as I remove those screws. They will tend to drop down. They're kind of hard to get to back in there, so either a magnetic tipped screwdriver will help you or just make sure the area underneath is clear so when they drop on the floor you can find them easily. Also, a flashlight or some other kind of light to help you look back in there and see them.
This comes out. This bulb twists off and out. To service either one of these bulbs, I just pull it out.
All right. New parking light from 1A Auto. See? Nice and clear. Exact fit. If your old one is broken, or if you're replacing your old and cloudy ones, this will let's see. You've just got to put this in correctly. Put your light in. Socket to the right clock position here. Once you insert the bulb then turn it clockwise to lock it and then the same thing with the small side marker light.
Insert it and clockwise to lock it into position. There's a pin here and a pin over here. Make sure those go in like they're supposed to go. Probably the most fun part is just getting these screws in. This one's probably by far the most difficult. I take it, get it on my screwdriver, and I hope it stays. You can also put a little bit of glue on the tip of your screwdriver. I'll help the screw stay on it while you put it in there.
We hope this video helps you out. Brought to you by www.1AAuto.com, your source for quality replacement parts and the best service on the Internet. Please feel free to call us toll-free, 888-844-3393. We're the company that's here for you on the Internet and in person.