Replaces
This part doesn’t fit a . Select from parts that fit.
Frequently bought together
Part Details
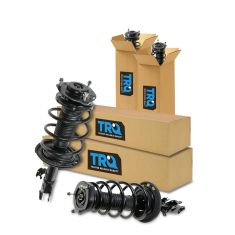
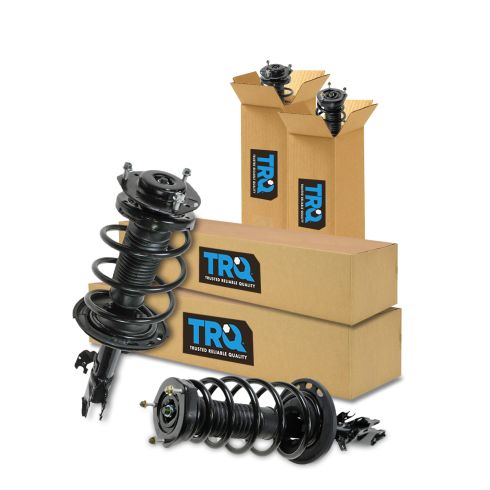
TRQ fully loaded shocks and struts are manufactured using premium raw materials and calibrated to restore original ride comfort. TRQ shocks are fully loaded featuring a pre-loaded bearing plate, upper and lower spring isolator, upper spring seat, coil spring, boot kit, and premium strut. TRQ recommends replacing your shocks or struts in pairs to ensure even wear of components and improved ride comfort. All products are fit and road-tested in our Massachusetts R&D facility to ensure we deliver on our promise of Trusted Reliable Quality.
Product Features
Replacing struts used to require specialized tools to compress, remove, and transfer the old spring and mount. Our Pre-assembled, complete strut & spring assemblies come with all new parts and make the job much quicker and easier for the do-it-yourself mechanic.
Strut & spring assembly contains:
Item Condition:
New
Attention California Customers:
 WARNING: This product can expose you to chemicals including Chromium (Hexavalent Compounds), which is known to the State of California to cause cancer, and birth defects or other reproductive harm. For more information, go to www.P65Warnings.ca.gov
Lifetime Warranty
This item is backed by our limited lifetime warranty. In the event that this item should fail due to manufacturing defects during intended use, we will replace the part free of charge. This warranty covers the cost of the part only.
FREE Shipping is standard on orders shipped to the lower 48 States (Contiguous United States). Standard shipping charges apply to Hawaii and Alaska.
Shipping is not available to a P.O. Box, APO/FPO/DPO addresses, US Territories, or Canada for this item.
Expedited is available on checkout to the United States, excluding Alaska, Hawaii.
Final shipping costs are available at checkout.


Created on:
Tools used
Hi, I’m Mike from 1A Auto. We’ve been selling auto parts for over 30 years!
Use a large pry bar or a flat bladed screw driver to remove the wheel cover. Just kind of slide it between the wheel and the plastic and pop it off. These lug nuts are a 21 millimeter socket. I'm going to use that and a breaker bar to loosen them while the vehicle's on the ground. Raise this part of the vehicle. We're using a two post lift, but you can use a jack and jack stands. The lug nuts are loose. I’m going to take my socket and finish removing them. I’m just going to hold onto the wheel and take the last lug nut off. It's going to be loose. You don't want to drop it. You can drop the lug nut. That's okay. You just don't want the wheel to fall.
After removing your wheel and raising and supporting the vehicle, we're going to remove the bolt that is holding on the brake line and the ABS wire from the strut. Bolt goes all the way through. It's a threaded nut, so I'm just going to spray some rust penetrant on the back side. A little bit up here. This is a 12 millimeter bolt. Push the brake caliper line down, and then this ABS line just pulls out of the bracket and can go aside. It's also clipped with a piece of plastic to the strut. You just pull these two tabs apart it pops out of the holes, so that will be loose from the strut now. Just push those aside.
Next thing to remove would be the upper sway bar link. We've already replaced this one. We had to cut ours off. Most likely you will have to cut yours off too before you do the strut. You can get new sway bar links from 1AAuto.com. On the one that we have, the replacement it is an 18-millimeter nut and then an 18 millimeter. There's a socket. Sort of like a six point on the back, so you can counter-hold it to remove it. Our originals did not have that. It made it very difficult to remove them, and we had to cut them off. If these get bound up a little bit you can take a small hammer and just tap them out.
Next, I'm going to remove the two lower strut bolts that are mounting it to the knuckle. Start with some rust penetrant on here. A little bit between there. These are 22 millimeter. They're very, very big, so I'm going to counter-hold on the end of the bolt and I'm going to loosen at the nut. I'm going to use a 12-point 22 millimeter so I can get a better angle. I'm just going to push it down to free that one up. Work on the bottom one. Worst case, I can go under here. Once they're initially broken free, you can switch to a socket and a ratchet and finish removing them.
With the nuts removed, I'm going to take a small ball-peen hammer, and I'm going to tap out the lower bolts. If you need to, you can push on the knuckle a little bit to free it up. I'm going to leave the top one in for now because I want to loosen the three nuts that are holding the strut to the strut tower, and if this bolt is out and I loosen them the strut could fall, so it's just going to help me keep the strut where I need it to be right now.
I'm going to spray some rust penetrant on the top of these studs and nuts that are holding the strut in. Do not need to loosen the center nut. That is what's holding the strut together and the spring under compression, so don't touch this nut. Just these three outer ones. These are 14 millimeter. I'm just going to start by loosening them all evenly. It did drop down, but since I had it bolted to this knuckle, it didn't fall out on me. You can actually lift up on it. Pull this bolt out. Wiggle it. It's going to come off the knuckle. Pull it right out.
Here's our old strut assembly and a brand new assembled strut from 1AAuto.com. That means you don't have swap over the spring, and you don't have to swap over the mount. It's all ready to go and bolt right into the car. These right and left specific, so just like the OEM one it's got a little R here. On our new one from 1A Auto, it's got an R there, so that's going go on the passenger's side front.
Right-hand side of the car. It has the same mounting holes for the strut, same mount setup for the sway bar link, and of course, where I was pointing out the R, it's the same mount for the brake line and ABS line. At the top, we have the same style strut top. There's actually a warning sticker here. It's telling you not to undo this nut, so we can peel that off before we install it. This one came with three new locking nuts. I'm going to take them off before I install it, but this should fit in your car and work great for you.
We're going to take our new strut and put it up into the strut tower and line up the holes. I'm just going to capture some of these nuts. We can let it hang like that, that's fine. I'm going to one of our bolts and make it lined up into the knuckle. You might have to actually lift it up. If you need to you can put a jack under here. I'm going to get the other bolt in. I'm just going to thread in on these nuts for now. Now I'm going to go to the top of the strut and I can start tightening down. These new lock nuts are 15 millimeter. I'm going to start tightening them down just evenly bringing the strut up. The torque on these is 63-foot-pounds. I'm just going to go evenly. Just going to take our socket and snug these down before I torque them to the final spec. I'm going to torque these to 155-foot-pounds. Make sure you counter-hold the bolt. Do the same for both bolts. I'm going to reinstall the sway bar link. Counter-hold the sway bar link. Tighten it, so with the upper sway bar link to 55-foot-pounds.
Reinstall the ABS wire bracket because tabs where it slides into the hole. That's where it fits over. This is a little tight. I'm just going to tap it into place. Put the brake fluid line back up here. The bolt line up. Clip the ABS retainer right back onto here.
Reinstall your wheel. Lower your vehicle to the ground and torque it. The strut is replaced. Reinstall our wheel. Important to note, these lug nuts have a taper. Taper meets the wheel, matches the inside of the wheel. Don't install them the flat side like this. That is incorrect. Install them with the taper to the wheel. It helps locate the wheel on the lug nut stud. I'm just using a socket and ratchet to bring these down snug before I put the car on the ground. Torque the lug nuts to 76-foot-pounds. I'm going at a cross pattern. Reinstall the hubcap. You've got to line up the opening to the valve stem with the valve stem on the wheel. Just push it in place.
Thanks for watching. Visit us at 1AAuto.com for quality auto parts, fast and free shipping, and the best customer service in the industry.
Tools used
Tools used
Tools used
Hi, I’m Mike from 1A Auto. We’ve been selling auto parts for over 30 years!
Use a pry bar or a large flat bladed screwdriver to remove the hubcap. I'm just going to slide it under the edge. Put that aside. Take a breaker bar and the 21 millimeter socket, and loosen the lug nuts while the car is still on the ground. I'm just going to use the socket to take them off. Removing the last lug nut, I'm just going to hold onto the wheel so it doesn't fall off. I'll take it right off.
There are two hooks holding down the rear seat cushion. They're hard to see. There's one right down here where my index finger is. Try to pull up on it. It's pretty stiff. Let's take this pry bar and very carefully place it right next to the hook and the pop it up. Then you repeat this for the other side. Then you lift the back seat cushion out and just place it aside.
On this Camry with the split fold rear seats we'll need to lower the passenger side seat, so we're going to pull the release that's inside the trunk. We have to fold the seat down.
Before we can remove the side bolster we need to pop the seatbelt out of it. It's got a little slot in here. Feed the seatbelt up through there and to the side. Down under here there's a 12 millimeter bolt that needs to be removed. Then this can be lifted outwards and up off the pin that it sits on. Lift it out a little bit. At the same time I'm going to slide it up so this sits in your middle tab here. You don't want to pull it this way because you'll break this. It's just going to gently come up, and then slide it out.
This side bolster out, you can see the three studs on the top of the strut. Now that we have access to that, we can go on the outside of the car and start removing the strut. You're replacing the strut. You should have the sway bar link on hand because it's very easy to damage when you're taking it off, especially when they're rusty. You can get brand new sway bar links from 1aauto.com. You need to remove the sway bar link from the strut.
In a perfect world, this wouldn't be too rusty and it should come off easy, but this looks pretty rusty. You're going to spray some rust penetrant on here. Take a wire brush. Try to knock off some of the rust. This will ideally help the nut turn. 14 millimeter box wrench and our five millimeter Allen key. Fit it in there. Try to kind of hold these as I remove it. Can see some rusty bits coming loose. Let's spray some more rust penetrant. Try to brush it off, just to help and to help this nut spin off of this ball joint part of the sway bar link.
These are typically locking nuts, so the opening in them is kind of an oval shape. Makes it difficult to spin it off. I almost had it. It stripped. This is typically what will happen. It will kind of start to move on you and then it just strips out the Allen key because they're so difficult to remove. The next step you get some locking pliers, put it back here, hold the little part that's exposed to keep it from spinning and keep taking the nut off. Get it loose. I can take it off with my fingers. Just pull this out. Place that aside.
There are two bolts here on the strut. One is holding the brake line on—it's a 12 millimeter. One is holding the ABS line on. This is a 10 millimeter. I'm going to spray some rust penetrant to the backside of these bolts. I'm going to start by removing the brake line. Spray a little bit in here. Use a 12 millimeter socket. Put that aside.
Switch to a 10 millimeter socket for this bolt. Put this aside over here. The strut is mounted to the knuckle. These two large bolts in here: one down here, one up here, our 19 millimeter nuts and 19 millimeter bolt heads. I'm going to spray rust penetrant on them before I try to remove them. Use a 19 millimeter socket and a large ratchet or a breaker bar. If you have a large ratchet, might give you a little more space to work with. I can kind of hold it with this 19 millimeter wrench.
Going to remove this nut. Repeat this for the lower one. It may be easier to go from underneath. Now I've broken it free. I'm going to switch to an extension and a smaller ratchet so I can move it more freely. Still need to kind of hold the bolt with the box wrench. Got pretty loose. I'm just going to remove it with my hand. Just a small hammer to tap it out. Get this top one started. Need too you should be able to pick up on this a little bit. Push in the knuckle, wiggle it around, and pull the bolts out. Leave this upper strut bolt in place.
Now I'm going to go up inside the car and remove the bolts that are holding on the studs. Once this is loose up top, I can remove this lower bolt, and the whole strut assembly should slide out from the wheel well. Back inside the car, there are three nuts on top of these studs that need to be removed so we can lower the strut out of the body. One's over here, there's one here, and then one in the back. It's hard to see. It's behind this one. These are 12 millimeter. I'm going to use the deep socket, loosen them up. The strut might actually start to lower as you loosen this nut off. It actually just slid loose and came down. All right, the strut is loose from the top of the car in the body. I left this bolt in here so the strut wouldn't fall out when I ended the bolts. I'm going to pick up on the strut, ready this out, to get the strut loose. There, the bolt finally came out. The strut is off of the knuckle. Pick it up. Pull it right out of it wheel well.
Here's our original strut assembly. Here's our brand new one from 1aauto.com. It's a complete assembly. No need to decompress the spring.
Install a new spring, or a mount or a bump stop or boot. It's already assembled and ready to go. This matches up to our original one perfectly. It’s got the same type of mount for the strut, the same mounts for the brake line and the ABS line, same mount for the sway bar link, and the same three studs on the top. There's a warning label here. Don't remove this center nut because you'll undo the tension on the spring. You don't need to touch that. You can just take off these nuts to install it, and this should get you back on the road and riding nice.
Install the strut into the wheel opening, and push up on the knuckle. Put the top bolt in. I'm going to actually take this and just tap it in a bit. Capture our nut so it doesn't come out. Now remove the punch. Capture the lower bolt. I need to use the punch to line it up. Just put it in like about halfway and wiggle the strut around. Just got to take the punch again, put it ahead of the bolt and tap it in, and capture that nut. Now it's time to go back up inside the car, push this strut into place and capture the nuts up top.
I'm going to reuse the original nuts because they're in good shape, but we need to get the studs on the strut up through the holes that are in the body here. I have to reach out underneath to get them up through the holes. I'm going to my capture at least one of them. Now I can snug these up evenly to pull them up into the body. Once they get snug, I'll stop. I'll come back and torque them afterwards. I torque these top bolts to 29 foot-pounds. I torque the top and bottom strut mounting bolts to 133 foot-pounds. Just taking up some of the slack by threading this down before I torque it. Same thing in the bottom. With the slack taken up I can counter hold the bolt. Use your torque wrench, torque this to 133 foot-pounds. Repeat the same for the other bolt.
If you bend this shield, just bend it back. Install the ABS sensor bracket. It's a really small little bolt so I'm just going to thread it in. When it gets tight I will stop. Reinstall the brake hose. Goes in place here. Get it started. Until I get tight I'm just going to stop. Reinstall the original sway bar link or a brand new one. Now torque these to 29 foot-pounds. Make sure it doesn't get caught on this trim here, this piece on this trim. I was holding it up. Slide it underneath it. It should line up nice with the bolt hole underneath.
To install the side bolster and put this tab up into the body. Pull the seatbelts out of the way, then slide this up. Kind of see from behind where the tab needs to go. Make sure it doesn't get caught on this trim here, this piece on this trim that was holding it up. Slide it underneath it. It should line up nice with the bolt hole underneath.
Install the side bolster. This part slides down into the back over here of the sheet metal. This bolts into the bottom part here. Watch out you don't grab the seatbelts and kind of just see behind it on this side. Push in. Line up down the bottom.
Now we can lift up these seats to install the lower seat. You want to make sure you don't lose your seatbelt buckles. You can buckle them into the upper seat belts. These are going to go up underneath the back seat. I'm just going to slide it in like this. I'm going to push it forward and push it down into the locks. Repeat that for the other side. Unbuckle your seat belts. Move them lower where they belong. Your seat is reinstalled.
Thanks for watching. Visit us at 1AAuto.com for quality auto parts, fast and free shipping, and the best customer service in the industry.
Tools used
Tools used