Replaces


Frequently bought together
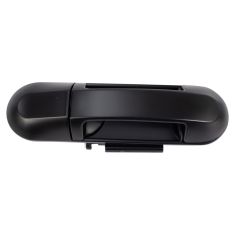
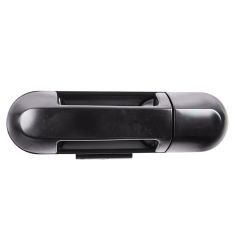
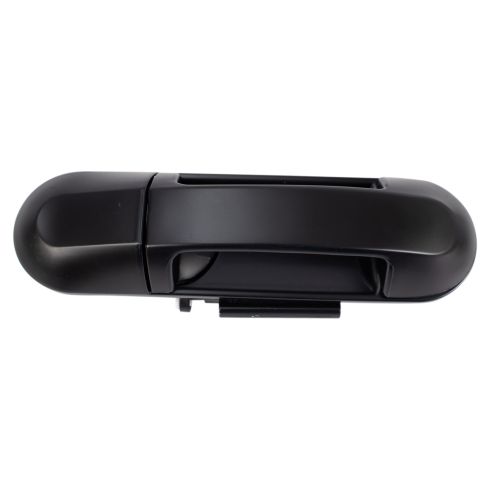
Part Details
About TRQ:
TRQ is a trusted brand dedicated to making every repair a success story by combining premium parts with easy installation. Each TRQ part is engineered by a team of automotive experts to meet or exceed OEM standards, delivering enhanced performance and maximum longevity. With rigorous in-house testing, the brand ensures superior fit and function across every product line. TRQ also provides customers with best-in-class, step-by-step installation videos—so you can complete repairs with confidence, whether you're a first-time DIYer or an industry professional.
Paint To Match Note:
"Paint-to-match finish" refers to a smooth, paintable surface. This item is not painted. Paint offers better coverage and adhesion, but it is not necessary for installation.
Attention California Customers:
 WARNING: This product can expose you to chemicals including Lead and Lead Compounds, which are known to the State of California to cause cancer, and birth defects or other reproductive harm. For more information, go to www.P65Warnings.ca.gov.
Lifetime Warranty
This item is backed by our limited lifetime warranty. In the event that this item should fail due to manufacturing defects during intended use, we will replace the part free of charge. This warranty covers the cost of the part only.
FREE Shipping is standard on Orders shipped to the lower 48 States (Contiguous United States). Standard shipping charges apply to Hawaii, Alaska and US Territories. Shipping is not available to Canada.
Expedited is available on checkout to the United States, excluding Alaska, Hawaii and US Territories as well as P.O. Boxes and APO/FPO/DPO addresses. Final shipping costs are available at checkout.

Created on:
Tools used
Hi, I'm Mike from 1AAuto. We've been selling auto parts for over 30 years! We're dedicated to delivering quality auto parts, expert customer service, and fast and free shipping, all backed by our 100% satisfaction guarantee. We've created thousands of videos to help you install our parts with confidence. That saves you time and money, so visit us at 1AAuto.com, your trusted source for quality auto parts.
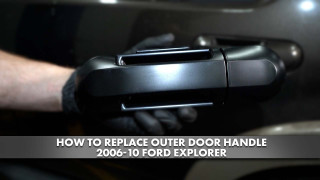
In this video, we're going to be working with our 2006 Ford Explorer. We're going to show you how to remove and replace your rear exterior door handle. This information is the same for the driver and the passenger side, as well as being the same for the chrome, textured or paint-to-match handle.
If you like this video, please click subscribe. We have a ton more information on this truck, as well as many other makes and models. If you need this part for your vehicle, you can follow the link down in the description over at 1AAuto.com.
Here are the items you'll need for this repair: 7-11mm socket, ratchet, socket extension, flat blade screwdriver
Remove these two trim covers here to expose the seven millimeter bolts we need to remove to get our door panel off. You can do this with a small flat blade screwdriver, or, if you want to keep your interior in nice shape, you can use one of the trim tools from our interior trim tool removal set available from 1A Auto. Put that trim tool on the bottom edge here. We'll start at the back. Pry out the clips. Do the same thing here. Just get under one edge. Pop that cover off.
With these covers removed, we can access the two seven millimeter screws in the upper portion of the door handle, the two in the door pull here, and a fifth one at the bottom. We'll remove these with a seven millimeter socket ratchet and extension. Using the same interior trim tool, pop up on the tabs for the window switch and disconnect the electrical connector on the bottom. With the screws removed and the switch out, lift up on the door panel and lay it backwards. Push down on the ears that secure the door release cable in place. You want to use a small flat blade screwdriver to make sure you get some good leverage on there. Push one side in and pull the cable partially out to hold that side compressed before moving onto the other side, at which point you can remove the entire cable from the panel. Pull it out and let the cable through the slot in the top. Rotate it and remove it from the latch. You can now remove your door panel from the vehicle.
Remove the four seven millimeter screws securing the speaker to the door with a socket, ratchet, and extension. With the screws out, carefully remove the speaker from the door. Disconnect the connector on the back and remove your speaker.
Disconnect the motor connector at the bottom. You can use this hook portion of the trim tool or a pair of side cutters or a screwdriver to get behind the pin on the connector. Pop it out of the door. We'll do the same thing for the one on the window switch. With all your harnesses disconnected, you can start removing the weathershield inside of the door. Be careful, as this foam material is a little easy to tear. Keep your hand right where you're pulling to try to prevent the foam from ripping, creating leaks. Inside of the door panel toward the rear where it latches against the body is the door latch assembly.
You'll see a yellow clip here with a latch rod going from the bottom of the door handle into it. With a small flat blade screwdriver, pop this tab open to release the rod. We'll reach through the access hole at the front of the panel for the front nut with an 11 millimeter deep socket and extension and a ratchet. Be sure to hold the door handle into place at the front when you're removing the last nut so it doesn't fall out. Once the nut is removed, lift the bottom of the handle out first and remove the handle from the door.
Here we have the original equipment door handle that we removed from our 2006 Ford Explorer, and we have a variety of replacement options available for this. There's a smooth black, which would be ideal for a paint to match, or you could use it on a black Explorer. A textured black door handle will works if you put all four of them on the car. It looks nice. Or you can upgrade all of your door handles or replace a chrome door handle with this chrome replacement option.
All of these door handles, except for the finishes, are exactly the same. You can see we have the same latch mechanism on the back. the same mounting locations, the same hook for our latch rod, which we will have to reuse from our old part and the handles themselves are all the same in the front.
If you have a broken, cracked, damaged or just a poor appearance on your door handle, these replacement parts from 1A Auto are available individually to replace one broken handle or can be purchased as a kit if you would like to upgrade or change the look of your doors. You'll have to reuse the old latch rod from your door handle. Simply unhooks from that plastic clip. In this particular instance, we're going to be replacing our old door handle with the black smooth or paint-to-match door handle, but this procedure will be the same for the chrome or textured handles. All you have to do is hook your old latch rod right back into the new handle. Your new door handle may come with a thread protector over the studs. You'll have to remove that for install.
Place your new door handle in. It may help to open the handle to help get that inside. Once the studs are lined up, reach into the panel and start the two 11 millimeter nuts by hand. Using an 11 millimeter socket and ratchet, we'll go into the door panel to tighten up the nut at the back. You can use this same setup to tighten the one at the front, but I find it a little bit easier to use an extension and go through that access hole in the door panel. Once the nuts are tightened up, pull down tight on your latch rod while pushing up on this mechanism. Reinstall it into its retainer and snap the clip into place.
Send your wiring back through the openings in the weather shield along with our door handle cable. Line it up and press the adhesive back on. Reconnect the motor harness and snap the clips into the holes in the opening here. Reattach the window switch wire harness the same way.
Reattach the connector to your speaker. Line it up and reinstall seven millimeter screws by hand before tightening them down with your socket and ratchet. Reinstall the cable into the handle.
Send the cable through the slot here. Push the retainers into place until they snap. Sometimes one of these will get caught in there and it'll stay partially compressed, so make sure you wiggle it a little bit, and make sure that it's fully seated and that the window harness comes up through the opening here. Line up your door lock pin. Set the panel into place. Push it down until all the tabs lock into the door. Reconnect your window switch.
Install the panel back into the door until it snaps into place. Reinstall your five seven millimeter screws into the door panel. There's the one black screw at the bottom. It's got the plastic thread on it. Your four machine screws, we'll have two going into the door pull here and two into the handle. A good trick for getting the two screws in at the top, because they're a little difficult up inside there, way at the back, and they'll fall down inside of the door panel if they fall out of your socket, is to just take a little bit of grease. I'm using brake grease, but you can use wheel bearing grease. Coat the head of the bolt with it. You don't need to go crazy here. Just make sure you get a little bit on the flat edges. When you install this into your socket, it'll keep the bolt in place. Reinstall the cover on your door pull. It just snaps into place. The same thing with the one up top on the handle. Make sure you hook the front end in first before snapping the back in.
Thanks for watching. Visit us at 1AAuto.com for quality auto parts, fast and free shipping, and the best customer service in the industry.
Tools used
Brought to you by 1AAuto.com, your source for quality replacement parts and the best service on the Internet.
Hi, I'm Mike from 1A Auto. I hope this how-to video helps you out, and next time you need parts for your vehicle, think of 1AAuto.com. Thanks.
In this video, we're going to show you how to replace a rear exterior door handle on this 2003 Mercury Mountaineer and it's a similar process on these Mountaineers from 2002 to 2010, as well as on the Explorers in the same years and we show on the driver's side but the passenger side is the same procedure. The items you'll need for this are a new rear exterior door handle from 1AAuto.com, a flat blade screw driver and a 7 and 11 millimeter socket and ratchet.
Start off by prying out on the bottom of this panel and then pulling out to release the clips. Then slide it towards the front of the car and off the door handle. Now roll this panel out while pulling up on the front. Slide it forward and then just push the tab on this harness and disconnect it. Then remove this 7mm bolt and this 7mm bolt right here. Now lift your door panel up and out and your door panel's free.
Peel back your water shield in this top corner, and you can see Mike uses a razor blade to help separate the adhesive. Using a flat blade screwdriver pry this clip open and then pull the door handle rod free. To give you more room while you're trying to remove the exterior door handle, we recommend you just lift up this yellow clip on the back of the interior door handle and pull your lock rod free.
Two nuts hold the door handle. One you can access through here, which is this one here and then there's one way back as well. We'll just fast forward as Mike removes both of those. Now open your door handle while pulling it free from the door and by opening it, you're helping that lever at the top to just fit out of the door as you can see. You can push it down with your hand once you get it out far enough and the door handle pulls free.
You may or may not run into this. It's happened on two doors with this vehicle but the stud stayed in there. So we're just going to take a good set of locking pliers, lock on, and, because it's a little easier I'm going to reach through here. I'm holding the nut on the other end with a wrench and turning the stud for the door handle out.
At 1A Auto, our replacement door handles come in black which you can just mount on there and it will be a perfectly good replacement. You could also paint to match. You could be as crude as just going to a hardware store and getting a can of spray paint that closely matches and doing it that way. If you want a better match, go to an automotive part store that has a paint department, they can help you match the paint and put it in an air-charged can and refinish the handle. You would want to remove the gasket when you refinish it. Another option that we have at 1A Auto is, we do sell chrome replacement door handles okay and so this will be add a little bling. Get one for all four doors and put them on there and they're going to mount just like the original. Our original door handle's fine so we're just going to put it back in but all you need to do is take this rod and pull it out, put it into your new door handle, back in, put the rod down in. Put the front in first and then you kind of pull your door handle open and push this rod down in. Okay, and watch the studs to see that they go through the door. Now the handle's on. Actually you're just going to start this one on by hand first. We'll fast forward as he tightens up both those 11 millimeter nuts.
You want to make sure that your door is in the unlocked position. Back is locked and this way is unlocked. Then, you want to hold your lock/unlock switch here, because that's unlocked and that's locked. Hold it in the unlock position, pull it forward to make sure it's unlocked, put it into your clip, and then just lock the clip down. Reclip the door handle rod and just close the yellow clip over it. Push your water shield back into place.
The door panel is held in by all these hooks, so if you take the water shield off for any reason, just make sure that everything is lined up so the hooks can go in easily. You can actually kind of hook the bottom ones on first. Just push the panel up, you may have to move it up a little bit, make sure it goes against the door all the way, and slide it down. Now replace those two 7mm bolts and tighten them up. The top one helps if you feed it back into place with an extension. Reconnect the harness and this tab slides in first. Take this panel and just slide it behind your door handle. Push those tabs back into place. Push the clips back in on the front.
We hope this video helps you out. Brought to you by www.1AAuto.com, your source for quality replacement parts and the best service on the Internet. Please feel free to call us toll-free, 888-844-3393. We're the company that's here for you on the Internet and in person.

DHA48869