Replaces


Recommended for your 2000 Ford Crown Victoria
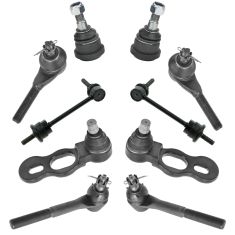
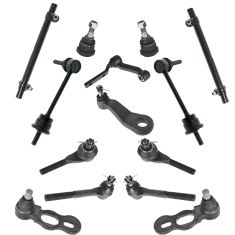
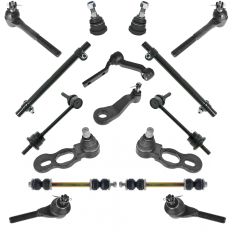
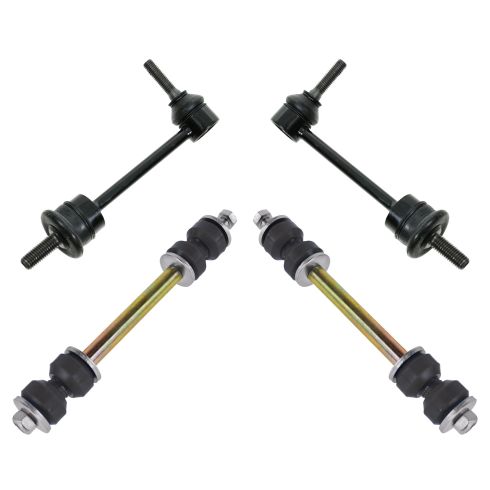
Part Details
Specifications
About TRQ:
TRQ is a trusted brand dedicated to making every repair a success story by combining premium parts with easy installation. Each TRQ part is engineered by a team of automotive experts to meet or exceed OEM standards, delivering enhanced performance and maximum longevity. With rigorous in-house testing, the brand ensures superior fit and function across every product line. TRQ also provides customers with best-in-class, step-by-step installation videos—so you can complete repairs with confidence, whether you're a first-time DIYer or an industry professional.
Our steering and suspension components are pre-greased and sealed for long life and do not require the extra maintenance typically required by greaseable versions.
Attention California Customers:
 WARNING: This product can expose you to chemicals including Lead and Lead Compounds, which are known to the State of California to cause cancer, and birth defects or other reproductive harm. For more information, go to www.P65Warnings.ca.gov.
Lifetime Warranty
This item is backed by our limited lifetime warranty. In the event that this item should fail due to manufacturing defects during intended use, we will replace the part free of charge. This warranty covers the cost of the part only.
FREE Shipping is standard on orders shipped to the lower 48 States (Contiguous United States). Standard shipping charges apply to Hawaii and Alaska.
Shipping is not available to a P.O. Box, APO/FPO/DPO addresses, US Territories, or Canada for this item.
Expedited is available on checkout to the United States, excluding Alaska, Hawaii.
Final shipping costs are available at checkout.
Created on:
Tools used
Brought to you by 1AAuto.com, your source for quality replacement parts and the best service on the Internet. Hi, I'm Mike Green. I'm one of the owners of 1A Auto. I want to help you save time and money repairing and maintaining your vehicle. I'm going to use my 20 plus years experience restoring and repairing cars and trucks like this to show you the correct way to install parts from 1AAuto.com. The right parts installed correctly. That's going to save you time and money. Thank you and enjoy the video.
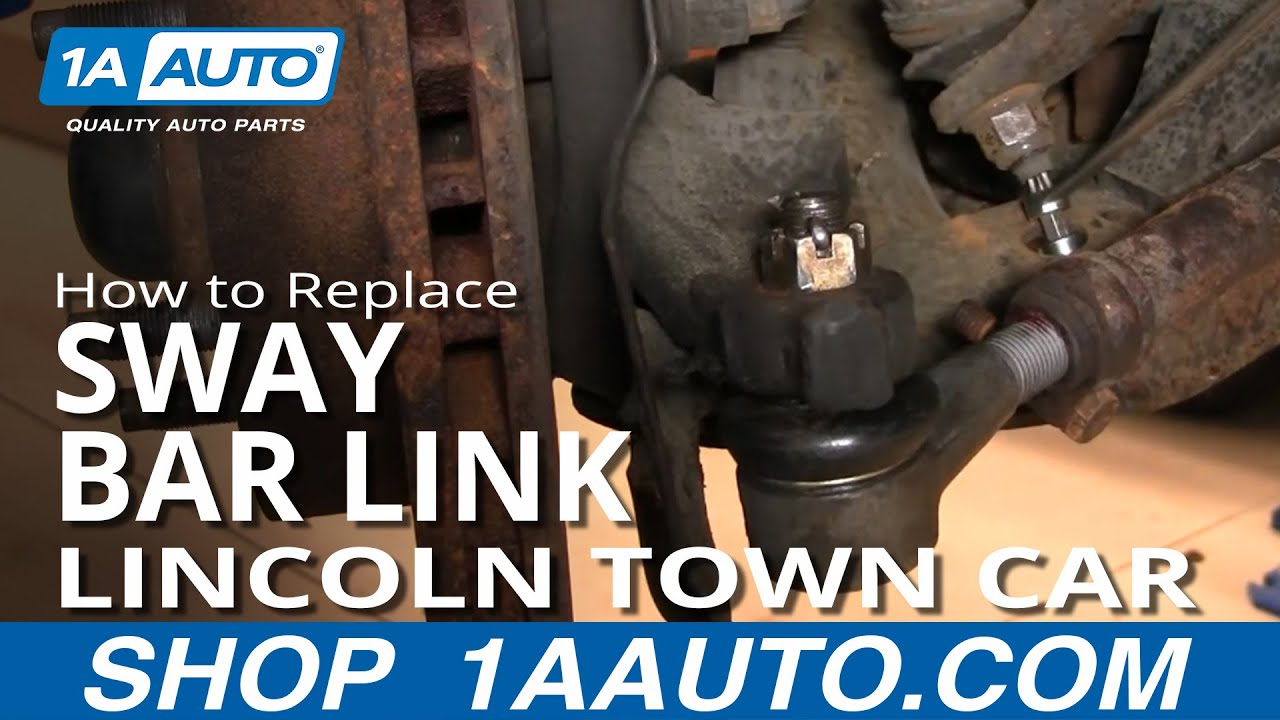
In this video, we're going to show you how to replace the stabilizer, or sway bar end link, on this 2000 Lincoln Town Car, same as any '98 to '02. Tools you'll need are a 13/16th socket and ratchet or your tire iron, jack and jack stands, 15 and 18mm wrenches, T40 Torx bit, an adjustable wrench, and a quarter inch wrench or whatever size to grab on to that T40 Torx bit. We're going to start off. Remove your center cap. If you're using hand tools, you'll want to loosen your lug nuts while the wheel's on the ground first then raise the car off the jack, secure it with the jack stand, and then remove your lug nuts. I have the benefit of air tools. These are 13/16ths lug nuts. We'll just speed it up here as we remove those lug nuts and then remove the wheel and tire. Pull or turn your steering wheel so you can easy access to the tie rod. In order to remove your stabilize link, you then do 2 bolts, one here that is a 18mm and one up here that's a 15mm. What I do on bolts like this that you can only get to with a wrench, put a wrench on it. Then you can hook another wrench on and then carefully push. Gives us more leverage. Loosen it up, same thing down here.
Same thing down here. I'll put this wrench on. I'm going to be pulling this one. I'm going to hook my other wrench. I'm going to pull carefully while it moves. I believe it looks like the whole shaft is spinning. Most likely, this stud is going to spin on you. I going to put the ... and you see right there the wrench is moving and that stud is moving as well. Put the wrench on. This is a T40 Torx bit. I have to give the Lincoln engineers a little bit of grief because this is difficult. They probably have some special tool. Got that T40 Torx bit on there. Now I'm going to put my adjustable wrench on. Tighten it up as much as I can. Now that Torx bit just want to get that one on better here. Sorry you can't really see that probably, but this wrench is holding that Torx bit so I can then spin this here. Eventually it will come apart. What I'm going to have to do is pull this back off, now that it's loose. I'm going to coat this bolt with penetrating oil. 15mm wrench. On this one, I'm going to use a punch. Just punch that right out. Now to continue, I got a quarter-inch wrench here, which is the same size as my Torx bit. I'm going to feed my Torx ... I'm actually going to put my quarter-inch wrench in there, feed my Torx out through the wrench and into the tie rod. I didn't start with this because of the angles.
This actually didn't really work. I had to put it up in there and grab it with the adjustable wrench. Now it does, so I just let the quarter-inch wrench go there. It holds it and I just take the nut off. There's your link out. It's a new link from 1A Auto. You can see it has grease-able fittings. I'm going to put it down in at the bottom first, so get the bottom through. Start my larger nut on and now the top. I'm going to force that into the knuckle. Putting it together is much easier because the link is nice and tight. You can just tighten up the bolts with your wrenches. They probably have Torx specifications, but if you get them nice and tight with the combination wrenches, you'll be good enough. We tighten up the lower one and then tighten up the upper one. Now we're going to fast forward through putting the tire back on. Thread the lug nuts on by hand. I use my impact wrench just to tighten them preliminary then lower it down to the ground, Torx them to 100 foot-pounds using a star pattern, and then put my center cap back on.
We hope this helps you out. Brought to you by www.1AAuto.com, your source for quality replacement parts and the best service on the Internet. Please feel free to call us at toll free, 888-844-3393. We're the company that's here for you on the Internet and in person.
Tools used
Brought to you by 1AAuto.com, your source for quality replacement parts and the best service on the Internet.
Hi, I'm Mike from 1A Auto. I hope this how-to video helps you out, and next time you need parts for your vehicle, think of 1AAuto.com. Thanks.
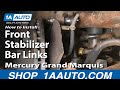
In this video, we're going to replace a front stabilizer bar link on this 2000 Mercury Grand Marquis, pretty much the same process for a '98 to 2011 Grand Marquis or Ford Crown Victoria. We do the passenger side. Obviously the driver side is the same procedure. We do recommend that you replace these in pairs. Tools you'll need are Jack and Jack Stands, your tire iron or 21mm Socket with a breaker bar, basically what you need to get the wheel and tire off, 15mm and 18mm wrenches and a 5mm Allen wrench.
Start out by removing the wheel cover. You pry off the center cap then there should be a key somewhere in your car, in the glove compartment. Remove the center nut and then pry the wheel cover off. If you don't have air tools, you'll want to loosen the lug nuts with the wheel on the ground. Then, raise and support the vehicle. We'll loosen them. I'm going to fast forward here as I just remove those lug nuts. Set aside that bracket that holds the hub cap and take the wheel and tire off.
The stabilizer bar is held on, right there, with the bolt. I'll put some penetrating oil on it. There's another bolt down here. On top is a 15mm. I like to put the wrench on there and take another wrench, hook it right in. It's a little tight to get a socket and ratchet on there. We're actually on there with this method. It gives you more leverage. Nice and slow. The bolt should come loose pretty easily. This bolt in here is an 18mm. Do kind of the same thing. Get the wrench on it. Put my 17mm wrench on and pull. Nice and easy. It starts to move. I'm going to look at the stud and see if it's moving. It's starting to move. I'm going to come up through this hole with the 5mm Allen wrench. Put that in there. I'm going to speed up here as I just keep working that wrench with the Allen wrench holding it. It will get difficult to hold that Allen wrench so I'm just giving a shot underneath. I stick a wrench on there to hold the Allen wrench, to give you some more leverage. Just keep fast forwarding here as, like I said, I just work that bolt right off. We'll keep the high speed action going, here, as we go back up to the top and remove that bolt the rest of the way. I go back to using the wrench for some extra leverage as that bolt gets a little more difficult to remove as it gets farther off the stud. I just want to take . I'm using a chisel, and some type of impact tool to drive the top out. It's coming through so far. I'm just using a smaller extension here, to get it the rest of the way out.
The new link from 1A Auto is much easier to use. It has a nut here that you can grab on to with the wrench. This makes it a lot easier to put in. You may want to put in a grease fitting here and a grease fitting down here. Those come with it. Just use a small wrench to put them in. They're already installed. This one points up and away so that's easy to get grease in there.
Here, I basically take the bolts off first, and then, you want to get the bottom in first. What you might need to do is just grab hold of the stud on the bottom and position it so you can get it into the stabilizer bar. Now, use a jack and jack up the lower control arm until you get into a position where you can work the upper stud into the top of the steering knuckle. You can remove your jack and put on the nut on the upper side and use your 15mm wrench to tighten it up and then grab on to a larger wrench, give yourself some extra leverage and get it nice and tight. You don't have to get it incredibly tight. It probably has specifications, around 50-55 ft-lbs but it's pretty hard to get it to work down there so just use a wrench and get it nice and tight. Do the same thing with the lower nut. I was pleasantly surprised on the 1A Auto part, the lock nut was able to go on and it didn't make the stud twist. I was able to get it on, tighten it up and these probably tighten to a spec of 65-70 ft-lbs. It's pretty tough to get any kind of a torque wrench on there. I just got it nice and tight with the wrenches that I had.
Put your wheel and tire back on. Start all the lug nuts with the little bracket for the wheel cover and just preliminary tighten them with the impact wrench or your socket and ratchet. With the wheel on the ground, use a torque wrench and tighten them to about a 100 ft-lbs using a star pattern then put your wheel cover back in place. Put the center safety bolt back in, tighten it up, make sure it's all on there good. Always make sure you put your key back in the glove compartment.
We hope this video helps you out. Brought to you by www.1AAuto.com, your source for quality replacement parts and the best service on the Internet. Please feel free to call us toll-free, 888-844-3393. We're the company that's here for you on the Internet and in person.

PSA55853