How to Replace Variable Valve Timing Solenoid 2001-07 Toyota Highlander L4 2-4L
Created on: 2018-01-29
New Variable Valve Timing Solenoid from 1AAuto.com How to repair, install, fix, change or replace a broken or snapped variable valve timing solenoid on 01, 02, 03, 04, 05, 06, 07 Toyota Highlander L4 with the 2.4-liter engine
-
step 1 :Removing the Variable Valve Timing Solenoid
- Remove the two 10mm bolts from the engine cover
- Remove the engine cover
- Disconnect the solenoid
- Remove the 10mm bolt from the solenoid
- Remove the solenoid
-
step 2 :Installing the Variable Valve Timing Solenoid
- Remove the 10mm bolt from the bracket
- Apply white grease or engine oil to the threads
- Insert the solenoid into place
- Tighten the 10mm bolt to the solenoid
- Tighten the 10mm bolt to the bracket
- Connect the sensor wiring harness
- Replace the engine cover
- Tighten the two 10mm bolts to the engine cover
Tools needed
-
Socket Extensions
Flat Blade Screwdriver
Pry Bar
White Grease
10mm Socket
Ratchet
Engine Oil
Hi, I’m Mike from 1A Auto. We’ve been selling auto parts for over 30 years!
To open the hood we have to pull the release inside the car. It's just inside, right around your left knee on the driver's side. Release the secondary or safety release. Just kind of feel around for it. This one is right here. Squeeze up.
Going to remove these two top nuts that hold on the appearance cover. They are 10mm, so I'm using a 10mm socket ratchet and extension. They should just thread off real easily. There's our appearance cover. It's got some foam inside. That's just for noise. It just keeps the noise down from the valve train.
The variable valve timing solenoid is located in the back of the head right here. There's a bolt that's on the bottom, but before we can remove the bolt we need to unplug it from the electrical connector. Just going to push down to open the lock. Sometimes you have to push the lock down ... Push the lock to open it and then push the connector in a little bit and then pull it off. This one is pretty gummed up with oil. Just kind of pushing it down at the same time, wiggling it off. Going to need to use two hands probably. If it's too hard to push with your fingers, like this one, use a flat bladed screw driver.
Try to push it open like that and push the connector off. If these connectors are really stuck, take some water displacement oil and spray it in here to try to free up some of the gunk that's in there, the dirt. This oil is pretty inert. It won't really hurt anything. It'll help free up some of the gummed up dirt that's in there. Just kind of wiggle it in and out without even trying to unlock it. It's unlocked.
Now I can pull it off. To give me some extra space there's this vacuum line that runs down here and it's connected into this clamp. I'm going to push it out of the clamp so I can move it out of the way. It's a 10mm bolt. I'm going to reach down in with the extension, and you really just have to feel for this bolt. It's kind of like directly underneath the solenoid. It's very hard to see, so I'm just kind of working blind, doing this by feel. Got the bolt carefully coming out.
Here it is. Now I need to get this out of the head, so I'm just going to wiggle it back and forth and work on pulling it out. It's got an O-ring in there. It's probably stuck in the head in this heat and age and time. I'm just going to keep working at it until it comes out. Use a pry bar and just carefully pry it out. Push that vacuum line back out of the way. There is the solenoid.
Here's our original variable valve timing solenoid and our brand new one from 1AAuto.com. Same style mounting, same style connectors, similar in overall design. This should work great and fit perfectly in our vehicle. If this bracket is in the way with this bolt we'll remove it. It's a 10mm bolt. The bolt head kind of interferes with the solenoid when you're trying to install it.
You can put a little bit of white grease on this O-ring or some engine oil. That way it slides into place easily and doesn't rip. It looks like our solenoid mounting hole goes towards the bottom. Line that up at about that bolt there. It slides straight in. Get it lined up vertically. That looks pretty straight going up and down. Because I can't see the mounting bolt I'm going to take a little bit of masking tape and put it on the bolt head. Even if it doesn't stick very well, it'll just make it that much tighter inside the 10mm socket so it doesn't fall because I need to maneuver it in here and I don't want to drop the bolt.
I wiggle the solenoid around and I've got the bolt in the opening for it. It feels like I've got it in the opening, in the threaded hole in the head. Get it started by hand and then I'm going to get a ratchet on the end of this extension and finish tightening it. Just hold the extension and then as it gets tight, only about seven pounds, so I'm just going to hand tighten it and go a little bit more, and that's all it takes. The solenoid is installed.
Now you're going to connect the electrical connector, click on it once it's into place. I do need to put this bracket back in. Get that started in the threaded opening. Get that tight. Put this vacuum line back into it. The variable valve timing solenoid is now installed.
Reinstall the plastic engine cover. I wiped it down with a rag to clean some of the dirt off of it, make it look a little nicer. Get it lined up over those studs. It'll sit right down. Reinstall the nuts. Actually just do these hand tight. They don't need to be super tight. The job is complete.
Thanks for watching. Visit us at 1AAuto.com for quality auto parts, fast and free shipping, and the best customer service in the industry.
Shop Products
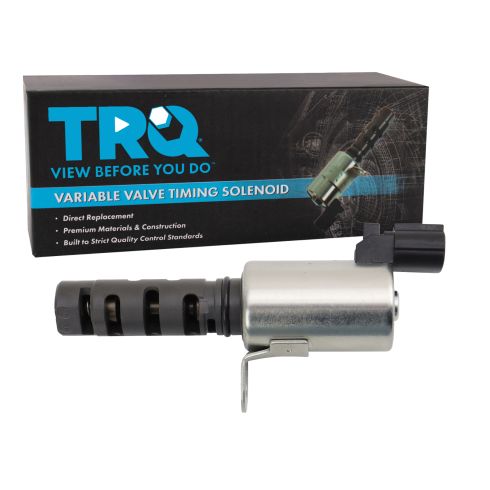
Toyota Lexus Scion Variable Valve Timing Solenoid TRQ VTA93419
Part Details:
- No
- 1
- Female
- 2
- Blade

Top 5 Problems Chevy Equinox SUV Second Generation 2010-17
Want to know what problems to look out for with the 2nd generation Chevy Equinox? Check out this video!
