How to Replace Upper Control Arm and Ball Joint 2002-05 Mercury Mountianeer
Created on: 2014-10-17
Learn how to replace the upper control arm and ball joint on your 02-05 Mercury Mountaineer or Ford Explorer with this video from 1A Auto
-
step 1 :Removing the Wheel
- Pry off the center cap with a flat blade screwdriver
- Loosen the lug nuts with the vehicle on the ground
- Raise the vehicle with a floor jack
- Secure the vehicle on jack stands
- Remove the lug nuts
- Pull off the wheel
-
step 2 :Removing the Control Arm
- Remove the 18mm nut from the control arm
- Thread the nut onto the control arm a couple threads
- Tap the wheel knuckle with a hammer until it separates from the control arm
- Hammer the axle out with a hammer and pry bar
- Remove the 18mm nut from the control arm
- Pull the wheel knuckle forward
- Remove the 10mm bolt from the brake sensor bracket
- Pull off the brake sensor bracket
- Disconnect the brake sensor wiring harness
- Remove the two 21mm nuts that hold the control arm to the frame
- Maneuver the control arm out
-
step 3 :Installing the Control Arm
- Tighten the two nuts on the control arm shaft preliminarily
- Maneuver the control arm into place
- Push the control arm washers into place
- Fasten the two 21mm nuts onto the control arm
- Tighten the two 21mm nuts to 110 foot-pounds of torque
- Push the control arm stud into the wheel knuckle
- Fasten the 19mm nut onto the control arm
- Tighten the 19mm nut to 90 foot-pounds
- Put the brake sensor harness into place
- Insert the 10mm bolt into the brake sensor bracket
- Connect the brake sensor wiring harness
- Support the suspension at ride height with a jack
- Tighten the control arm shaft nuts
-
step 4 :Reattaching the Wheel
- Slide the wheel into place
- Start the lug nuts by hand
- Tighten the lug nuts preliminarily
- Lower the vehicle to the ground
- Tighten the lug nuts to 100 foot-pounds in a crossing or star pattern
- Reattach the center cap
Tools needed
-
21mm Socket
A Piece of Pipe (for leverage)
Hammer
Torque Wrench
Pry Bar
Jack Stands
18mm Socket
19mm Socket
10mm Socket
Ratchet
Floor Jack
22mm Socket
Brought to you by 1AAuto.com, your source for quality replacement parts and the best service on the Internet.
Hi, I'm Mike from 1A Auto. I hope this how-to video helps you out, and next time you need parts for your vehicle, think of 1AAuto.com. Thanks.
In this video, we're going to show you how to replace the upper control arm with the ball joint in this 2003 Mercury Mountaineer. It's the same process on the Mountaineers from 2002 to 2005 as well as the Ford Explorer. We show you the passenger's side; the driver's side the same procedure. You need new upper control arm or arms from 1AAuto.com, 10 to 22mm sockets with ratchets and extensions, some pipe or a breaker bar for extra leverage, hammer, jack and jack stands, torque wrench and a pry bar.
Pry off the hub cap by using a flat blade screwdriver in this small slot on the side. Once you get it started, you can just pull out around the edges. We'll just fast forward as Mike removes those 19mm lug nuts. If you don't have air powered tools, you want to loosen them while the vehicle is on the ground, raise the vehicle and remove them the rest of the way. Now you can pull the wheel free. Now remove this 18mm nut. We'll fast forward as Mike does that and you can see he's using a piece of pipe for some extra leverage. Once you remove that nut, just put it back on a few threads and then take a hammer and just hammer your wheel knuckle. You want to do this until it breaks free and slides down the stud.
On the back of your axle here, just place a pry bar and just hammer the axle out. That's loose. Now remove that 18mm nut and pull your wheel knuckle forward. You want to make sure that the axle's free so that it won't get damaged if the knuckle falls forward.
Then come up here, just push the tab on this harness and disconnect it. Now remove this 21mm nut and this 21mm nut right here. To make it easier to remove those, just remove this 10mm bolt right here that holds this bracket in place. Then, using a piece of pipe for some extra leverage, just remove those nuts. Now just maneuver the upper control arm down and out. You just want to work out one side at a time and kind of feed it back. The inner fender is in the way here. All right, so that's out now.Once you get that end out then just move the other end out.
Up top is the old upper control arm, below it is the new one from 1A Auto. You can see they're identical and they'll fit exactly the same. Tighten up the nuts on the end of the shaft just enough so that they're just a little tighter but the shaft will still rotate. This just helps you so you don't have to do it so much when it's installed in the car and it's harder to get to. Feed your new upper control arm back into place. You want to maneuver it kind of the same way you maneuvered it to get it out just in reverse. Then take these washers and they have two tabs that you want to push up into those two holes. It fits into place and then you just replace the nut. The green side goes towards the front to the vehicle on this side and then pink one goes towards the back. You just repeat the process on this pink one and replace the nut. Then we'll fast forward as Mike tightens both of those up. Now torque both of those to 110 foot-pounds.
Push the stud back into the wheel knuckle and then replace that 19mm nut. Make sure your axle's pushed all the way back in and it should just feed right back into place and then tighten up that 19mm nut. Then just torque that nut to 90 foot-pounds. Replace this bracket and the 10mm bolt that holds it into place and tighten it up. Reconnect this harness. We've got the jack supporting it and the vehicle's level so the suspension is in its correct ride position and we want to tighten up the end bolts on the control arm.
Replace your wheel and then replace all the lug nuts and tighten them preliminarily. Then you want to lower the vehicle and tighten them the rest of way and then torque each of these in a crossing pattern to 100 foot pounds. Now replace your hub cap and we do recommend that you have your alignment checked and adjusted if necessary.
We hope this video helps you out. Brought to you by www.1AAuto.com, your source for quality replacement parts and the best service on the Internet. Please feel free to call us toll-free, 888-844-3393. We're the company that's here for you on the Internet and in person.
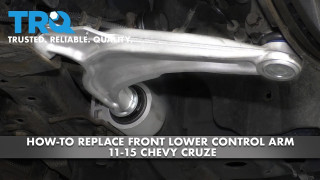
How to Replace Front Lower Control Arm 2011-15 Chevy Cruze
Control arms are a crucial part of the suspension system of your vehicle. They carry the load of the vehicle to the wheel and maintain its alignment. Control arms are large and strong. They contain rubber bushings for smoother rides at the cost of eventual wear. How to install a new quality TRQ lower control arm in your 2011-15 Chevy Cruze.
