How To Replace Transmission Transfer case Tailshaft Seal 1984-91 GMC Jimmy
Created on: 2010-06-19
Watch this video to learn how to fix a leaking transmission. The experts at 1A Auto show you how to replace the transmission driveshaft seal on your 1986 GMC Jimmy.
-
step 1 :Removing the Tailshaft Seal
- Remove the four 7/16 bolts from the driveshaft
- Scratch with a screwdriver as a reference point.
- Pull the driveshaft out.
- Place a catch pan under the front of the driveshaft.
- Pull the driveshaft out.
- Use a hammer and screwdriver to get under and pry out the gasket.
-
step 2 :Replacing the Tailshaft Seal
- Clean the area with paper towels.
- Push the gasket into place.
- Make sure it's in evenly and flush all the way around.
- Cover the front end with transmission fluid.
- Push the front end into place.
- But the back end into place.
- Replace the four bolts. Torque to 20ft/lbs.
- Replace the lost transmission fluid.
Tools needed
-
7/16 Inch Wrench
Hammer
Flat Blade Screwdriver
Torque Wrench
Paper Towels
Drain Pan
Brought to you by 1AAuto.com, your source for quality replacement parts and the best service on the internet.
Hi. I'm Mike Green. I'm one of the owners of 1A Auto. I want to help you save time and money repairing and maintaining your vehicle. I'm going to use my 20 plus years experience restoring and repairing cars and trucks like this to show you the correct way to install parts from 1AAuto.com. The right parts installed correctly. That's going to save you time and money. Thank you and enjoy the video.
In this video we are going to show you have to replace the transmission or transfer case tail shaft on this 1986 GMC Jimmy. This procedure is really the same for many different rear wheel drive vehicles. The tools may differ a little bit. For this truck you need actually a 7/16 inch wrench to disconnect the drive shaft. You will need a hammer or rubber mallet, flat blade screwdriver and a torque wrench.
If you've got one of those cars you're a little embarrassed to drive somewhere because anywhere you go you leave your little signature such as this truck likes to leave a little bit of red transmission fluid behind. You can see right here there's a seal and this seal has gone bad so it allows transmission fluid to come out the back and then go all over the place. I kind of like it on this truck because it keeps everything nice and oily and doesn't rust, but it's getting old as far as leaking on my driveway and other people's driveways.
The first thing I'm going to do is I'm going to remove the drive shaft by taking off these four bolts. On these GM vehicles most of these bolts are 7/16. Actually I have the truck in neutral which is a little bit of a mistake. It's a lot easier if you leave it in gear, but if you're quick with your wrench you can generally get them loose. The other thing is if I twist the drive shaft and then give a pull on the wrench. We will remove all four of these. Really the best thing is to leave these on just a little bit because you want to try and put the yolks in the same place.
I'm going to use a screwdriver and scratch in here a bunch. Scratch on here a little bit. That just lets me know this is how the drive shaft goes into this side of the rear end. Now you want a larger screwdriver or a pry bar. The drive shaft comes out. There's the front of the drive shaft and you can see I've got a catch pan underneath. You want to make sure you do that because on some transmissions when you pull the driveshaft out you will lose fluid. This bearing, right here, I just bent it over. That's all you want to do is be careful not to damage this aluminum of the transmission housing or elk shaft. You just want beat that metal up so you can get in there.
I'm just going to take a paper towel and clean up the tailshaft in there a little bit. We've got our new seal here. We just tap in a little bit. Now a special made tool. Make sure you're nice and flush. Tap it in nice and evenly and make sure it gets well seated. You want to make sure it's sealed evenly all the way around. Good. I'm just going to give it a couple more square taps. Now I'm ready to put my driveshaft back in. I'm going to wipe down the yolk a little bit. I'm actually just going to take a little bit of automatic transmission fluid and put it all in there. Wipe it up and down and around. Get a little inside. I've got my scratched side on this side and it's going into the scratched side on the rear end. This might take a little convincing with a rubber mallet to get it beyond a certain point, but then once it's on there it's good. The yolks know how to lay. Then put these down. Then you are going to tighten these. I've got my torque wrench set to 20 foot pounds. Believe it or not that's all we want on these. Really these just kind of hold the u-joint in and the u joint really presses on the big metal flange here. The last one. Now the last thing is we're going to start it up. Get it warmed up. Fill up the transmission. Make sure it has the right fluid level and then we're good to go.
We hope this helps you out. It was brought to you by www.1AAuto.com your source for quality replacement parts and the best service on the internet. Please feel free to call us toll free 888-844-3393. We are the company that's here for you on the internet and in person.
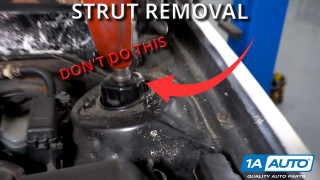
Most Common Strut Installation Mistakes
Len shows you the most common mistakes, and what can happen if you aren't paying attention!
