How to Replace Tie Rod 1998-2005 Mercury Mountaineer
Created on: 2014-10-17
Learn how to replace the outer tie rod on the 98-05 Mercury Mountaineer and Ford Explorer from our experts in this how-to video
-
step 1 :Removing the Wheel
- Pry off the center cap with a flat blade screwdriver
- Loosen the 21mm lug nuts with the vehicle on the ground
- Raise the vehicle with a floor jack
- Secure the vehicle on jack stands
- Remove the lug nuts
- Pull off the wheel
-
step 2 :Removing the Outer Tie Rod
- Measure the distance from the boot of the inner tie rod to the edge of the outer tie rod
- Make note of this measurement
- Remove the cotter pin with a pair of pliers
- Remove the 19mm ball joint nut
- Loosen the nut that holds the outer tie rod to the inner tie rod with an adjustable wrench
- Remove the 18mm nut from the outer tie rod end
- Strike the steering knuckle with a hammer to loosen the outer tie rod
- Pull the outer tie rod out of the steering knuckle
- Twist off the outer tie rod by hand
-
step 3 :Installing the New Outer Tie Rod
- Twist the new outer tie rod onto the inner tie rod
- Push the outer tie rod into the steering knuckle
- Fasten the 19mm castle nut onto the outer tie rod
- Tighten the castle nut to 50 foot-pounds of torque
- Push the cotter pin through the castle nut
- Twist the cotter pin into place with needle nose pliers
- Attach the grease fitting to the new outer tie rod
- Tighten the grease fitting with a 7mm socket and ratchet
- Fill the tie rod with grease, using a grease gun
- Measure the distance from the boot of the inner tie rod to the edge of the outer tie rod
- This should be the same as the measurement noted in Step 2
- Tighten the nut that holds the outer tie rod to the inner tie rod with an adjustable wrench
-
step 4 :Reattaching the Wheel
- Slide the wheel into place
- Start the lug nuts by hand
- Tighten the lug nuts preliminarily
- Lower the vehicle to the ground
- Tighten the lug nuts to between 100 foot-pounds in a crossing or star pattern
- Reattach the center cap
Tools needed
-
Adjustable Wrench
A Piece of Pipe (for leverage)
Torque Wrench
Hammer
Jack Stands
19mm Socket
Grease Gun
21mm Socket
Measuring Tape
7mm Socket
Ratchet
Floor Jack
Needle nose pliers
Brought to you by 1AAuto.com, your source for quality replacement parts and the best service on the Internet.
Hi, I'm Mike from 1A Auto. I hope this how-to video helps you out, and next time you need parts for your vehicle, think of 1AAuto.com. Thanks!
In this video, we're going to show you how to replace an outer tie rod on this 2003 Mercury Mountaineer. We show you on the passenger side, but the driver side is the same procedure. The items that you need for this is a new outer tie rod from 1AAuto.com, a 7mm, 19mm, and 21mm socket and ratchet, a piece of pipe for some extra leverage, two adjustable wrenches, a pair of pliers, a hammer, a tape measure, jack and jack stands, and a torque wrench.
Pry off the hub cap by using a flat blade screwdriver in the small slot on the side. Once you get it started, you can just pull out around the edges. If you don't have the benefit of air tools, you'll want to start with the vehicle on the ground, loosen the lug nuts, then raise and support the vehicle on jack stands. Remove the lug nuts, wheel, and tire the rest of the way.
There's a small indent on the inner tie rod. Put the tape measure there and measure out to the center of the grease fitting, which is 9-1/16" in this vehicle. Then, just bend off the legs on your cotter pin on the bolt. Then just pull the cotter pin out with a pair of pliers. Then, using a 19mm socket and ratchet, just remove this nut. Spray this nut with some penetrating oil, and then, using two adjustable wrenches, just separate it. Once it turns, it's loosened up, and you can hammer your wheel knuckle until you see the outer tie rod move. You can see it move right there.
Now you can pull it up and out of the knuckle and twist off the outer tie rod. Up top is the old outer tie rod, and below it is the new one from 1A Auto. You can see they're identical, and they'll fit exactly the same.
For lineup purposes, ideally what you want to do is be able to remove this without turning the inner tie rod. Our bolt or nut didn't come loose. That's not a big deal, but it does mean that we will need to take this and have it aligned because we did turn the inner tie rod a little bit, but we can still put it back together. We'll fast-forward as Mike twists on the new outer tie rod. Remove the nut and then line up the outer tie rod with the hole on the wheel knuckle. You may need to move the wheel knuckle around a bit until it goes down in place. Once you get it in, replace that nut and then just tighten it up. You want to tighten this to about 50 foot-pounds. Once it's fully tightened, make sure the hole lines up with the castle nut, and you may need to turn it a bit more so that it lines up, and then just push your cotter pin through and bend the tabs in opposite directions.
Tighten that nut back on to the outer tie rod using your two adjustable wrenches. Put in your new grease fitting and tighten it up with a 7mm socket and ratchet. Now, just add a few squirts of grease into the grease fitting. Replace your wheel, and then replace all the lug nuts and tighten them preliminarily. Then, you'd want to lower the vehicle and tighten them the rest of the way and torque these in a crossing pattern to 100 foot-pounds. Replace your hub cap, and we recommend you have your front alignment checked and adjusted if necessary.
We hope this video helps you out. Brought to you by www.1AAuto.com, your source for quality replacement parts and the best service on the Internet. Please feel free to call us toll-free, 888-844-3393. We're the company that's here for you on the Internet and in person.
Shop Products


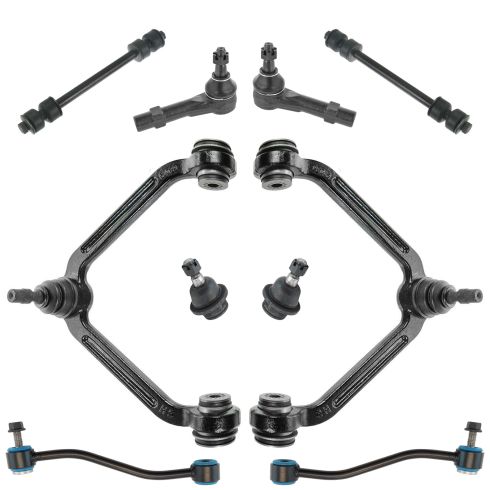
2001-05 Ford Explorer Sport Trac Front & Rear 10 Piece Steering & Suspension Kit TRQ PSA63432
Part Details:
- (2) Front Sway Bar Links
- (2) Rear Sway Bar Links
- (2) Front Lower Ball Joints
- (2) Front Outer Tie Rods
- (2) Front Upper Control Arms with Ball Joints
- 10 Piece
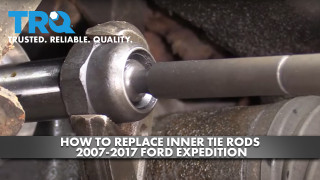
How to Replace Inner Tie Rods 2007-17 Ford Expedition
This video shows you how to replace the inner tie rods on your 2007-2017 Ford Expedition.
