How to Replace Rear Washer Pump 2003-11 Honda Element
Created on: 2018-12-17
How to repair, install, fix, change or replace a broken, damaged, split or leaking windshield washer pumpon 03, 04, 05, 06, 07, 08, 09, 10, 11 Honda Element
Tools needed
-
Socket Extensions
Flat Blade Screwdriver
Rust Penetrant
8mm Socket
Drain Pan
Ratchet
Needle nose pliers
Trim Tool Set
Hi, I'm Mike from 1A Auto. We've been selling auto parts for over 30 years.
Hi, everyone. Sue here at 1A Auto and today I'm going to show you how to replace a washer pump in an 06 Honda Element. If you need any parts for your car, click on the link below and head on over to 1aauto.com.
Okay to start with we have to take the front bumper off so I'm going to raise my vehicle up on a two post lift. You can use a jack and jack stands at home. And you're going to get all the bolts underneath first. So to start with the bumper, I'm going to take the outer cover off, and there is two on each corner, 10 millimeter socket style bolts, and they're probably pretty rusted. Which you can't get up in there with a spray unfortunately. See if this one will come down or if it's spinning in place. Yep. I'm going to try to get some spray up there because this clip does have a cutout right here. I'm going to have to let that soak. And this one I think is spinning in place over here. Get these ready.
So at this point where you tried to remove these little bolts here holding, so they're middle clips with welded nuts on them that hold the plastic down and they're so rusted that the nut has broken off on the metal clip. So all four bolts on--two on that side, two on this side are just spinning in place. So what we're going to do is bring it back down, and we're going to disconnect the top of the bumper and see if we pry it out. If we can access these and go from that point.
So I'm going to remove this plastic clip that's still intact. The other one's missing. So now I've got one piece out from underneath. Now I'm going to bring it down halfway because I got to go in the fender well, and see if I can take the two bolts out from the fender well. I'm going to take the fender flare, this bolt off both vendors so that I can access the bumper, goes in here on a clip. That's an eight millimeter socket. I'm going to do the same thing to the other side. So obviously everything on this vehicle is somewhat broken and causing havoc. So you just got to get this piece out. So now we're going to move on to this one. Hope they all don't break. There's five total on this. Look at that, just like the way it's supposed to go.
So, obviously, we're going to have to get a whole bunch of body clips for this vehicle because we just started and this is how much they're all just coming apart and breaking. They're so brittle. Let's see what we get. There we go. Now we just simply lift this up. There you go. Now we're going to remove all the other plastic clips that we see up here. I think I'm going to have to use multiple tools at the same time to try to save some of these. It's like they made of steel. I've never seen anything like it. Okay, let's move on to the three on each headlight. Okay we'll move over here.
So the reason we're changing these headlights--they're not as foggy as they could be. I've seen a lot worse. But something else that's pretty common with these Elements is these ears break off. There's a lot of weight on this front nose design and I think that has a lot to do with it. The cold and just tapping, you tap it. Both headlights are broken on the assemblies, and that will give an improper headlight alignment. So obviously you go down the road and headlights will shake or they're not lined up properly.
So I took this bolt out and I took these other two body clips out. I'm going to take this one last one here just to give it a little bit more flex. And now you need to pull this. I'm going to pull this flare out like that. You've got this ear tab that goes over there. See its mounts right over that screw part. And then this, these are plastic push ins, so you're just going to grab it from the top, pull it out. Now we got to do the same thing to the other side. So the clip on the inside of this fender well's just spinning. So I'm going to try a pair of angled needle nose pliers to try to hold that clip in place while I take my eight millimeter socket. See if I can spin this free. Perfect. I'm just going to keep moving the broken clips. Just going to remove as much as I can. So now I can pull this flare out, grab the bumper and give it a pull. There we go. Now it's lowered down--let's see if we can get to these broken tabs on the bottom.
So now that we have access to the bottom mounting bolts, you see the clip is broken. I'm going to use a pair of locking needle nose pliers. See if I can grab onto this. I'm going to use an electric three-eighths drive down below here with my 10 millimeter socket. There we go. We're just going to end up breaking the plastic I think. So I've got one more over here. Now that I can reach it better, I'll spoke it. And I'm going to put the locking pliers on this one. I'm going to go down below and see what happens. I'm going to try this angle. Nope.
So, basically every clip is rotted/busted. So we're going to have to now the bumper's off the car. When it comes to the time, we're going to have to move each one of those clips, whether we have to cut them out or just let them soak a little bit longer. We'll have to replace those. So now I can remove my bumper from the area. So now that I have a catch basin underneath it, catch the fluid. I'm going to disconnect the washer hose. So now I'm going to disconnect the hose from the tank. I'm just going to hold it up here and now I can disconnect the electrical connected to the motor. So there's a tab over here on the inner side. If you get yourself a little pocket screwdriver or a flat head screwdriver, push in and pull that up.
There's three mounting bolts--there's one here, one here, and then one up on the very top in here for this washer tank. They're 10 millimeter socket. I'm just going to start moving them. I've never taken this tank out yet, so I'm assuming it's going to come right out. Slide through here, it'd be a mystery. Let's hope we don't have to take the headlight out. Again, the top mount, so that's located right there. Okay, so now I'm going to grab the tank from down below here. Now that the three mounting bolts are off, I can move the tank and access the back pump, and that's got a tab right in here. I'm going to get my small screwdriver. It's the same as the front pump. Push in on that tab and push that electrical. And then we have the actual hose. So I'm going to just take a pair of needle nose, wiggle it back and forth, and then pry it off. She's on there. There we go.
Now I can fish this tank out past the back side of the headlight. That's it. Disconnect the hose from that. There we go. And there is our washer tank. It's the front pump and the back pump. Once you remove the tank and you need to replace the back pump, I'm going to take a pair of pliers and put it down here where the grommet is and pry the pump up. That's it. This pump is the same as the front pump, so we sell this on 1A Auto. This one works. So I'm just going to install it again.
I like to put the grommet in first. Make sure that's seated, and then I grab the pump, let it up, and just give it a push in. So now to reinstall it, we're just going to snake the filler neck up. Watch out for the headlight harness. It's right there. Work it around the headlight harness. There we go. So before we go much further, I'm going to connect to the hose for the rear sprayer, and that had a little clip in here like that. Then I get my connector, so I'm going to bring this tank up further to connect it. I want to line that up. I just want to be able to see it first. There we go. Push it down. There we go. All right, put the hose back in that spot. Don't forget we have this hose that goes in the groove in the front here. So I'm just going to plug that in. Then snap it and snap it in there. Connect my connector and get my three mounting bolts. And then the top one.
I'll tighten those all up with my 10 millimeter socket. I can kind of see the old mounting marks. So if you were installing a new tank, go by the dirt mark on the body. Just make sure that it has a clearance so that the pump doesn't get hit if you bottom out. And the last one. Okay, now we're ready to fill her back up.
Now we're ready to put the bumper back on and we had a lot of hardware breakage from the age of the car, a lot of dry plastic, so we have to replace almost all pieces, and I'm just going to line it up and show you how to line it up. So you know, you took it apart. I'm sure you can gather it. So this notch is going to go right into the plastic notch that's in that fender flare. So hold it up, line that up, and just push it right in. I'm going to do the other side the same way. Here are things starting to set themselves in. Now you're going to put all your clips back in on the top, so you're going to put one center clip in. Then you're going to install your top radiator cover and the outer fours goin after. And then don't forget to take each fender well and put this tab over. Tuck at the inner fender well and put the tab over that. Then you place your top fender well over it, and then put the screw in.
Thanks for watching. Visit us at 1aauto.com for quality auto parts, fast and free shipping, and the best customer service in the industry.
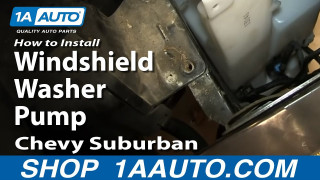
How to Replace Windshield Washer Pump 2000-06 Chevy Suburban
This 1A Auto video shows you how to replace the windshield washer pump on your 00-06 Chevy Suburban, Tahoe, or GMC Yukon. Watch to learn how!
