How to Replace Rear Strut Spring Assembly 2006-10 Ford Explorer
Created on: 2017-05-19
How to repair, install , fix, change or replace your front shocks with their loaded struts on 06, 07, 08, 09, 10 Ford Explorer
-
step 1 :Removing the Wheel
- Loosen the five 19mm lug nuts
- Raise and support the vehicle
- Remove the lug nuts
- Pull the wheel off the hub
-
step 2 :Disconnecting the Sway Bar Link
- Spray the sway bar link with rust penetrant
- Hold the bottom sway bar link bolt with a 16mm wrench or socket and racket
- Remove the 15mm nut from the top of the sway bar link
- Support the lower control arm with a jack
-
step 3 :Removing the Strut
- Spray the lower control arm bolts with rust penetrant
- Spray the bolts at the top of the strut with rust penetrant
- Loosen the 24mm bolt from the control arm
- Hold the bottom strut bolt with a 24mm wrench or socket and ratchet
- Loosen the inner control arm bolt with a 24mm socket and ratchet and a wrench
- Remove the 24mm nut from the bottom strut bolt
- Remove the outer 24mm bolt from the control arm
- Remove the 24mm bolt from the bottom of the strut
- Loosen the three 13mm nuts at the top of the strut
- Remove two of the three 13mm nuts
- Leave on 13mm nut as a placeholder
- Remove the top sway bar link bushing
- Tap the lower control arm with a hammer to separate it from the strut
- Remove the placeholder nut
- Pull out the strut
-
step 4 :Installing the Strut
- Lift the strut into place
- Start the three 13mm nuts on the top of the strut by hand
- Lift the control arm and sway bar link into place
- Lift the wheel knuckle with a jack
- Line up the strut with the control arm
- Line up the 24mm bolt that connects the strut to the control arm
- Lower the jack from the wheel knuckle
- Support the control arm with the jack
- Line up the bolt that connects the control arm to the wheel knuckle
- Start the two 24mm nuts onto the control arm bolts
- Lower the jack from the control arm
- Support the wheel knuckle at with the jack
- Tighten the three 13mm nuts to 22 foot-pounds of torque
- Raise the suspension to ride height with the jack
- Tighten the outer control arm bolt to 203 foot-pounds
- Tighten the bottom strut bolt to 203 foot-pounds
- Tighten the inner control arm bolt to 185 foot-pounds
-
step 5 :Reconnecting the Sway Bar Link
- Line up the sway bar link
- Slide the bushing onto the sway bar link
- Thread the nut onto the sway bar link
- Lower the suspension with the jack
- Support the control arm with the jack
- Tighten the sway bar link nut to 22 foot-pounds
- Remove the jack from the suspension
-
step 6 :Installing the Wheel
- Slide the wheel onto the hub
- Start the five 19mm lug nuts
- Lower the vehicle to the gorund
- Tighten the lug nuts to 100 foot-pounds
Tools needed
-
24mm Socket
13mm Socket
15mm Wrench
Torque Wrench
16mm Wrench
Hammer
15mm Socket
Rust Penetrant
16mm Socket
Jack Stands
19mm Socket
24mm Wrench
Ratchet
Floor Jack
1/2 Inch Breaker Bar
13mm Wrench
Hi, I'm Mike from 1A Auto. We've been selling auto parts for over 30 years. We're dedicated to delivering quality auto parts, expert customer service, fast and free shipping, all backed by our 100% satisfaction guarantee. Visit us at 1AAuto.com, your trusted source for quality auto parts.
In this video we're going to show you how to replace the rear shock, and actually it's a rear strut and spring assembly. This is a 2006 Ford Explorer, pretty much the same for this generation of Explorer. We hope you like the video. If you do, click subscribe. Click subscribe even if you don't like the video. Also check out 1AAuto.com in the link below. You can find the parts in this video as well as check out all the other parts that we have available for Explorers and all kinds of vehicles. Here are the items you'll need for this repair.
With the vehicle on the ground, take a 19 millimeter socket, or your tire iron, and loosen up your lug nuts. Raise and support your vehicle, you can use jack and jack stands; we are using a lift. Remove the lug nuts the rest of the way, and remove the wheel and tire.
Spray the top of the stabilizer link with some penetrating oil. Let it sit. There's a 16 millimeter bolt that is the stabilizer link on the bottom. You need to hold that with a socket and ratchet. 15 millimeter is the nut on top. Take the nut off the top, and that'll allow your control arm to drop down. I'm just going to raise up the lower control arm a little bit to take some of the pressure off, and this just makes it so it doesn't pop when you take it apart. Our vehicle's on a lift, so we're using a heavy screw jack, obviously if your vehicle was on jack stands you'd use your floor jack and just raise it up a little bit.
Spray the lower bolts, and then up top there are three smaller bolts that hold the strut at the top. The outer one is a 24 millimeter bolt and you'll want to use a nice big bar for leverage. Loosen that up. For the inner one that goes through the bottom of the strut, hold the nut with the 24 millimeter wrench, or another socket and ratchet, and again use a large bar, and loosen up, then you can remove that nut. Get switched up here with socket on that side, and the wrench on the bolt side.
I'm also just going to spray and loosen that inner bolt and nut. Using a 24 millimeter wrench and socket on the other side, just loosen it up a couple of turns. Okay, now you can kind of slowly take the jack out while you're pulling this bolt, and also let it down and your strut bolts should come out too. A hammer is going to help that effort.
With a 13 millimeter wrench, loosen up each one of them first. Then once they're loose, a lifesaver of a tool here is a ratcheting wrench. Ours are in pretty good shape, but a lot of times these are very rusted, and when they're very rusted, a lot of times what a shop will do is either just cut these off with a torch, or a reciprocating saw, but ours are coming off easily. We'll remove these two back ones, and then take this one off but put it back on just finger tight to hold it in place.
Before we separate the lower control arm, we're just going to support the suspension here. You can remove this bushing, although it will come off on its own. Then lift up, remove that last nut, and the strut comes down.
We are reinstalling our original strut. This video is to show you how to do it. We didn't have a new one available at the time, but you want to put it up and in. Make sure when you put it up in there,that the strut is facing basically front to back, to go into the control arm.
Fit it in, and start putting your nuts on. Get all three in place then you can tighten those up preliminarily. While you can still move the strut around, bring your control arm back up. For the stabilizer link, if it's kind of rusted in place like ours is, just push it back up into the stabilizer bar. While the strut will still move around, I'm just going to lift my suspension up out of the way so it's easier for me to move the control arm into place. Get the bolt in, and then I can lower this down, and then I'll swap the jack onto the control arm and get this together.
I'm tapping on the top just to bring it down into place. The front side's in, but the control arm's not quite seated yet. Push in on the bolt. Make sure that once you get the bolt on, it turns into this nut that's set into the control arm. We'll put this nut on, we'll tighten that preliminarily, and tighten this bolt preliminarily. We'll lift it and support it in ride position before we torque them.
Remove this, and now we're just going to get support out here at the knuckle. Do not go all the way up, we just want to go up enough so that we can torque the three nuts on top. So make sure that there's some weight on the spring. Once you see the strut going up in, that's enough for now. The technical spec for these is 22 foot-pounds tight. With a small wrench like this, get them nice and tight if you don't have a torque wrench that would fit in here.
Now we want to raise our suspension up to the ride height, so basically raise your suspension until the weight's off your jack stand or your lift. Now you want to torque these to 203 foot-pounds, 203 foot-pounds, and 185 foot-pounds.
Then you can put your stabilizer link bushing back on, and the nut. We want to tighten the link, so I'm just going to remove my jack from here, and I'm going to place it over here just so I can get to that link bolt better. The nut is 15 millimeters, and this bolt is 16 millimeters, and we'll tighten these preliminarily and you want to torque it to 22 foot-pounds. Make sure it's all together correctly, the bushings have gone down into the stabilizer bar, and tighten it to 22 foot-pounds.
Reinstall your wheel and tire. With the vehicle back on the ground, you want to tighten your lug nuts to 100 foot-pounds using the star pattern.
Thanks for watching. Visit us at 1AAuto.com for quality auto parts, fast and free shipping, and the best customer service in the industry.
Shop Products


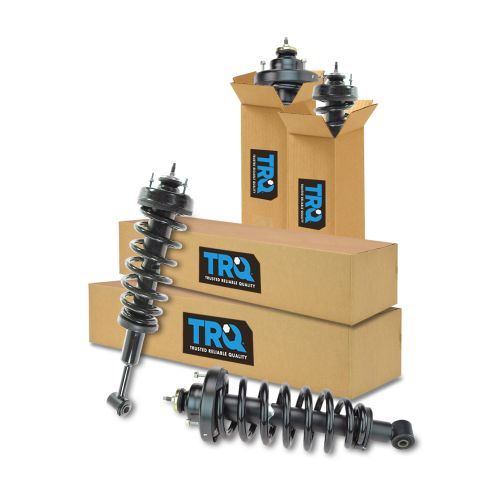
2006-10 Ford Explorer Mercury Mountaineer Front & Rear 4 Piece Strut & Spring Assembly Set TRQ SCA57084
Part Details:
- 4 Piece
- (2) Front Strut & Spring Assemblies
- (2) Rear Strut & Spring Assemblies

How to Replace Strut Assembly 2005-10 Chevy Cobalt
Follow along to learn how to replace a front strut assembly on your 05-10 Chevy Cobalt.
