How to Replace Rear Shocks 2001-07 Volvo V70
Created on: 2019-02-04
How to repair, install , fix, change or replace your rear shocks on 01, 02, 03, 04, 05, 06, 07 Volvo V70
-
step 1 :Preparing the New Shock
- Compress the shock and remove the shipping strap
- Compress and decompress the shock for a total of three times
-
step 2 :Removing the Shock
- Lift the secondary trunk panel flooring
- Remove the sound damper
- Remove the sound foam from the free shock
- Loosen the center 18mm nut from the shock
- Raise and support the vehicle with a jack and jack stands
- Spray the lower nut with rust penetrant
- Remove the bolt with a 17mm socket and ratchet
- Gently pry the shock down with a pry bar
- Remove the shock
-
step 3 :Installing the Shock
- Insert the shock into place and center it with a pry bar
- Tighten the lower 10mm bolt to the shock
- Lower the vehicle
- Tighten the upper 19mm bolt
- Press the foam to the shock
- Replace the sound damper
- Replace the secondary trunk panel flooring
Tools needed
-
5mm Hex Wrench
Gloves
Rust Penetrant
Pry Bar
T40 Bit
17mm Socket
18mm Socket
19mm Socket
10mm Socket
Ratchet
1/2 Inch Breaker Bar
Hi, I'm Mike from 1A Auto. We've been selling auto parts for over 30 years.
Hi, everyone. Sue here, from 1A Auto, and today, on our ‘03 Volvo V70 wagon, I'm going to show you how to replace rear shocks. These came from 1A Auto and they're the TRQ model. So, when you open the box, what you expect to see is the rear shock comes compressed like that. And then you're going to have universal instructions in a bag with the new washer and locknut for the top.
When you take your new shock when you go to install it, you're going to take this shipping strap off—just compress it. Take the strap off and the holder. These two are junk now. Now you'll notice that the shock instantly extends itself out, because it's compressed gases and oils in there.
Now, when you do this to the shock, it's called starting the shock. So, you need to decompress it and let it extend back out three times, and it activates the oils and the gases inside there. So, I just compress them, then let it extend out. Do this three times. Now it's ready to be installed and you should have no residual banging, because the gases have been activated.
First thing we're going to do is open the tailgate. I've already put the seats down, so it's easier access. In the wagon, you can see there're two panels, here, in the back. You're going to remove the secondary one—the one all the way in. Just lift that up. Bring this right outside. Then we're going to remove this damper. It's a sound damper. Just lift that right up.
Okay, I'm just going to peel this back. Just fold it underneath the seat so you can access it better. Take this sound foam off. There's a little bit of shipment glue. And there we have the rear shock and the mounts. We're going to do just the shock. We're going to leave the mount alone. So, I'm going to just undo the center.
With an 18mm ratchet wrench, I'm going to hold that nut steady. This is a T Torx bit 40—a T40—so, we're going to have to hold the top of that shock. We're going to go opposite way of each other. Break that free. We're just going to leave that right up here. Now we're going to go set the car up on a two-post lift, raise it up. At home, you can use a jack and jack stands.
Now that we've raised up and supported the vehicle, we can visually see the bottom mount of the shock. So, the nut part is part of the lower whole control arm. So, I'm just going to spray the outside of it with some rust inhibitor. It's a 17mm socket. Let's break it free. Going to support that shock. Take the bolt out. With a pry bar or a screwdriver, just give it a little tug on it. Here it comes, right out.
Looks like original equipment to me. Here we have our new shock from 1A Auto, and here's the original equipment. It's an ‘03. You could see they're the same height. The only difference I see is that our new one from 1A comes with an Allen head instead of a Torx, which is one in the same. Allen head might actually be easier. More access to Allen heads than Torx bits. Then you're ready to go—ready to install.
I like to put the bolt in hand and ready to go up in there, because once it's up in there, you might have to be able to slide the bolt in. And just for a little FYI—I'm sure you'll see it with your own eyes—but the mounting hole goes this side. So, it's not straight up.
Get my pry bar. Center that. Okay, let's tighten it up. Just check and make sure I was centered, and I am. I looked up and I couldn't find any torque specs, so I'm just going to—I broke it free, basically, with a little ease. So, I didn't really have to work at it. It's basically a 10mm bolt. That's tight enough.
Now we'll lower the vehicle down and assemble the top. Now we're in the vehicle again, and the new shock has come up through the mount, and I'm going to install the new flat washer and the new neoprene locknut. Start it by hand, of course. Get that out of your way. The new nut is a 19mm. I'm going to use a ratchet wrench, and the center being Allen—instead of Torx—is an Allen head number 5. You're just going to hold that center of that shock with that Allen head and ratchet—this 19mm nut down on the stud.
I'm going to use my knee to hold that center of that shock. You might end up having to turn this ratchet around—use the open end—to get the last good grip on this. I had to go because there's no torque specs. I couldn't torque it anyways, because I can't put a socket and hold the shock at the same time. I think that's it—bottom right out.
We'll reinstall our sound pad. Now we’re going to do the driver side shock. It's the same exact way—same design. Now I'm going to put down the insulation sound. Sit right in the spot. Grab that hard cover for the secondary. See those two notches in it? Align those notches right up. They go down and under. Now you are finished installing your rear shocks.
Thanks for watching. Visit us at 1aauto.com for quality auto parts, fast and free shipping and the best customer service in the industry.
Shop Products


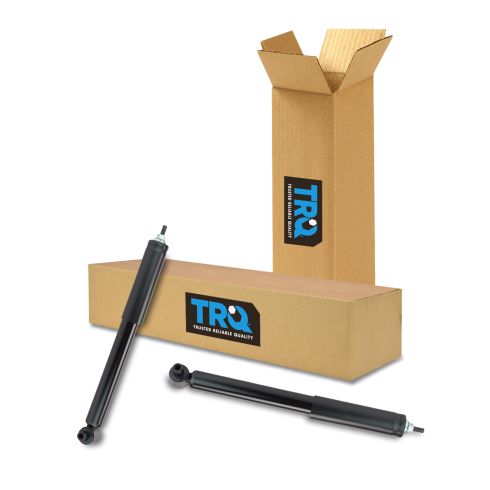
Volvo S60 S80 V70 Rear Driver & Passenger Side 2 Piece Shock Absorber Set TRQ SBA60278
Part Details:
- 2 Piece
- (1) Rear Passenger Side Shock Absorber
- (1) Rear Driver Side Shock Absorber
How To Install Replace Remove Rear Shocks Struts 2002-06 Nissan Altima
If the rear shocks on your 02-06 Nissan Altima are bouncy or clunking, it's probably time to replace them! Watch this video to learn how to do it yourself!
