How to Replace Rear Bearings 2001-05 Honda Civic
Created on: 2016-05-11
New Wheel Bearing & Hub Assembly from 1AAuto.com
-
step 1 :Removing the Wheel
- Loosen the 19mm lug nuts with the vehicle on the ground
- Raise the vehicle with a floor jack
- Secure the vehicle on jack stands
- Remove the lug nuts
- Pull off the wheel
-
step 2 :Removing the Wheel Speed Sensor
- Remove the 10mm bolt behind the wheel speed sensor
- Wiggle the speed sensor out
-
step 3 :Removing the Brake Shoes
- Strike the rotor/brake drum with a hammer if it will not come off
- Remove the rotor/brake drum
- Remove the two brake shoe springs with the vise grip pliers
- Twist off the front retaining spring with the vise grip pliers
- Hold the retaining pin in place by hand
- Pry off the brake retainer with a flat blade screwdriver and turn it off the pin
- Remove the brake shoe
- Remove the retainer pin
- Repeat the process for the other side, letting the rear shoe hang on the e-brake
- Remove the adjustor
- Rotate the e-brake shoe with vice-grips
- Push the brake shoe off the e-brake
-
step 4 :Removing the Rear Bearing
- Remove the dust cap with a chisel and hammer
- Insert a tapered punch into the punched slit between the retainer and nut
- Tap the punch to separate the nut
- Remove the 32mm nut axle nut
- Tap the back of the wheel hub from the back of the spindle
- If the inner race is stuck to the spindle, work it off with a chisel and hammer without scoring the spindle
-
step 5 :Installing the New Rear Bearing
- Inspect your spindle for scores, gouges, or any other damage
- Slide the wheel bearing onto the hub
- Tighten the 32mm axle nut
- Torque the axle nut to 134 foot-pounds
- Punch the outer ring of the axle nut into the keeper with a chisel and hammer
- Tap the dust cap into place
- Spin the wheel bearing and listen for grinding or crunching sounds
-
step 6 :Reinstalling the Brake Shoes
- Secure the end of your e-brake cable with vise grip pliers
- Push the spring back with the hook on the e-brake spreader
- Hook the lower brake spring into the shoe brake
- Insert the retainer pin in the back
- Insert the retainer clip over the pin
- Press the retainer clip into place
- Press the clip down and rotate the pin to keep it in place
- Hook the spring into the remaining pad underneath the tab
- Repeat the process for the other side
- Spin the star wheel on the adjustor so it's clamped together
- Insert the adjustor into place with the longest leg facing you
- Insert the adjustor arm into place
- Hook the retainer spring to the brake shoes
- Adjust out your brake shoes by turning the star wheel up with a flat blade screwdriver
- Replace the rotor/brake drum
-
step 7 :Reattaching the Wheel
- Slide the wheel into place
- Start the lug nuts by hand
- Tighten the 19mm lug nuts preliminarily
-
step 8 :Installing the Wheel Speed Sensor
- Insert the wheel speed sensor into place
- Tap it with an extension and dead blow hammer if necessary
- Tighten the 10mm bolt to the sensor
-
step 9 :Reattaching the Wheel
- Lower the vehicle to the ground
- Torque the lug nuts to 80 foot-pounds in a crossing or star pattern
Tools needed
-
Rubber Mallet
Jack Stands
Chisel
Flat Blade Screwdriver
Vise Grip Pliers
Hammer
32mm Socket
Rust Penetrant
Needle nose pliers
19mm Socket
10mm Socket
Floor Jack
Brought to you by 1AAuto.com, your source for quality replacement parts and the best service on the Internet.
Hi, I'm Mike from 1A Auto. I hope this how-to video helps you out, and next time you need parts for your vehicle, think of 1AAuto.com. Thanks!
In this video, we're going to show you a rear hub replacement. This is a 2003 Honda Civic with ABS. Same for a 2001 to 2005, we show you the passenger side, driver side is the same procedure. You'll need a new rear hub from 1AAuto.com, and quite a few tools, including 10 to 19 millimeter sockets with ratchets and extension, 32 millimeter socket, needle nose and standard pliers, needle nose vice grips, a flat-head screwdriver, a chisel, taper punch, hammer and rubber mallet, jack and jack stands, and some penetrating oil.
One thing to note, we do take the brakes apart. You won't need to take them apart if your hub comes out whole. If it comes out the way ours did where the inner race stayed behind, you will need to take your brake shoes apart to get that apart.
Raise and support the vehicle, remove the tire. Remove the ten millimeter bolt on the back of the wheel speed sensor. We already sprayed our sensor down, we're going to add just a little more penetrating oil to make sure it comes out smoothly. Try to wiggle it out with a flat-head screwdriver or a small pry bar.
Corrosion often builds up between the wheel hub and the drum brake. You may have to hit it with a hammer to get it to loosen up and come off easily. Always be sure not to hit the wheel studs. Just a little bit of tapping so we can get our hands behind it and the drum comes off. Repeat these steps on the opposite side of the vehicle. Work to disassemble and reassemble the rear drum brakes one side at a time, that way if you get lost or don't remember where something goes, you have the opposite side as a reference.
Using a small pair of needle nose vice grips or a brake spring tool, if you have one available to you, remove these springs from the drum brakes. Be sure the vice grips are on there good and tight, because these springs can slip out under tension. Remove the brake shoe retainers by supporting the back of the pin, pressing down with the screwdriver, and turning the retainer off of the pin. Remove your brake shoes and your retainer pins from the back of the dust shield. Repeat for the other side.
Remove your adjuster and allow the rear shoe to hang on the e-brake. Remove the dust cap on the end of the wheel bearing by putting a chisel on the edge of the cap. You may have to rotate it and work it from different angles to get it to come free.
This nut is punched into this retainer, to free it up you're going to want to take a tapered punch. Using the 32 millimeter socket and an impact gun or half inch drive ratchet, remove the axle nut from the end of the spindle. Tap the back of the wheel hub to release from the spindle.
Something that happens often is the inner race of the bearing stays pressed onto the spindle. Here, we can see our exposed bearings because the inner race isn't attached. Here's our new part with what the back of the bearing is supposed to look like. We're going to have to work the inner race off of the spindle. Work the back of the race with a chisel and hammer, careful not to hit straight onto the spindle and score it.
The original part from the vehicle came out, but the inner race didn't quite come out. The new part from 1AAuto.com is exactly the same: same ABS toner ring. Studs are installed. It's going to be a good replacement.
Before installing the new wheel bearing, inspect the spindle for scores, gouges, burrs, or anything you may want to file off, as not to damage the bearing or hang it up and prevent it from going on fully. Slide the new wheel bearing onto the hub. Install your axle nut, bring it down with the 32 millimeter socket on a half inch drive ratchet or impact gun. Torque the axle nut to 134 foot-pounds.
Use a punch to knock the outer ring of the axle nut into the keeper. Using a rubber mallet or a block of wood between the hammer and the dust cap, tap it back into place. Make sure your wheel bearing spins freely and doesn't make any grinding or crunching sounds that may indicate something's wrong with the installation.
Use a pair of needle nose vice grips to secure the end of your E-brake cable. You're going to want to push the spring back with this hook on your E-brake spreader. Slide it back. The lower brake spring hooks in from the back of the shoe. We'll hook it in to our rear shoe, making sure to lock the top into the wheel cylinder.
Feed our retainer pin to the back. Install your retainer clip over the pin. Press it down either by hand, with pliers, or the help of a flat-head screwdriver. You can use pliers to push the clip down. Grab your pin and rotate it.
Install the lower spring into your front pad. Be sure to hook it under the tab at the bottom. Install your retaining pin and clip the same way you did on the other side. Make sure your star wheel on your adjuster is spun all the way down with the longest leg facing you. Your adjuster arm will install with this adjuster sitting over this lip. Hook the retainer spring. Install your vice grips nice and tight.
We're going to install this hook into this hole. Install your vice grips nice and tight, so the spring is under a good amount of pressure. You don't want it snapping back at you. Sometimes, if it becomes partially engaged, you can tap it the rest of the way in with a screwdriver and a hammer.
Aligning this hole in the hub, you can access the star wheel with a screwdriver in order to adjust out your brake shoes. After you've adjusted your shoes up, you'll want to test fit your brake drum until you can just feel your brake shoes dragging on the wheel. This may take a few tries. Just a little bit of contact is all you need.
Reinstall the wheel, and your four 19mm lug nuts. Torque your four lug nuts to 84lbs in a cross pattern.
Reinstall the sensor into the hole. You may need to tap it with an extension, some kind of soft punch, and a dead blow hammer. Reinstall the 10 millimeter bolt into the sensor and tighten it down.
Torque your four lug nuts to 80 foot-pounds in a cross pattern.
Thanks for tuning in. We hope this video helped you out. Next time you need parts for your car, please visit 1AAuto.com. Also check out our other helpful how-to and diagnosis videos.
Shop Products


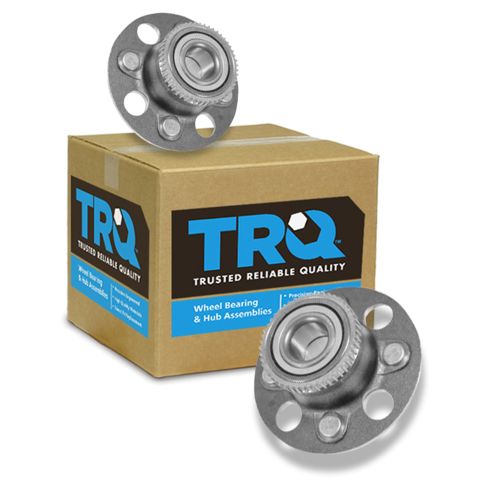
Honda Civic Rear Driver & Passenger Side 2 Piece Wheel Bearing & Hub Assembly Set TRQ BHA53591
Part Details:
- 2 Piece
- 4 Lug
- (1) Rear Passenger Side Wheel Bearing & Hub Assembly
- (1) Rear Driver Side Wheel Bearing & Hub Assembly
- Ball
How to Replace Rear Wheel Bearings and Axle Seals 2000-06 GMC Yukon
Learn how to install a new TRQ axle seal and bearing in your 2000-06 GMC Yukon by watching this video.
