How to Replace Radiator 1996-2004 Chevy S10 Pickup
Created on: 2010-08-11
Check out this video for help replacing the radiator in your 96-04 Chevy S10 pickup.
-
step 1 :Disconnect the battery
- Use an 8 mm wrench to disconnect the negative battery terminal
-
step 2 :Remove the fan shroud
- Remove the seven 10 mm bolts using a socket, ratchet and extension.
- Pull the shroud up and out.
-
step 3 :Install the new radiator
- Double check that everything connects the same way before installation.
- Drain the radiator by placing a drain pain under the radiator drain.
- Remove the skid plate by remove the six 15 mm bolts, remove them with a socket and ratchet.
- Release the petcock to drain the radiator fluid.
- Disconnect the radiator hoses and the oil cooler and transmission cooler lines.
- Use an adjustable wrench and 19 mm socket and ratchet to do this.
-
step 4 :Install the new radiator
- Put the radiator into place
- Connect all the lines and hoses
- Do all this with your adjustable wrench and 19 mm socket and ratchet.
- Fill with radiator fluid.
- Turn the truck on and run it to check for leaks.
-
step 5 :Install the fan shroud and skid plate
- Bolt in the seven 10 mm bolts and six 15 mm bolts with your sockets, ratchet and extensions.
Tools needed
-
Adjustable Wrench
Socket Extensions
Flat Blade Screwdriver
15mm Socket
8mm Wrench
Drain Pan
10mm Socket
Ratchet
Needle nose pliers
Brought to you by 1AAuto.com, your source for quality replacement parts and the best service on the internet.
Hi, I'm Mike Green. I'm one of the owners of 1A Auto. I want to help you save time and money repairing and maintaining your vehicle. I'm going to use my 20 plus years' experience restoring and repairing cars and trucks like this to show you the correct way to install parts from 1aauto.com. The right parts installed correctly, that's going to save you time and money. Thank you and enjoy the video.
In this video, we're going to show you radiator replacement. We're going to do it on this 2002 S10 pickup; this is a 4 wheel drive vehicle. Radiator replacement, if you follow this video, you can pretty much use this video for just about any car. Just keep in mind that rather than taking a fan shroud off, if you have a front wheel drive car, you may be removing the radiator fan itself. Usually the tools you'll need are wrenches and maybe a screwdriver and pliers to remove the radiator hoses. The procedure is pretty much the same for any vehicle. You remove either the fan shroud or the radiator fan. Then you drain your radiator, either by using the radiator drain or by removing a hose. Then after that you remove any of the other hoses and also unhook the engine oil cooler, if you have it, and the transmission oil cooler, if you have it. With that we'll get started.
Using an 8 millimeter or 5/16ths wrench to disconnect the battery, and I'm going to disconnect the negative battery cable. I'm going to be removing the bolts for the fan shroud, you can see there's two right down there, and there's three right across the front, one, two and three. Then obviously down on the other side, there's two more, right there. These are 10 millimeter bolts. The bolts are over here on a magnetic tray. Then on this truck, I pull up on my a/c hoses, and then get them out of the way, and the shroud comes up and out.
Now I have a good look at my radiator, and what I'm going to do is I'm actually grab my new radiator and make sure that all the connections seem like they're in the same place, before I go too far. Here's my new radiator, and you have fills over here and a fill over here on my car is the operator hose and the other radiator hose. This helps me in other ways because it lets me know that here is my drain right here, and I've got these two connections, here and here, which is the exact same as my truck here. Everything looks pretty good. I'm going to go ahead and drain the radiator now. When draining the radiator is basically take a pan and put it under where your drain is. On this truck there is a skid plate underneath here. I need to remove that in order to access the bottom of the radiator and drain it. It's held on by 6 15 millimeter bolts.
I was actually unable to release the petcock, which is the drain, so I'm going to go to Plan B, which is to take this main hose here, and slowly disconnect it, and as I'm disconnecting it let the radiator fluid drain out. I've got my pair of pliers, reach down, and pull that clamp, squeeze it, back it off. Grab hold of the hose and twist it, and find the drain pan because it's actually coming off pretty easy. I'll pull it until I start hearing water start coming out. Use my pan to catch as much of it as possible.
Probably as you can hear by the drip, drip, drip there, my radiator is still draining. I'm going to remove this hose. Almost all cars have on this side usually is the engine oil cooler. Not all cars have that. Trucks like this and larger trucks that tow usually have oil cooler.
On this side, this is the transmission cooler, and there's one up here, and there's one down below. Most automatic transmission vehicles will have that. This has little quick release things on it that I don't have the right tool for it, so I'm just going to remove the bolts with a wrench. Also this is the fill hose, so I'll remove the hoses and then remove the oil cooler and transmission cooler lines. Transmission cooler lines appear to be about 19 millimeter. I'm just using a large adjustable wrench. They come apart pretty easy. I need to get the lower shroud out of the way, so what you do is just pull and push a screwdriver right in between here, pry a little bit, and the shroud comes apart, and then you can pull it out of your way. There're three of those slots, one in the middle and then one on the other side here that you can see I've already done. I'm just going to fast forward through unbolting the transmission cooler and oil cooler lines. Basically just use an adjustable or a 19 millimeter and 22 millimeter wrench, whatever wrench is correct for your car.
As you can see here as you undo your lower oil cooler line, you're going to get some oil dripping out, so you want to have a catch pan for that. Once the hoses are all unhooked and the transmission cooler and engine oil cooler are out of the way, your radiator comes up, and provided it doesn't get caught on anything, which it usually does, it comes out. I tilt it back like this to keep the coolant in. Now that the radiator is out you can see they are generally all the same, two nuts and adapters on the new one. That's not really a big deal. Then we'll pull these out. The other ones will just bolt right in there. Only last thing is we want to pull the feet off the old radiator here, and slide them onto the new radiator, which is not a big deal.
Carefully slide it down into place. Take a couple of these lines and move them out of the way a little bit. Make sure that shroud doesn't get in the way. Gently, you'll want to make sure you don't bend any of the pins anywhere, down in place. Now we just hook up all the cooler lines and the hoses and we're all set. At this point, I've got all my connections hooked back up, upper and lower. Same on the oil cooler side and my hoses are back on. Radiator hose down here is back on filler hose. What I'm going to do is I'm going to fill the radiator now and start it up. Let it get hot into operating temperature, and check and see if there're any leaks. I'm looking for leaks of obviously radiator fluid or coolant. I'm looking for leaks of oil and transmission fluid in case I didn't get those lines tight enough.
Once you can see the radiator fluid, make sure you've got enough in your regulator bottle too. I'm going to throw the cap on. Even though everything's not in place, I can start it up. Obviously just put the fan shroud on with a couple of bolts, just to keep everything in place. Then we'll start it up and run it a little bit and make sure nothing is leaking. The other thing we do before we start it up is we'll check the oil, as we did drain a little bit of oil out it when we disconnected that oil cooler. We took the truck for a little ride, got it heated up, nothing was leaking out of it. There were a couple of drips, but that was from the work that I did. Some of the fluid had dripped down the frame and worked its way out. Everything looks good, so we'll bolt the fan shroud back together and bolt the skid plate on from the underneath and we're all set.
We hope this helps you out, brought to you by www.1AAuto.com, your source for quality replacement parts and the best service on the internet. Please feel free to call us toll free at 888-844-3393. We're the company that's here for you on the internet and in person.
Shop Products


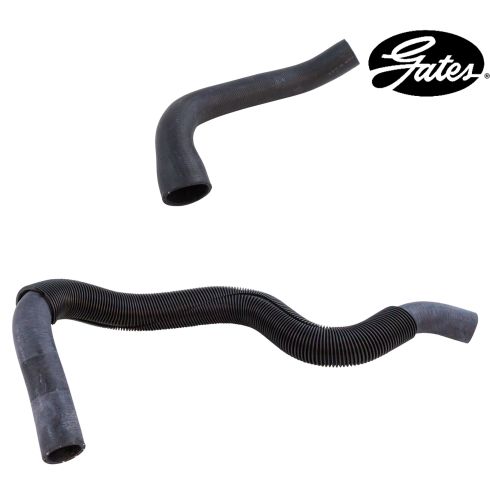
Chevrolet GMC Olds Isuzu Radiator Hose 2 Piece Set Gates 1AHCK00056
Part Details:
- Highest Quality Materials
- Direct Fit Replacement - Guaranteed to fit and function for your specific application
- Quality Tested - built to a strict level of product standards.
- 2 Piece Set
- (1) Lower Radiator Hose
- (1) Upper Radiator Hose
How to Replace Radiator Cap 1994-2002 Dodge Ram 1500
Check out this video to learn how to replace the radiator cap on your 94-02 Dodge Ram!
