How To Replace Parking Light and Bulb 1998-2007 VW Passat
Created on: 2012-01-18
Check out this video to learn how to replace the parking light and bulb in your 98-07 Volkswagen Passat. Replace your lights for a fresh new look!
-
step 1 :Remove the parking light
- Pull the ring clip to release the parking light.
- Pull the parking light assembly forward and disconnect the wiring.
- Transfer the spring and bulbs to the new assembly.
-
step 2 :Install the new parking light.
- Plug in the new bulb and the spring from the old assembly
- Connect the bulbs and wiring.
- Line up the parking assembly and put it into place.
- Pull the ring to hook the parking assembly and anchor it.
- For the passenger side, use your Phillips screwdriver to move the intake duct cover out of the way.
Brought to you by 1AAuto.com. Your source for quality replacement parts and the best service on the internet. Hi, I'm Mike from 1A Auto. I hope this How To Video helps you out, and next time you need parts for your vehicle think of 1AAuto.com. Thanks.
In this video, I'm going to show you how to replace or just service the side parking lights on this 2001 Passat. Same as any '98 to '01 Passat. No tools are needed for the driver's side. You will need a Phillips screwdriver for the passenger's side. The driver's side is pretty easy. Everything is pretty open here. There's actually a little ring here. You pull that and release it. Just kind of reach in behind. You have to break the light loose, pull it forward. If you're just looking for service a bulb, counterclockwise to release it, clockwise to lock it in there. The new light, you would need to move this spring. Just twist the spring off, put it on your new light. Obviously, my lights are in fine shape here. Go ahead and put it into place, bulb in. Just make sure you line everything up. Clockwise to lock it. There's a few tabs in the back, then a tab here that goes into a tab on the headlight or swab headlight. Just make sure you put the light in correctly. Then, again, pull back and lock it on right there.
Passenger's side is pretty much the same. There's just an air intake duct in the way. Here, this just comes right up and off right there, 2 Phillip screws. Grab the back of your duct, pull it off, and pull that out. Now, you can see you can get right back there just like the other side. Put the duct in into place. Make sure this part here is in place correctly. Again, snap that together and put your screws back in. This right here, one of your tabs, goes right in there. Get that lined up. Then the back one usually pretty much lines itself right up.
We hope this helps you out. Brought to you by www.1AAuto.com. Your source for quality replacement parts and the best service on the internet. Please feel free to call us toll free: 888-844-3393. We're the company that's here for you on the internet and in person.
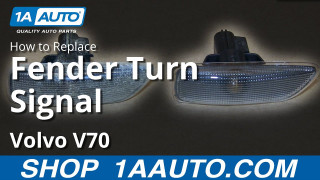
How to Replace Fender Turn Signal 2001-07 Volvo V70
How to repair, install, fix, change or replace a broken, damaged, cracked, faded, cloudy, or chipped signal light on 01, 02, 03, 04, 05, 06, 07, Volvo V70.
