How to Replace Parking Brake and Hardware 2002-10 Ford Explorer
Created on: 2017-05-12
How to repair, install, fix, change or replace your own worn, squeaky, fading old emergency or parking brakes on 02, 03, 04, 05, 06, 07, 08, 09, 10
-
step 1 :Removing the Wheel
- Loosen the 19mm lug nuts with the vehicle on the ground
- Raise the vehicle with a floor jack
- Secure the vehicle on jack stands
- Remove the lug nuts
- Pull off the wheel
-
step 2 :Removing the Brake Pads
- Pry the brake pads into the caliper with a flat blade screwdriver to push in the pistons
- Remove 10mm bolts from the brake caliper
- Pull the caliper aside
- Pry the brake pads off with a flat blade screwdriver
- Remove the brake pad slides
- Secure the caliper with a bungee cord without stressing the brake hose
- Pull the rotor off
- If the rotor will not come off, thread the lug nuts and strike behind the rotor with the ball end of a ball peen hammer
-
step 3 :Removing the Emergency Brake
- Remove the top spring from the emergency brake shoes with locking pliers
- Pry the shoes apart at the bottom with a flat blade screwdriver
- Remove the emergency brake adjuster
- Push the shoes together by hand
- Remove the bottom spring from the shoes
- Pull the rear shoe out
- Pry the retaining clip off the rear shoe with a flat blade screwdriver
- Pull the front shoe out
- Pry the retaining clip off the front shoe with a flat blade screwdriver
- Pull off the brake shoes and the top spring
- Feed the pins through the back of the backing plate to remove them
-
step 4 :Installing the Emergency Brake
- Clean the brake shoe contact area with a wire brush
- Apply silicone lubricant to the contact area
- Feed a pin through the back of the backing plate
- Line up the brake shoe onto the pin
- Place a clip onto the brake pin
- Turn the pin into place with needle nose pliers
- Feed the second pin through the backing plate
- Line up the brake shoe onto the pin
- Place a clip onto the brake pin
- Turn the pin into place with needle nose pliers
- Apply silicone lubricant to the adjuster threads
- Attach the bottom spring to the brake shoes
- Put the adjuster into place with the wheel on the front side
- Clip the top spring to one brake shoe
- Pull the spring onto the other shoe with locking pliers
-
step 5 :Preparing the New Brake Pads and Rotors
- Adjust the brake shoes
- Slide the rotor on to test
- Remove the rotor
- Clean the brake shoes with brake parts cleaner
- Clean the rotor with brake parts cleaner
- Clean the brake pad slides with a wire brush
- Apply anti-seize fluid or white grease to the slides
-
step 6 :Installing the Brakes
- Slide the rotor onto the hub
- Put an old pad in the caliper
- Use a large C-clamp and the old pad to push the pistons back
- Apply brake grease to the back of the pads
- Install the new brake pads into the caliper
- Put the caliper on
- Thread 10mm bolts by hand
- Tighten bolts to 24 foot-pounds
-
step 7 :Reattaching the Wheel
- Slide the wheel into place
- Start the lug nuts by hand
- Tighten the lug nuts preliminarily
- Lower the vehicle to the ground
- Tighten the lug nuts to 100 foot-pounds in a crossing or star pattern
-
step 8 :Testing the Brakes
- Pump your brakes repeatedly until they feel firm
- Test your brakes at 5 miles per hour and then 10 miles per hour
- Road test the vehicle
Tools needed
-
Large C-Clamp
Socket Extensions
Torque Wrench
Hammer
Jack Stands
19mm Socket
Flat Blade Screwdriver
1/4 Inch Socket
Bungee Cord
White Grease
10mm Socket
Ratchet
Wire Brush
Floor Jack
Needle nose pliers
1/2 Inch Breaker Bar
Hi, I'm Mike from 1A Auto. We've been selling auto parts for over 30 years. We're dedicated to delivering quality auto parts, expert customer service, fast and free shipping, all backed by our 100% satisfaction guarantee. Visit us at 1AAuto.com, your trusted source for quality auto parts.
In this video, we're going to show you how to replace the rear parking brake shoes and hardware. This is a 2006 Ford Explorer. If you like this videos, and I hope you do, please click subscribe. Also check out all our other videos for Explorer as well as other vehicles, and if you need the parts for this car, click the link in the description and go to 1AAuto.com.Here are the items you'll need for this repair.
With the vehicle on the ground, and a 19 millimeter socket or your tire iron and loosen up your lug nuts. Raise and support the vehicle. You can use a jack and jack stands. We are using a lift. Remove the lug nuts the rest of the way, and remove the wheel and tire.
Use a large screwdriver, insert it here, and pry out to push the piston back into caliper. This'll help you get it apart easier. There's two 10 millimeter bolts to remove: one down here and one up here. Use a wrench or socket and ratchet to remove those. Once those bolts are out, use your wrench or your screwdriver and pry the caliper out. Set these bolts aside and then the outer pad, you have to push it out and then pry up. I'm pushing this way and then prying up and the pad comes out and the inner pad just pulls right out. You can either secure your caliper with a bungee or just make sure that you don't stress the brake hose.
Remove the disc. It should just pull off. There’s a lot of corrosion, so we're expecting a little bit of a fight. I'll put a lug nut on just to make sure it doesn't fly too far. If you're going to reuse your disc, you don't want to hit it with a hammer. We're going to be replacing this one, so we're not that worried about it.
First you need to remove this top spring. Use a good set of needle nose locking pliers. Lock on to this spring. Pull it forward, and out of the notch in the brake shoe. For the spring and adjuster on the bottom side, just use a flat blade screwdriver to pry out, and then you can pull your adjuster out, and then you can push the shoe in, and then the spring comes out.
You need to get the retaining pins and clips out. Pull the shoe back, put some pressure on the top, push it down, and push the clip in with your screwdriver and down. Sometimes they come off really easy. For the front one, do the same thing. Pull it out so you can see it and push on it. Sometimes it helps if you hold from the back, then you can just pull the shoes right off. This spring has to feed through. Just getting caught up on here a little bit. The shoes and spring come off. Going to take the pins out. You can feed them up and out on this side. Just push them back through, and they just drop out.
On this side, we have the original hardware from the vehicle, and the new hardware kit from 1A Auto. You can see there's two of everything because it’s for both sides, and we've only taken apart the one side so far. We do recommend you do it in pairs. Everything is going to function the way it did originally. There are some slight differences. These clips are a little different. They go together differently, but everything's going to install and function just the way the original did.
You want to clean and lubricate the touch points for the brake shoes. There's three on each side, one, two, and three, and then one, two, and three. Wire brush them, and use a little bit of the silicone lubricant that comes with the kit and lubricate those touch points.
To reinstall, take one of your pins and just feed it to the hole in the back, pull it through, and hold it, and your shoe. We sell new shoes at 1A Auto. We are reinstalling our old one because it's still in good shape, but you can get new ones at 1AAuto.com. Put the shoe over the stud and on. Take a clip and put it on. Use needle nose pliers. Squeeze the clip with your thumb, grab the pin with the pliers, and twist.
We're going to repeat the same thing for this side. This is a little harder to get to, because there's a whole bracket back here, but we're using a magnet. You could also feed a piece of wire through there to pull it through, and then just grab onto it on this side. To hold the pin in place, I'm going to use a quarter inch socket, kind of any size. This is a three eighths and an extension, and just push it in from the back to hold the pin. Put my shoe on and the clip. I can actually just turn the clip like that, lock it in place, and then twist the clip back the other way.
Take a little bit of silicone, just put it on the threads and work this back, and then back this way so it's as small as it can be. Put your smallest spring up in place, get your shoes into place somewhat, and your adjuster. On the passenger side, this wheel goes towards the front. Push it into place there, pull the shoes apart, and push into place there, and again, make sure everything's together. All right, upper spring, pull one of the top shoes out some. Okay, feed the spring into place and we'll hook the back first, and we'll get the shoe into place, then we'll grab on as far out as we can, and we're just going to try and set that hook the first time. We won't try and get it all the way in. Then, follow that with a screwdriver and push it in.
We're going to just preliminarily install our rotor, and then we want to adjust our brake shoes so that there's basically some tension between the brake shoes and the rotor. Right now, it's very loose. So the best way to adjust is just use something, push up on the spring a little bit, and then you can just adjust out. Make sure as you turn it that you're expanding the gap between here and the adjuster shoe. You can feel a little bit of tension between the shoe and the disc, then I'll just do it a little bit more.
Okay, good tension, not too much movement, and now it's a little difficult to pull off, so I know I have the tension right. Brake parts cleaner clean off the surface of the shoes. Then the same thing, brake parts cleaner, clean out the surface of the rotor and install the rotor. Clean the rotor surface and the backside.
Use a wire brush and clean your slides here. If your car does have a lot of rust, you may want to pull these off and chip away at the cast iron underneath. A lot of times, what happens on these vehicles is that they rust. These expand and may cause binding in the brake shoes. If they don't look clean or if they look bowed out at all, you'll want to take them apart and make sure there's no rust built up underneath.
Use some silicone brake grease and grease these slides on the top and bottom. You want to reset the piston into your caliper so put your old shoe back in. This gives you a better point to press on. Big c-clamp and push it all the way back in. And you want to make sure that your bolt slides are in good shape and free and as long as they are you can put them back together. If not, you can pull them right out, clean them up, and use some silicone brake grease and reassemble them. We put some grease on the back of our pads, put the inner one in first and now push it into place. And then the outer one slides down and on. I need to pull those out just a little bit.
Make sure your bolt slides are all the way out, they'll get hung up otherwise. Put the top into place and put it down on and put your bolts back in. Tighten the caliper bolts to 24 foot-pounds. Reinstall your wheel and tire. Put the vehicle back on the ground, you want to tighten your lug nuts to 100 foot-pounds using a star pattern. Any time you work on your brakes, before you go out and test drive just pump them a few times, make sure you have a nice firm pedal before testing.
Thanks for watching. Visit us at 1AAuto.com for quality auto parts, fast and free shipping, and the best customer service in the industry.
Shop Products


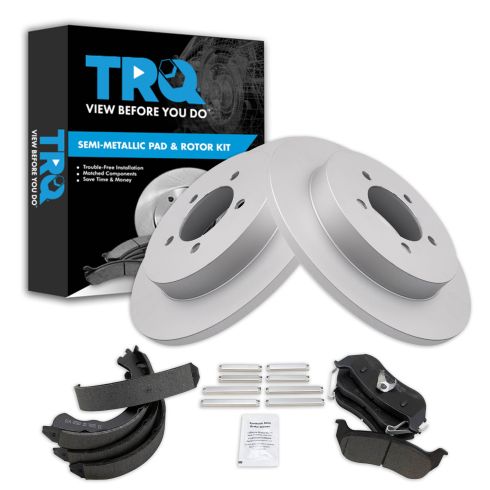
Ford Mercury Rear Semi-Metallic Premium G-Coated Brake Pad & Rotor Kit TRQ BKA37531
Part Details:
- Semi-Metallic
- Premium Posi
- (1) Rear Parking Brake Shoe Set
- Premium G-Coated
- (1) Rear Semi-Metallic Brake Pad Set
- (2) Rear Premium G-Coated Brake Rotors
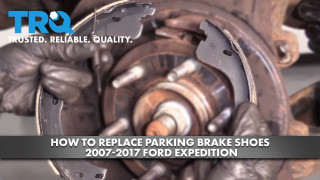
How to Replace Parking Brake Shoes 2007-17 Ford Expedition
This video shows you how to install new drum or parking brake shoes on your 2007-2017 Ford Expedition.
