How to Replace Parking Brake Shoes 2007-17 Ford Expedition
Created on: 2020-12-03
This video shows you how to install new drum or parking brake shoes on your 2007-2017 Ford Expedition.
Tools needed
-
Torque Wrench
Gloves
Flat Blade Screwdriver
Pry Bar
7mm Hex Socket
Wheel Chocks
Brake Caliper Compressor Tool. Single Piston. Lever Style.
Brake Grease
Floor Jack
Wire Brush
Brake Parts Cleaner
Safety Glasses
All right, friends, to get started on our rear brake job, let's go ahead and safely raise and support the vehicle. Remove our center cover, then remove all six lug nuts so we can get the wheel off. Now, from the backside of the caliper, you're gonna go ahead and remove these little covers and then we're gonna remove these 7-millimeter Allen head bolts that hold the sliders. Let's use a pry bar. Remove the caliper. Let's go ahead and remove the rotor. Now we have a clear view of our e-brake shoes. We wanna pay close attention to the direction that our adjuster is going in. You can see that you have the little spool and the threaded area. That's gonna be facing towards the front of the truck. Now the next thing that we're gonna need to do is get our e-brake hardware off of here. I'm gonna start off by removing one of these tabs right here. If I was to press right along here, you can see that it moves the pin. I'm just gonna twist that pin from the backside so it lines up with the slot, and then I'll remove the retaining clip. Get the pin out there. Now let's just take a long screwdriver, come up in between here. We're gonna pry up against the shoe and up against inside there and remove the adjuster. At this point, it releases the tension on the spring and we can remove that as well. Set these aside.
Now let's remove our caliper bracket bolts. Let's go ahead and relieve this side the same way. Turn that pin. Now this part's bound to be about the second hardest part of the whole job. We're gonna have to get this upper spring off of one of the shoes. To do that, I'm just gonna grab this shoe right here, get this in between, and I'm gonna try to turn it. Essentially by turning it, I can see the backside of the spring where it comes through the shoe, and then I'm gonna try to push this so it goes into the slot. There we are. You can grab this side. There we are, friends. Let's go ahead and clean down this whole area. Just go ahead and go ahead. Now that we have this cleaned down, we're gonna continue on by spraying down this pivoting area. We wanna make sure that we spray it with a penetrant and with a lubricant. This one happens to do both. That feels great. With a little bit of caliper grease, we're gonna go along all the mating areas where our shoe is gonna touch up against the backing plate. You'll see them because they're raised up. Let's not forget about this area right here. We know that the shoe rests up against here and, of course, on the other side.
The next thing that we're gonna wanna do is disassemble our adjuster, clean it up, all the threads, and then we're gonna add a tiny bit of lubricant to make sure that it keeps moisture away from it. Tiny bit more grease on this lower aspect again. And then, of course, we'll get the backside on there. Work in that lubricant, we'll set this aside. Now it's gonna be time to install our brand new e-brake shoes. You're gonna notice that there's one aspect of the e-brake shoe that looks like this and the other half is gonna be smooth. The smooth area is gonna be down along the bottom and the rigid area's up along the top. Take your upper spring and put it onto that rearward shoe. Slide it in through the back like this. Bring up that spring. Now we're gonna get this into the new shoe. Okay. There we are. As you can see, the shoes are situated exactly where they need to be. Let's continue on with the anchor point. Let's go ahead and take our pin. Come from the backside of the backing plate and through the hole. Of course, through that e-brake shoe and I'm gonna put it so it's facing straight up and down. Take the clasp. Slide it on here like that. Push in on this tab, slide it down. And now we're just gonna spin that pin. We've got this turned so it's sitting completely inside the groove right along there.
At this point, let's move along to the bottom here and then we'll go to the last anchor point. Let's take that spring. Start it in. We're gonna put it into both of the shoes. Make sure it's sitting into where it needs to be. Let's get our adjuster in there. This looks pretty good. Just make sure that it's sitting into the grooves where it needs to be. There it is, all the way in the groove. Make sure that your spring is completely situated inside the holes. Let's move along to that last anchor point. Just give it a couple of loving bonks. Make sure everything's situated the way it needs to be. The springs are definitely completely in. Your anchor points are completely locked in. They're not kinda turned a little bit or anything like that and then, of course, you have your adjuster spring completely locked in with the adjuster inside of its slots. Let's go ahead and clean down the e-brake shoe area. Let that dry. Now the next thing that we're gonna wanna do is clean up our mating surfaces on the hub and the backside of our rotor. Over on the bench, we need to make sure we clean up the bracket. When we clean it, we wanna sand this area, right along here, and along the backside as well. That's gonna make it so the pad can move and, of course, you wanna do that on both sides of the bracket.
Now we're just gonna lightly coat the areas that we sanded with something that's gonna help keep the moisture away. Do the same to the other side. Now back over at the truck, let's go ahead and make sure that our caliper piston's pushed all the way back. Next, take a rag, roll it up a little bit and get inside this area here. That's where the slider is gonna be. You want to be free and clear. Do both. All right. Now that we have the caliper done, let's make sure that we clean up the slider pins. You wanna make sure that they're free and clear of any debris or buildup. You also wanna clean up the threading on your mounting bolts and, of course, use a little bit of red thread locker. Let's go ahead and add a little bit of lubricant to these sliders, and then we'll put them right in from the backside and in through these slider boots. Let's take a little bit of caliper grease and just go along the piston and, of course, along the backside of both ears. This is for the contact points. Time to get the pads onto the caliper. You want the rounded area of the inner pad so it's facing down and into the upper area of the caliper. Set it in just like this. Squeeze it so the tabs squeeze in. You should hear it latch in. Now it's gonna be time for the outer pad. Just take it. Slide it over the top like this. It goes right in.
Now it's gonna be time to install the bracket. Let's go ahead and put these in, snug them up, and then we'll torque them to 140 foot-pounds. Now let's go ahead and install our caliper. Now it's gonna be time to install the caliper. We wanna pay special attention to this area. There we are. Start in both of the sliders, snug them up, and torque them to 28 foot-pounds. Reinstall your covers. Let's go ahead and get the wheel back up on here. We'll start all the lug nuts, and then we'll torque them to 150 foot-pounds. Torqued. All right, friends, now all you have to do is go ahead and pump up that brake pedal so it's nice and firm. Check your brake fluid. Take it for a road test.
Shop Products


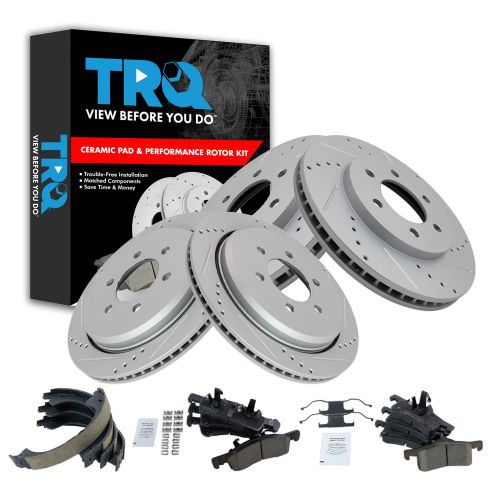
2003-06 Ford Expedition Lincoln Navigator Front & Rear Ceramic Premium G-Coated Performance Brake Pad & Rotor Kit TRQ Performance BKA21766
Part Details:
- Performance
- Premium G-Coated
- (1) Rear Parking Brake Shoe Set
- Ceramic
- Slotted X Drilled
- Performance
- (1) Front Ceramic Brake Pad Set
- (1) Rear Ceramic Brake Pad Set
- (1) Front Premium G-Coated Performance Brake Rotor Set
- (1) Rear Premium G-Coated Performance Brake Rotor Set
How to Replace Rear Parking Brake Shoes 1999-2013 Chevy Silverado
Watch this video to learn how to install new parking brake shoes on your 1999-2007 Chevy Silverado.
