How to Replace Outer Tie Rod Ends 2008-12 Chevy Malibu
Created on: 2020-08-13
This video shows you how to install a new outer tie rod on your 2008-12 Chevy Malibu.
Tools needed
-
Torque Wrench
Gloves
Hammer
Rust Penetrant
Copper Anti-Seize
19mm Socket
Cotter Pin
Torque Angle Gauge
Safety Glasses
Pliers
1/2 Inch Impact Gun
Marker / Writing Utensil
Okay friends. Before we get started, the first thing that I want to mention is you want to be safe, so have hand protection and eye protection. The next thing we're gonna talk about is safely raising and supporting the vehicle so the suspension is hanging. So come right underneath here, this is where you're gonna support the vehicle in the front. Now with the front of the vehicle, safely raised and supported. We're gonna remove all five of our 19-millimeter lug nuts.
Remove your wheel. Now that we have the wheel off, we have a clear view of our tie rod area, I'm just gonna spray down these areas with some penetrant spray. Now we're gonna use some nice long pliers, and I'm gonna break this jam nut free. Turn this clockwise. There we are. Now, we're gonna remove our outer tie rod end nut.
If you find that the outer tie rod end nut just spins the whole stud inside of the knuckle, you could take those nice long pliers or whatever you might happen to have, and just try to squeeze this down as tight as you can. We're gonna apply a little bit of pressure, and we'll try again. If your tie rod still stuck in the knuckle, it's great to use a hammer, bonk right on the knuckle right here, and break it free.
For the next part, we're gonna want something that you can write with, because we're gonna take off the tie rod, but as we turn it, and we make a complete rotation, we're gonna count those rotations and take note of it. That's one, two, three, and so on. It's always important to make sure you coat your threads with something such as copper never seize.
Now it's gonna be time to put on our brand new outer tie rod end. As you go to install it, make sure you put on the same amount of turns that you had to remove the old one. One, two, three, and so on. Should pretty much line up. Let's put on our outer tie rod end nut. We'll snug it up, and then we'll torque it to manufacturer specifications as well. We wanna torque this to 18 foot-pounds and then add an additional 90 degrees, so basically a quarter turn after the 18. So that's 18. Now I need to take it another quarter turn. I'm gonna start approximately like that, and I'm gonna bring it right out to me. There we are.
The next thing we wanna do is pay attention to the slots on the nut compared to the hole in the stud. If it doesn't line up, you need to continue tightening until it does. Go to the very next slot. As you can tell I have that lined up now. Take your cotter pin, slide it through, and then peen it over so there's no way this nut can loosen up on its own.
Now it's time to tighten up our jam nut. We're gonna grab this, turn it counterclockwise. That feels good. Now just go ahead and grab onto that tie rod, make sure it's pretty level and it's not kinked in any way. Double check everything. We have all our clamps. Perfect. We're gonna go ahead and put the wheel on here. We'll start all the lug nuts, we'll snug them up, and then we'll torque them to 100 foot pounds. Torqued.
Shop Products


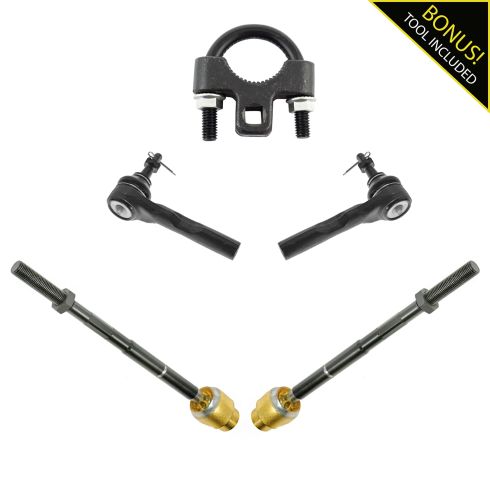
Chevrolet Pontiac Saturn Front Driver & Passenger Side 4 Piece Tie Rod Set with Inner Tie Rod Tool TRQ PSA69772
Part Details:
- 4 Piece
- (4) Front Tie Rods
- (1) Heavy Duty Inner Tie Rod Tool

How to Replace Tie Rod End 1999-2005 Volkswagen Jetta
Check out this video to learn how to replace the outer tie rod on your 99-06 Volkswagen Golf, Jetta, or Beetle. Save money and DIY it with 1A Auto!
