How to Replace Liftgate Handle 2007-14 Honda Fit
Created on: 2019-05-17
Learn how to replace the rusty, stuck lift gate handle on your 07-14 Honda fit. It's a common problem, and you can fix it yourself with 1A Auto's help!
-
step 1 :Opening the Lift Gate If Its Stuck
- Pry off the access door inside the vehicle, just above the latch
- Slide the lock lever over to the unlocked position, or unlock it with the lock button or key fob
- Push the latch lever to the right to release the latch
-
step 2 :Removing the Lift Gate Handle
- Remove the wiper arm trim piece
- Remove the 10 mm nut securing the arm to the wiper motor
- Pull the wiper arm off
- Pry off the lift gate interior trim
- Remove the 8 mm screw on the interior of the lift gate that is securing the driver side of the exterior lift gate trim
- Press out the push clips retaining the exterior lift gate trim using a pry bar
- Remove the exterior lift gate trim
- Disconnect the lift gate latch cable
- Remove the two 10 mm nuts securing the lift gate handle
- Remove the lift gate handle
-
step 3 :Installing the Lift Gate Handle
- Replace the lift gate handle
- Secure the lift gate handle with the 10 mm nuts
- Replace the lift gate latch cable
- Replace the exterior lift gate trim
- Replace the 8 mm screw securing the exterior lift gate trim
- Replace the interior trim panel
- Replace the lift gate latch cover
- Replace the wiper arm
- Secure the wiper arm with the 10 mm nut
- Replace the wiper arm cover
Tools needed
-
Socket Extensions
Pry Bar
8mm Socket
10mm Socket
Ratchet
Pocket Screwdriver
Pick
What's up guys? I'm Andy from 1A Auto. In this video I'm going to show you how to replace the lift gate handle on this 2010 Honda Fit. This a common issue with these vehicles, causing you not to open the lift gate. If you need parts for your vehicle, click the link in the description and head over to 1AAuto.com. I'm just going to take a pocket screwdriver or a straight blade screwdriver. Take this little access door off right there.
So this bracket right here was in the stuck open position. So when you go to unlock this rear lift gate, the lock wasn't working. So there's a little lever right here. So I push this lever back. This little lever right here is the lock. See that little piece right there? That goes down. You could actually do it with the key fob as well. Once that's in position right there, take a larger screwdriver, release that and open the lift gate. To remove the rear wiper arm, we need to take this little trim piece off, just slide that out, just like that.
I'm going to remove this nut. I'm going to use a 10 millimeter socket and a ratchet and hold the arm while I loosen this up. Take that off. Just grabbed the arm, just rock it back and forth. Should be able to break it free. It's a good idea to mark this before you take it off. Can mark the windshield or just take note of where it was before. You want to pull this trim off. Just grab underneath here, pull it straight down. You can use a trim tool. It comes right down. has all these push retainers, little bee in there. There's a screw right here. You can try to use a Phillips head screwdriver, or you can use an eight millimeter socket and a ratchet. Take this screw out, it's in there pretty tight.
All right, so I'm taking a pry bar, and going through here, there's all these push clips that hold this on. There's one right here, there's some more over here. There's one there. If you can try and get this one up with the pry bar as well. Just push it like that. And there's a couple more over here. All right, so I got most of those released except for one right here. I'm just going to see if I can pull from the front. There we go. That one broke right there. But those would be the push clips that you can get off from the inside. And then that one's got that screw.
If you could get a pry bar right in between here, you could get that last clip that broke on ours, either with a pry bar or a small screwdriver right above the wiper motor. I can take this cable off right here, slide it out, and then slide the retainer out, right there. Set that aside. I'm going to take these two nuts off, I'm going to use a 10 millimeter socket extension and a ratchet. Now we can just grab the handle, you can twist it, and pull it up. Here's the old handle. You can see all the rust and that's what's causing the handle not to open and close. This is a common issue on this vehicle. The new handle doesn't have any rust.
Take the new handle, slide this in sideways like this, and then twist it. Then I'll take the nuts, get them both started with a 10 millimeter socket, and an extension. Just taking the ratchet and snug them down. Now take this cable, and slide this in position, like that. And then lock it right there. Before I put the cover on, let's just test it and make sure it works. And it works. Just take this, we're going to slide this over the wiper motor. Just get the clips lined up. Those lined up, just snap it back into place. There we go.
And if the weather stripping didn't line up like right there, you can just take a little pick, take a little pick, get underneath here. Get that, make sure that looks good all the way around. Take this screw and eight millimeter socket, extension, and a ratchet and get this started and then just snug it down.
All right, take this panel, just line the clips up and just press it back up. Take this cover, get this lined back in position, and lock it in place. This vehicle, we're missing this trim handle right here, but if your vehicle has that, you would install that at that point. To reinstall this wiper arm. You want to line this up. Just like that. Take this nut, get this started. Take a 10 millimeter socket and a ratchet, and I'm going to hold the arm and just snug this up. Not too tight. Make sure it's not too loose. Take this cover and just slide it over.
Thanks for watching. Visit 1AAuto.com for quality auto parts shipped to your door, the place for DIY auto repair. And if you enjoyed this video, please click the subscribe button.
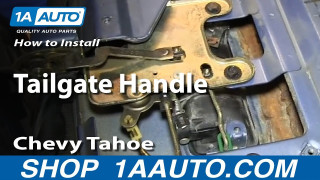
How to Replace Tailgate Handle 1995-99 Chevy Tahoe
How to repair, install, fix, change or replace a broken or snapped off tailgate handle on 95, 96, 97, 98, 99 Chevy Tahoe, or GMC Yukon
