How to Replace Inner Tie Rod End 2007-14 Cadillac Escalade
Created on: 2020-06-03
This video shows you how to install a new inner tie rod on your 2007-14 Cadillac Escalade.
Tools needed
-
24mm Socket
Torque Wrench
Hammer
Socket Extensions
Rust Penetrant
Pry Bar
Jack Stands
Liquid Thread Locker
21mm Socket
Hose Pliers
Inner Tie Rod Removal Tool
Socket Driver
Large Locking Pliers
Wheel Chocks
Straight Cutters
Wire Ties
Ratchet
Floor Jack
1/2 Inch Impact Gun
22mm Socket
One of the first things you want to do is safely raise and support your vehicle by the frame, so your suspension can hang. Once you've done that, take a small pry bar, and we're going to take off this center cap. If you were to spin it, you're going to see a little notch in the cap. Just carefully slide this off of here. That exposes our 22-millimeter lug nuts. Remove all six. Remove your wheel.
Now, that we have the wheel off, we have a clear view of our tie rod area. One of the first things we're going to do is break free this jam nut right here. I like to use a nice long pair of pliers like this. You could also use a wrench right on here like that. Once it turns like this, that means it broke free from the outer tie rod end, and now you'll be able to continue. Now, let's remove our 21-millimeter nut. Let's just put that nut on just a couple threads. Now, we're going to take a hammer and we're going to hit right here on the knuckle. You want to be very careful for your brake rotor. The next thing we're going to do is remove our outer tie rod end, and as you screw it off, just count those threads, one, two, and so on. All right, go ahead and write that number down. The next thing I would do is go ahead and blast this area with some penetrant again. Just for good measure, use some locking pliers. Hold on to the inner tie rod end, and then we're going to use a 24-millimeter socket and remove this. Now, if you were to look at this rubber boot right here, which is called your bellows boot, at this end, closest to the inner tie rod end shaft, you're going to have a little clip. Go ahead and grab that with some long-nose pliers.
Go right along the inner tie rod end. Grab. Squeeze. Draw it away. Remove it. Now, if you were to follow those bellows boot in, you're going to look to find a clamp that's holding the bellows boot to the power steering rack. Right along the frame and the boot, you're going to see a little nub right there. That's the area that the clamp is holding on by. What I like to do is I like to take a nice long pry bar, and I'll put the tip up against it, and come out just like this. And then I'm going to give it a couple loving blocks with a hammer and try to break it free.
Take my pry bar. Put it right up against that clip. Be careful not to damage your boot. One bonk. Set you free. That's what it looks like, friends. Now, we're just going to grab that inner tie rod boot. Go ahead and try to give it a twist to break it free, and then just give it a couple yanks. Go ahead and draw it right off of here. Now, is a great time to inspect the boot. Make sure it's not damaged in any way. This looks great.
The next thing we need to do is grab onto this portion of the inner tie rod end. You can either do that with a inner tie rod end tool, which overall will probably have a little clamp that goes over it. A little piece. You can put an extension with a 3/8 ratchet. You also have a different inner tie rod end tool that will have a nice long tube that will slide over with an adapter. Me personally, I love my nice long pliers. They're easy. Turn the wheel all the way to the left, so you can get to this. If you don't, you'll be inside here. Once you have it turned, go ahead and grab onto it. Turn it counterclockwise and break it free. Let's go ahead and remove that. There it is, friends.
The next thing I always like to do is just clean up the area. That looks pretty decent just like that. Make sure that there's nothing in the threads that's going to cause an issue. Now, it's going to be time to install our inner tie rod end. If you want to use a little bit of threadlocker, we'll call it your prerogative. I like to thread it in by hand. Okay. That's as tight as it's going to go. Now, I'm just going to go ahead and continue on by tightening it up. At this point with it being bottomed out, you really don't want to go too much further because if you apply too much pressure, you'll twist the inner portion of the rack, which will cause an issue. Okay. Just give it a little bit. That's it right there. Now, what you're going to notice is your inner tie rod end is going to come with this nice little package of grease. Go ahead and tear open a little corner of it, and then we're going to take the grease and go right along the ball and socket area, which is this area right here. Just put it in. Wiggle it around. This is going to help keep moisture out of there, and it's going to help keep it well lubricated for a long period of time. I like to put a little bit of grease right along her, right where this line is, that's where the bellows boot clamp is going to be. So, let's get this jam nut off of here.
The next thing we're going to do is go ahead and straighten out the wheel, so it's back to its original area. We're going to take our bellows boot, just like this, and I like to use a nice wire tie, and I'm just going to go right along it. Get it started on there. I'll leave it pretty loose at this point, but I'm going to trim off some of the slack just so I can get inside this area. Now, we're just going to take that inner tie rod end boot. Slide it right on over. Okay. It got to the grease. I'm just going to work it around a little bit. By having grease right here, that's going to make it so when it comes time for the alignment and they're turning this, it's going to turn easy-peasy, and your alignment professional is going to be very happy. Go ahead and slide it over the power steering rack down here. Once you're sure it's completely seated all the way around, go ahead and snug up that wire tie with some pliers, and then trim off the excess.
Now, it's going to be time to get this clamp back on there. Go ahead and carefully squeeze on it. Just watch your fingers. It is spring metal or spring steel. Slide it right on over. Make sure it's sitting flush all the way around, not hanging off anywhere, and the boot is definitely secured to the inner tie rod end. This is going to prevent moisture from getting in. Next, we'll take some copper Never-Seez and go right along the threaded area here. Go ahead and grab that jam nut. Get a nice new one.
Now, it's time to install the outer tie rod end. Make sure you put it in the same amount of threads that you did to take it off, one, two, three, and so on. Take that nut off of there. Okay. So, now with it sitting as it is, you just want to kind of go to the front of the vehicle, and make sure that both wheels are aiming straight ahead at this point.
Now, that everything looks like it's going in a nice and straight line, go ahead and bring that jam nut, so it's hitting up against the outer tie rod end. That's good right there. Let's go ahead and grab some pliers. The next thing we're going to do is take a nice wrench, 1-inch will work perfectly, and we're going to grab right onto this area on the outer tie rod end. And then we'll take our nice long pliers and go ahead and snug up this jam nut. Okay. That feels good. Go ahead and wiggle that tie rod around a little bit. Make sure it's facing straight up and down. This looks good. Now, let's go ahead and snug this up.
We're going to bottom it out. Now, you're going to torque this to 44 foot-pounds. That's torqued. The next thing we're going to do is look to see if we can find the hole in the stud of the tie rod, and match it with the next corresponding slot on the tie rod stud nut. This doesn't line up, so what I need to do now is I need to continue tightening until it does. I can see right through. I'm going to grab that locking cotter pin and install it. Slide that right on through. And just peen it over. There's no way that this nut can come loose.
We'll grab those lug nuts. Start them all on there. Let's bottom these out. Now, we'll bring it down to the ground, and we'll make it so the wheel is just barely touching enough so the wheel can't spin. Now, let's do the lug nuts, 140 foot-pounds. Go crisscross. Torqued. Now, it's going to be time to get the center cover on. Before you go ahead and pound it on there, just take a look at the back. You're going to see something that looks a lot like a valve stem. Line it up. It's going to go pretty much just like this. Light bonk and then, of course, clean up your wheel, make it look nice and pretty, and take it for a road test.
Shop Products


Chevrolet GMC Cadillac Front 8 Piece Steering & Suspension Kit TRQ PSA56255
Part Details:
- (2) Front Lower Ball Joints
- (2) Front Sway Bar Links
- (2) Front Inner Tie Rods
- 8 Piece
- (2) Front Upper Greaseable Control Arms with Ball Joints
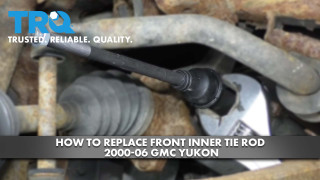
How to Replace Front Inner Tie Rod 2000-06 GMC Yukon
Watch this video to learn how to install new TRQ inner tie rods on your 2000-06 GMC Yukon.
