How to Replace Idler Arm Bracket Assembly 1995-2000 Chevy Tahoe
Created on: 2010-12-27
Watch this video to learn how to replace the idler arm bracket assembly in a 95-00 Chevy Tahoe.
-
step 1 :Remove the wheel
- Loosen the lug nuts.
- Raise and secure the vehicle
- Remove the lug nuts and the wheel.
-
step 2 :Remove the front shield
- Use a 15 mm socket and ratchet.
- Remove the four bolts.
-
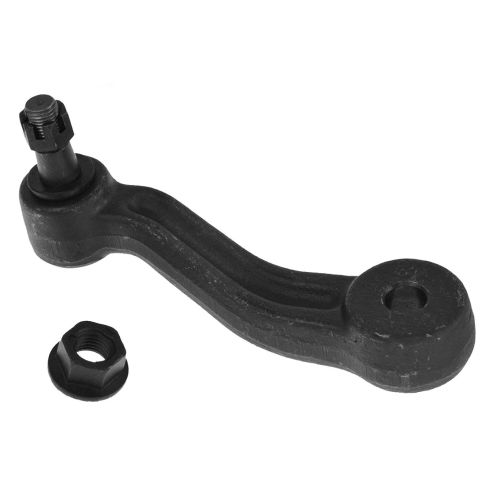
step 3 :Remove the Idler Arm
- Remove the 24 mm bolt securing the idler arm to the steering linkage
- Use a joint fork and a hammer to separate the joint.
- Remove the three other bolts securing the idler arm.
- Use a Tie Rod Puller to pull apart the idler arm and the idler shaft.
-
step 4 :Install the new idler arm
- Assemble your new idler arm to your idler shaft, threading on the bushing and nut.
- Bolt in the idler arm assembly into place, tightening up the three nuts.
- Bolt in the end of the idler arm assembly to the steering gear.
- Torque the nuts and bolts to 80 ft lbs.
- Install the cotter pin.
- Use a grease gun and fill the grease fitting.
-
step 5 :Reassembly
- Replace the shield with the four 15mm bolts.
- Clip the air bag harness back in.
- Put the wheel back on and lower the car
- Using a star pattern torque the lug nuts to 120-140 ft lbs
Tools needed
-
24mm Socket
Large C-Clamp
Socket Extensions
Torque Wrench
Hammer
Tie Rod Fork
15mm Socket
18mm Wrench
Jack Stands
18mm Socket
19mm Socket
Grease Gun
Tie Rod Puller
Ratchet
1/2 Inch Breaker Bar
22mm Socket
Brought to you by 1A Auto. com, your source for quality replacement parts and the best source on the Internet.
Hi, I'm Mike Green. I'm one of the owners of 1A Auto. I want to help you save time and money repairing and maintaining your vehicle. I'm going to use my 20 plus experience restoring and repairing cars and trucks like this to show you the correct way to install parts from 1A Auto dot com. The right parts installed correctly. That's going to save you time and money. Thank you and enjoy the video.
In this video, we're going to replace the idler arm on this '96 Tahoe. This is a full drive truck so it's the same as any '98, or '88 to '98 GM truck and '92 to 2000 SUV. Tools you'll need are various millimeter sockets, joint fork and hammer, a tie rod or an idler arm puller, a torque wrench, telescoping magnet and an 18 millimeter wrench.
First, using a 19 millimeter wrench or your tire iron, remove your front. Using a 15 millimeter wrench, remove this front shield. Then, we're zooming in here and this is a 24 millimeter bolt that holds the idler arm on to the steering linkage. We're going to use a joint fork, we're just going to put that right in between the joint where the idler arm and the steering linkage is, zoom out here and then, just use a good-sized hammer and just force that fork right between the joint and separate that joint. The idler arm assembly is held on by three bolts. You can see the backside of them there. You get to them through the frame through access holes right there. You can see my wrench is through one and then the other two are right near them.
We'll speed up going through and removing those three bolts. Note have a telescoping magnet available for when you drop those bolts into the frame as I do a couple of times. What I'm doing here is pulling the idler assembly away from the frame, and at the same time with the other hand, pushing the idler arm up and away from the steering linkage, or actually pulling the steering linkage down. Eventually it comes loose enough and comes right out. This is a 24 millimeter. You want to use this puller and this is a rubber gasket here, pretty much just have to force it into your puller, pull that right off. My new one; right back into place.
The trouble you run into is when you try to put this back together, right back and these two go to the back when you try and put this back together, this is a lock nut and wind up turning the shaft. What I'm doing, I got a big old bolt from another project. I put that on there and what happens this will go in enough and when I hit that other nut, it'll start pressing this on to the shaft. Then, I can use the arm itself to pull the shaft. I put my lock nut back on.
Using a magnet, I took out my other two bolts so I have that top one in. I'm going to use an extension and hold that bolt in place, assembly up in here and hang in on that bolt.
I will put the nut up on that bolt and then basically repeat the step for the two bolts, put them right in to my extension with my socket, feed them through. See the bolt come through, put it on to the assembly and put the nut back on and then same thing with the third one. Feed it through, see the back of my head and then, put the nut on. Before I tighten those up, I'll turn my attention over to the steering gear. Here I pull the steering gear down and on to the joint for the idler arm and then just put the nut on hand tight. Now we'll go back to tightening up those three bolts. You want to use torque wrench and tighten them up to 80-foot pounds. This 22 millimeters and tighten these up to 80-foot pounds as well. Just a little tighter so we can fit that cotter pin through.
We'll put a grease gun in there and make sure we hit that grease footing to get it properly lubed up. Put your shield back on real quick with the four 15-millimeter bolts. Over here, we're just going to put that little pin back into the harness that was holding our airbag sensor there. We'll speed up putting the tire back on. Put on the lug nuts, tighten them a little bit, then lower the car down and torque them to about a hundred twenty to a hundred forty foot-pounds and then put your cap back on.
We hope this helps you out. Brought to you by www.1AAuto.com, your source for quality replacement parts and the best service on the Internet. Please feel free to call us toll free 888-844-3393. We're the company that serves you on the Internet and in person.
Shop Products


How to Replace Idler Arm 1997-2003 Ford F-150
Watch this video to learn how to replace the idler arm on your 97-03 Ford F150.
