How To Replace Headlights 2001-04 Volvo V70
Created on: 2013-08-02
Watch this video to learn how to replace a cloudy or cracked headlight or change a burnt out bulb. The experts at 1A Auto teach you how to replace the headlights on your 01-04 Volvo V70 or XC70.
-
step 1 :Changing the High Beam and Low Beam Bulbs
- Twist the cap counterclockwise.
- Twist the socket counterclockwise and pull it free from the assembly.
- Pull the bulb up and out.
- Connect the new bulb.
- Twist the socket back into place.
- Line up the cap and twist it clockwise.
-
step 2 :Removing the Headlight Assembly
- Remove the two 10mm bolts at the top of the headlight.
- Pry off the bumper trim.
- Remove the 12mm bolt behind the trim.
- Remove the six plastic rivets from the top of the bumper cover.
- Loosen the T25 screw from inside the wheel well.
- Pull the front edge of the bumper cover out.
- Remove the 10mm screw on the inside edge of the headlight.
- Remove the three T25 screws on the outside of the headlight securing the adjusting plate.
- Remove the 10mm behind the plate.
- Pull the headlight out.
- Disconnect the two connectors to free the headlight assembly.
- The blinker bulb can be changed by twisting out the bulb.
-
step 3 :Replacing the Headlight Assembly
- Reconnect the two harnesses.
- Remove the rubber gasket from the old headlight and place it on the new headlight.
- Line up the headlight and push it into place and make sure the harnesses are not pinched.
- Reinstall the 10mm under the adjusting panel.
- Replace the three T25 screws.
- Reinstall the 10mm bolt on the inside front edge of the headlight.
- Reinstall the two 10mm bolts at the top of the headlight.
- Reinstall the front bumper cover.
- Tighten the T25 screw in the wheel well.
- Reinstall the 12mm bolt in the bumper cover.
- Put the trim piece into place.
- Replace the six plastic rivets in the top of the bumper cover.
- Use the two screw holes on the top of the headlight to aim the lights.
Tools needed
-
12mm Socket
Flat Blade Screwdriver
10mm Socket
Ratchet
T25 Torx Driver
Brought to you by 1AAuto.com, your source for quality replacement parts and the best service on the Internet. Hi. I'm John from 1A Auto. I hope this how to video helps you out, and the next time you need a part for your vehicle, think of 1AAuto.com.Thanks.
In this video, we're going to show you how to replace a headlight assembly on a 2002 Volvo V70,pretty much the same operation for 2001 to 2007, as well as for the model of the2001 to 2007 Volvo S60, and we're also going to show you how to service your high and low beams as well. The items that you'll need to do this are a New Headlight Assembly from 1A Auto, a 10, 12mm socket and socket wrench, Torx 25 socket, and a pocket screwdriver.
If you're simply looking to service the headlight bulbs, either the low beam or the high beam, we're going to show you here. They're behind the caps. Twist the caps counterclockwise and pull it up out of the way, and then in order to get to the bulb, you'll see it's in there, twist it counterclockwise again, pull it out and the connector right there, just pull up on it and pull the bulb up and out, and it's going to be the exact same thing for both the high beam and the low beam, it's just going to be a little bit different bulb.
Go ahead and put that back in and then reverse the process and line up the tabs on the bulb to that of the socket inside the headlight assembly. Once you've done that, you can reinstall the plastic cap. This is going to be the same for both the left and the right side as well. Also notice that on the cap, it's written bottom, and you're going to put that in line, it'll tab up and then go ahead and give it a twist.
Locate the two 10mm bolts on the top of the headlight and remove those. The front bumper trim comes in three pieces, use a pocket screwdriver to pry off the side that you are going to be doing the headlight on. Locate the 12mm bolt behind that front trim and I'll fast forward while I take that out. On the top of the front bumper cover, you'll find six plastic rivets. Those are removed by pressing the inside piece in about an eighth of an inch and then pulling the inside and the outside part of it out.
Wheel side of the front bumper covers on both side, there's a 25mm Torx screw, locate that. Fast forward as I unscrew the 25 Torx screw, and I'm going to do it probably eight or nine turns just to loosen it up, not to fully take it out. Once I've loosened it up, I can wiggle the corner of the front bumper cover around, and basically that screw puts the tension on the cover pulling it back, so just wiggle it around, get it off of the black plastic adjusting panel that the screw goes into, and once you can do that, it'll give you better access to getting the 10mm that are on the underside of the headlight. Pull out that front edge of the bumper cover and you'll find a 10mm screw there. I'll fast forward as I take that out.
Now go back to the corner edge of the bumper cover, pull it back and you'll find three Torx 25 screws that hold that adjusting plate, or the tension plate, for the front bumper in place, you'll going to go ahead and remove those three and I'll fast forward as I take those out. Pull that adjusting plate out of the way and you're going to find a 10mm screw that holds in the corner edge of the headlight, remove that and I'll fast forward through that. Let's start pulling back and down on the front bumper cover to give you more access to the headlight, and once you do that, you should be able to pull it right out. Disconnect the two connectors. Just looking to service that blinker bulb, or the parking light bulb on the right-hand side. It's just a twist out and twist in. We got the new part from 1A Auto on the bottom and you can see they are identical and should go in just as the other one came out. It's important here that the pins on the headlight assembly are straight. As they are with any kind of electrical connector, you need to make sure that they're going to go in to the connector, and once you confirm that, go ahead and reinstall both the harnesses. Find the rubber gasket on the old headlight and remove it by pushing down on the tabs and pulling it out and we're going to swap that over to the new headlight, and it's going to clip in just as it did on the old one.
I'm going to fast forward as I put that back on. Let's go ahead and put your headlight back in place. Make sure that the front bumper cover is out enough to give you room to push everything back in, and once it gets settled in there, make sure that your bolt holes are all going to line up and that nothing is pinched, and I'm going to go ahead and fast forward as I set that in there. Reinstall the 10mm bolt that goes into the corner underneath the adjusting panel. Get that adjusting bracket in place and then we're going to reinstall the three Torx 25 screws, and I will fast forward through that.
Reinstall the 10mm bolt on the inside front edge of the headlight, and I'm going to fast forward while I do that. Reinstall the two 10mm bolts on the top of the headlight. Reinstall the front bumper cover, slide the top edge into the groove in the adjusting bracket and get it all lined up for the bolt holes.
Tighten up the Torx 25 screw in the adjusting brackets so it pulls the edge of that bumper cover tight. Reinstall the 12mm bolt that goes through the hole in the front bumper cover, and I'll fast forward as I do that. Pop your trim piece back into place. Reinstall the six plastic rivets on the top of the bumper cover, and here we're going to show you the two adjusting points for the headlights. We hope this helps you out.
Brought to you by www.1AAuto.com, your source for quality replacement parts and the best service on the Internet. Please feel free to call us toll free 888-844-3393. We're the company that's here for you on the Internet and in person.
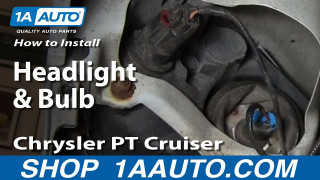
How to Replace Headlight 2001-05 Chrysler PT Cruiser
Watch this video for help with replacing a headlight and headlight bulb in a 01-05 Chrysler PT Cruiser.
