How to Replace Headlight 2001-05 Chrysler PT Cruiser
Created on: 2011-07-06
Watch this video for help with replacing a headlight and headlight bulb in a 01-05 Chrysler PT Cruiser.
-
step 1 :Remove the Wheel (Only if Replacing the Headlight Assembly)
- Using a tire iron or 19mm socket loosen the lug nuts.
- Lift the vehicle and remove the lug nuts.
- Pull the wheel off.
-
step 2 :Changing the Headlight Bulbs
- Turn the wheel to allow access to the small panel inside the inner fender.
- Push the panel towards the car and down to remove it.
- Twist the bulb you want to change counterclockwise.
- Push the tabs on the socket and pull the bulb free.
- Push the new bulb into the socket.
- Twist the socket clockwise into the assembly.
- Replace the panel.
-
step 3 :Removing the Inner Fender
- Follow the instructions in Step 1.
- Remove the pin under the bumper holding the lower plastic panels together using a screwdriver or pliers.
- Remove the three 7mm screws at the front of the inner fender.
- Remove the three push pins in the inner fender.
- Remove the five other 7mm screws in the inner fender and under the inner fender.
- Pull the inner fender down and out.
-
step 4 :Removing the Headlight Assembly
- Unplug the bulbs.
- Remove the two 10mm bolts that secure the fender to the bumper cover.
- Remove the four 10mm bolts around the headlight.
- Push the bumper cover down and work the light forward and down.
- Pull the headlight free.
-
step 5 :Installing the New Headlight Assembly
- Line up the light, putting the outside edge and top in first.
- Rotate it into place.
- Reinsert the four 10mm bolts around the headlight.
- Reinsert the two 10mm bolts securing the fender to the bumper cover.
- Plug in all the bulbs.
- Replace the inner fender. Push the pins into place.
- Reinsert the five 7mm bolts.
- Replace the front inner fender close out panel.
- Reinsert the three 7mm bolts.
- Reinsert the push pin underneath.
-
step 6 :Putting the Wheel Back On
- Put the wheel into place.
- Thread the lug nuts and tighten.
- Lower the vehicle and tighten the lug nuts to 100ft/lbs.
Tools needed
-
10mm Socket
Socket Extensions
Needle nose pliers
Jack Stands
19mm Socket
Flat Blade Screwdriver
Ratchet
7mm Socket
Brought to you by 1AAuto.com, your source for quality replacement parts and the best service on the internet.
Hi, I'm Mike Green. I'm one of the owners of 1A Auto. I want to help you save time and money repairing and maintaining your vehicle. I'm going to use my 20+ years' experience restoring and repairing cars and trucks like this to show you the correct way to install parts from 1AAuto.com. The right parts installed correctly, that's going to save you time and money. Thank you and enjoy the video.
In this video we're going to show you headlight replacement both just replacing the headlight bulbs and replacing the entire assembly. This is a 2001 PT Cruiser exact the same for 2001 to 2005 and very similar for the 2006 and up cars.
Tools you'll need are a jack and jack stands, a 19mm socket and ratchet or your tire iron, 7mm and 10mm sockets with ratchets and extensions, flat blade screwdriver, needle nose pliers, and painter's tape which is kind of optional.
You can see I have the car jacked up and the wheels off. If you're just looking to replace the headlight bulb, this is not necessary. What you want to do is if you're replacing the right-hand headlight bulb, you turn your wheels all the way to the left and get your wheel over here and give you some space. To just replace the bulbs you just kind of reach in here and pull this door down. You kind of push that way and pull it off, and then right in here is your bulb. Twist it counterclockwise and then pull it out, and then there's a little tab here just kind of pull the bulb apart, and reinstall and plug it back in. Install it into the light. Kind of twist it around a little bit and make sure it goes into the socket properly, twist it clockwise. There's a bulb up here which is one of your signal bulbs, same thing. Twist it counterclockwise. Pull it out. Bulb comes out, goes back in. Work it in there. Twist it clockwise and lock it in place.
Stop the action for just a second. Right where that red arrow is pointing, that is your high beam bulb which I accidentally forgot to kind of go over its location, and it's the same procedure as the other headlight. Twist it counterclockwise and pull it out. There's some tabs that hold the bulb into the harness and then you put it back in by pushing it back into the socket and twisting clockwise. And put this door back up in. It slides in over there, and then this locks into place like that.
To replace your whole headlight assembly you'll want to remove the little pin at the bottom. This is up near the bumper looking from the bottom of the car. There's a pin that holds the lower plastic panel at the bottom. Just use a screwdriver or if you use a pair of needle nose pliers, put it up in there and pry that out.
Now there are three 7mm screws that you'll want to remove. And we'll speed that up as we take out those 7mm screws, and then put that panel off to the side. Now there's three pins that hold part of the rest of the inner fender in, one there in front of the shock, and then there's one up top kind of hidden in there. I'm just going to pry it out with a screwdriver and then there's one more towards the back. Change the angle here. You want to pry those out with your screwdriver. Some of the other videos show you just kind of ripping this fender, part of the fender back. Not a good idea easy enough to take it apart. The next steps in taking it apart are five more 7mm bolts. There's one up there, three down lower, and then one up underneath, and now that inner fender comes right down and out.
What I'm doing here is - a couple of those push pins I wasn't able to get out with the screwdriver, so I'm just using a pair of needle nose pliers. Put them in underneath and pull them out. So now we'll unplug our bulbs. Now right up in here there are two 10mm bolts or nuts to remove here and here. Fast forward as I remove those two 10mm nuts. Now you have four 10mm bolts, and fast forward as I take those out. You'll notice on the bottom right one it appears to stay there. It unscrewed from the back of the headlight so after I took the headlight out I held it with a pair of pliers and then used a wrench to get it off and then I used an extension for that top left one.
Now with all the bolts out, your bumper cover will come down some. You've got to work you light forward and down. You'll probably have to push down a little extra right here and work your light up on top of your fender cover and the light comes right out.
Here we've got the new headlight from 1A Auto. If you're concerned about scratching your bumper cover just put a little blue painter's tape on there, and then kind of put the outside in first, and the top in, and then actually the outside goes in a little bit lower than where it's supposed to go and you basically just kind of rotate the bottom straight up and in. It's kind of a matter of you push it in there and then as you push it in and also you're looking back here to see that everything's going in and lining up correctly and you just kind of carefully pull this painter's tape up and out of here and get that off.
We'll fast forward a little bit here. We just start those four nuts that hold the headlight assembly to the fender, and we'll keep that pace going as we start the two 10mm nuts that hold the bumper cover up to the fender. Now you want to tighten those up first. It kind of helps to push the light up into place, and then as you're tightening the four nuts that hold the fender you can just make sure to look on the other side to make sure the headlight is up where you want it and then tighten those. You want them to be snug, but they don't have to be incredibly tight and then plug in your bulbs and your signal light. Here I'm just doing a final tightening and you can see I'm lifting up on that light and making sure it's up in the right place as I tighten it up.
Now you put the inner fender in. Put the pin in that holds it at the front to the front of the fender first. Then line up the back and make sure it's lined up correctly with the holes and everything to bolt it together. Put that pin in that's behind the strut, and then start all your 7mm bolts in, and then, of course, tighten those 7mm bolts. And the last part of that step to the inner fender is putting that last pin in right there. And then put the front close-out panel back up in place, and the three bolts that hold it. Also, I think I forget to film here, but there's also a push pin at the bottom that pushes in, and then tighten those up nice and snug.
Now you'll want to put the wheel back on. Start you lug nuts all by hand first to avoid cross-threading them, and then I use my impact wrench just to tighten them preliminarily, and then once the vehicle is back on the ground use a torque wrench to tighten the lug nuts to 100 foot pounds using a star pattern.
We hope this helps you out. Brought to you by www.1AAuto.com, your source for quality replacement parts and the best service on the internet. Please feel free to call us toll free, 888-844-3393. We're the company that's here for you on the internet and in person.
Shop Products
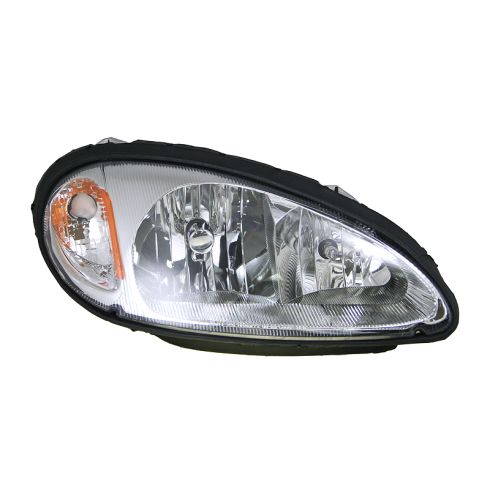
2001-05 Chrysler PT Cruiser Passenger Side Headlight Assembly TRQ HLA74074
Part Details:
- Yes
- PC (Polycarbonate)
- Yes
- Halogen

How to Replace Headlights 2004-07 Subaru Impreza WRX
How to repair, install, fix, change or replace the broken, damaged, cracked, faded, cloudy, or chipped headlightson 06 Subaru Impreza WRX
