How to Replace Glove Box Light Bulb 2002-06 Nissan Altima
Created on: 2017-09-18
How to repair, install, fix, change or replace the broken, damaged, faded, or burned out headlights on 2005 Nissan Altima.
-
step 1 :Removing the Glove Box
- Press the two hinge pins toward the center of the box to unlock the hinges
- Unhook the glove box from the pins
- Unclip the tether
-
step 2 :Removing the Dashboard Trim
- Remove the four Phillips screws along the top
- Remove the two Phillips screws along the bottom
- Pop out the rocker panel side trims on either side
- Pry out the trim from the clips
-
step 3 :Servicing the Bulb
- Turn the bulb counterclockwise to disconnect it from the trim
- Pull the bulb off of the socket
- Press the new bulb onto the socket
- Turn the bulb clockwise to lock it
-
step 4 :Installing the Dashboard Trim
- Line up the clips on the dashboard trim with the slots on the dash
- Press the trim into the dash so it clicks
- Press on the rocker panel side trims
- Tighten the six Phillips screws to the trim
-
step 5 :Installing the Glove Box
- Connect the tether to the glove box
- Slide the glove box to the hinge
- Press the two hinge pins into their slots
Hi, I’m Mike from 1A Auto. We’ve been selling auto parts for over 30 years!
Open the glove box to remove it. There are two pins at the bottom. Push them towards the center. It will unlock the hinges. I'll give you a better view of these once I have the glove box out. One just fell. That's okay. With those loose, you can unhook from these pins. It will lower down. There's a tether that keeps it from slamming when you open it. You have to unclip that. It's just going to push down. It's got tension to it, so it's going to zip back up. We'll reattach that later.
So these pins go through here and they go through the glove box and they make the hinge, so we're pushing them to the center to unlock it, and then they just fall out on the floor. We reinsert them when we install it.
Put this aside. This dashboard trim has to come out. This is basically the glove box holder. Have to remove these Philips head screws here, here, here. There's one underneath here. There's another one here, and the rest should be clips. Start removing this one up here. This one here. Actually, we need to pop this trim out, too. It's down here, and this will just pop out. Pull that out of the way. Pop this trim out, too.
If your glove box light has burned out, after we pull this panel down, you can turn it clockwise to unlock it. It's a 194 bulb. Take it out, and we'll put a new one in there.
Take our new 194 bulb and just push it in. Install it. Tabs, just got to find the hole there, and turn it clockwise. It locks in.
I'll reinstall the panel. It's got some push clips there and towards the bottom. There's an edge here that needs to go underneath this part of the dash. You've got to feed it up into there, and push it up over here. You've just got to push it up over that little bumper to hold it. Start finding our trim screws. Before I get too far, I'm going to install this trim panel back. Push this in.
Reinstall this trim panel. It needs to go underneath this, and in this little channel here. So it's probably best to lift it up like that. Push it down. Finally, reinstall the glove box lock bracket. Get some of those little tabs, and hold it in place. And there's one final screw. Don't forget, it's under here.
We'll reinstall our glove box. Now you don't want to forget this. It's kind of up here. It's this tether that's on a spring like a damper. Just so when you open the glove box it doesn't slam open. It's got to hook into here in the glove box. Of course, it doesn't go that far, so you've got to lift the glove box up and try to slide this little button in to the side of the glove box. It's a bit tricky to hold the glove box up. There. We got it.
Now those hinges. Let's see. There's a hinge here. It's going to slide in-between those two. There's one on each side, so I'm going to actually put the holding tabs that are here and here, I'm going to slide them into place. Get one end to go on in. The glove box will sort of sit there. Want to get lined up where the hinges go. Now we can just take our hinge pins and push them into place. They're going to go in from this direction, in all the way through.
We're going to line it up with the box, the glove box. All right. I've got one. We need to get the other one. You can actually lift the glove box up a little bit if it's easier. There's the other one. The glove box now hinges.
Thanks for watching. Visit us at 1AAuto.com for quality auto parts, fast and free shipping, and the best customer service in the industry.
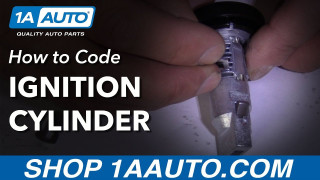
How to Code a New Vehicle Ignition Lock Cylinder Step by Step Guide
How to properly code a new ignition cylinder to fit your old keys.
