
How to Replace Fuel Pump Sending Unit Module 2000-03 Chevy Malibu
Created on: 2011-10-03
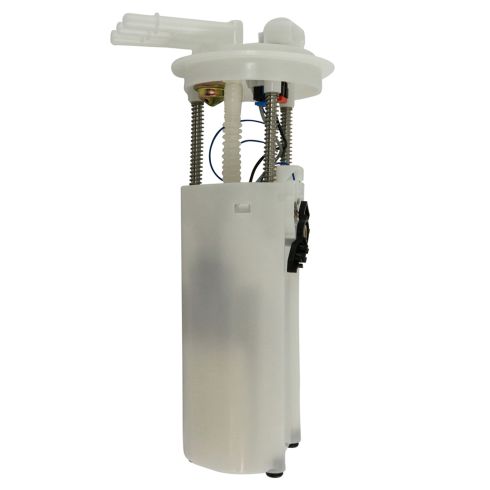
Watch this video to learn how fix your fuel system. The experts at 1A Auto show you how to replace the fuel pump and sending unit on your 99-03 Chevy Malibu.
-
step 1 :Depressurize fuel system
- With the car running, open the hood and access the fuse center.
- Pull out the fuel pump relay which is #18 in this car.
- After awhile your car will stop running because it runs out of fuel.
-
step 2 :Disconnect battery
- Use an 8mm wrench to disconnect the negative battery cable
-
step 3 :Disconnect and remove fuel tank
- Spray the bolts on the straps holding the fuel tank with penetrating oil.
- Loosen up the clamp at the top of the fuel neck.
- Grab onto that hose and twist it free and pull it off.
- Unplug the connectors by pulling out the safety tabs.
- Unclip the green clip behind the fuel tank by prying the tab and pinching to disconnect the line.
- Make sure you have a catch pan ready because this will leak fuel.
- Repeat on the upper line with the blue tab.
- Use a screwdriver to help if it’s difficult to reach.
- Disconnect the rest of the hoses.
- Loosen the heat shield between the exhaust and the tank.
- Support the tank and remove the straps.
-
step 4 :Remove assembly
- Use your needle nose pliers to disconnect the locking tab at the top of the connector.
- Unplug the wiring from the fuel pump assembly.
- Use a chisel and hammer to remove the locking ring.
- Pull the fuel pump assembly up and out.
- Remove the old O ring
-
step 5 :Install new fuel pump
- Put in the new O ring
- Place the new assembly in and lock the locking ring in place by turning it clockwise into the brackets.
- Secure with hammer and chisel.
- Plug in the new lead and use wire taps to connect the wiring with the old square ended lead.
- New large black lead connects to the old black lead.
- New thin black lead connects to old black and white lead.
- Purple and purple leads connect as do the grey ones.
-
step 6 :Reinstall the fuel tank
- Jack the tank back up.
- Bolt the straps back in, tightening the bolts with a hand wrench.
- Reconnect all the harnesses.
- Reconnect the big tube.
- Reconnect all the fuel lines, remembering to remove the little green line protectors.
- Secure the heat shield.
- Reconnect the fuel neck.
-
step 7 :Finish up
- Put the fuel pump relay back in.
- Reconnect the battery.
- Cycle the key a couple times to make sure the fuel gauge is working.
- Start the car and check underneath for any fuel leaks.
Tools needed
-
13mm Socket
Socket Extensions
Hammer
Rust Penetrant
8mm Wrench
Flat Blade Screwdriver
Phillips Head Screwdriver
7mm Socket
Chisel
10mm Socket
Drain Pan
Ratchet
Floor Jack
Brought to you by 1AAuto.com, your source for quality replacement parts and the best service on the Internet.
Hi. I'm Mike Green. I'm one of the owners of 1AAuto. I want to help you save time and money repairing and maintaining your vehicle. I'm going to use my 20 plus years' experience restoring and repairing cars and trucks like this to show you the correct way to install parts from 1AAuto.com. The right parts installed correctly. That's going to save you time and money. Thank you and enjoy the video.
In this video, we're going to replace the fuel pump and the fuel gauge sending unit in this 2001 Malibu, same as any '97 to '03 Malibu as well as some Cavaliers, some Aleros and Sunfires. if your fuel gauge does not work and also if your vehicle just stops running, what you should listen for is when you turn the key on, if there's a hum from the fuel pump from near the rear wheels. If you don't hear that, then most likely, you need to replace your fuel pump. Tools you'll need are jack and jack stands. You'll want to jack the rear of the car up just about as high as you can and secure it safely. You'll need Phillips and flat blade screwdrivers, 7, 10, and 13 millimeter sockets with ratchet and extension, a hammer, and an impact tool, which is a chisel or a large screwdriver, and pliers.
Okay. In this first part, we show you how to release the fuel pressure. If your fuel pump is gone, then you probably do not need to do this, but we show you how to do it anyways. The first thing you want to do is de-pressurize the fuel system, so basically, with the car running, you come in here to this fuse center, and now you're going to want to pull out the fuel pump relay, which is number 18, the small one here, which is this one here. Okay. You pull that out and after a while, your car will stop running because it runs out of fuel. An 8-millimeter wrench, disconnect your negative battery cable. Right here the straps that hold the tank up. What you want to do is take some penetrating oil and spray the tops of the bolts on those straps. You've got fuel neck that connects right here. We're going to use a regular screwdriver and loosen up that clamp. You want to grab onto that hose and just twist it and pull it and break it free and then pull it off.
Okay. There's a connector right here. You want to pull this safety tab out of this one and pull that connector out and there. Just remove that, and it probably doesn't hurt to pull this safety strap out, disconnect this harness, and disconnect these harnesses. As you look up behind the gas tank, you see a fuel filter, okay, and this little green clip. What you want to do is... To better illustrate this, I'm going to show you on a new sending unit that I've actually replaced in this vehicle and down on the ground so you can see it easily.
These are our new clips, so you can see how they work here, just like up there, you pry this like that and then you kind of pinch and push that through and then if this is your line, it comes right out. One more time here. You pry and pull this tab up, pinch and push it, and pull it out. You can see here I have it open and pushed up and out, and then I can pull the line off, and I stop there because fuel will leak out, so you want to have a catch can underneath. A little bit of fuel comes out, and the same thing for this upper one. Clip and push up.
I'm going to go to the upper clip. I'm just using that screwdriver because my fingers can't get in there very well, and if you push the line on a little tighter and then try and push that clip, that usually helps as well. This goes here. Basically, what you need to do is push it on, pinch the sides really well, and push it off. Pull this out here, so you basically want to press here and then start pulling on that plastic and pull it off.
There's a heat shield between the exhaust and the tank that if you loosen up, it makes it a lot easier. Pull the black pin out. Once you remove that pin, then there's a 10-millimeter and a 3.7-millimeter bolt to remove. Once you remove those, the shield is then loose enough that it flexes and moves out of your way when you need it to. Here, I'm removing those 7-millimeter bolts, and the only difficult one is the one that's up in the front and the center. You just have to pull or push the exhaust pipe out of the way to get to it.
You see we've got our tank being supported in the middle, and now we're going to remove the driver's side strap. Here, I just use a 13-millimeter socket, ratchet and extension. I'm just doing the beginning to show you that it can be done pretty easily with hand tools, and this is where preparing it beforehand with penetrating oil comes in very big. Now, I'm going to pull my straps down. The passenger side strap, you can actually twist and pull down and out, but then lower the jack and carefully bring the tank down. Nothing will come out of the large filler tube, because there is a valve that prevents that, but you may get gas coming out of some of the smaller lines, so be careful, and it pulls down and out.
A pair of needle-nosed pliers. This one right here, you just push it on, squeeze the edges here. It'll pull right off. You've got a little locking tab on the top of this connector. Push it on. Take your needle-nosed pliers and work the tab right out. Disconnect this, and then the little tab here, disconnect that harness. Let's see here. I can't get these two lines out of this clamp, either. I need a chisel and a hammer. A screwdriver would probably work as well. I'm going to tap this locking ring in a different ... excuse me.
Take this out. Remove our old O ring. Make sure there's no debris in there. Put the new O ring. Put in our new assembly. Okay. We've got a square connector. Our new sending unit has an oval connector. That's because this unit fits a number of different vehicles, so what we're going to do is plug in a new lead and put it in this safety lock there. Okay, so now these all match. We have a larger black and a narrower black. The larger black goes to this first wire. The narrower black goes to the black and white stripe, and then a purple and a brick, so what I'm going to do is tap into our existing harness, using wire taps. That'll work quite easily.
I'll fast forward here as I make those other three connections. Again, I use the wire taps to tap into the existing harness. To me, it's cleaner just to leave that old connector on there the way it is, and it works just the same. Fast forward. As I put the tank back up in there, obviously it's better to have less fuel in the tank, but if your fuel pump quits, you don't always get to choose. When you have the sending unit out, you can pour some gas out into a gas can, lighten the load some. Put it up in the there. Put the jack back under, move it back and forth to get it to go up in there nice and clean.
Keep the work pace up as I put the straps up in place. Start the bolts. I'll use an impact wrench to get them most of the way, and then at the end, tighten them up with a regular wrench, just to make sure you don't over-tighten them. Okay, so tightening up those straps. Then, after I tighten up the straps, reconnect all the harnesses into the body junction block there, and then reconnect the large line to the canister, which requires a good, firm push in. We're reconnecting the fuel lines here. The new unit comes with some little green line protectors. Make sure you take those out, obviously, and then reconnect the lines. Not a very good shot of it here. Sorry, but it's putting them on and locking the clips down into them.
Now, real fast here, make sure you put that shield back in place. Use the clip that clips it in, the 10-millimeter bolt, and the three 7-millimeter bolts. Okay. Make sure you put the clamp back up there if it fell off the filler neck and reconnect the hose to the filler neck and put that clamp on there and tighten it up. Put our fuel pump relay back in. Okay now what you want to do is cycle the key a couple times. Check to make sure the fuel gauge is working. Check underneath make sure there's no fuel leaks or anything.
We hope this helps you out. Brought to you by www.1AAuto.com, your source for quality replacement parts and the best service on the internet. Please feel free to call us toll free, 888-844-3393. We're the company that's here for you on the internet and in person.
Shop Products


1999-02 Chevrolet Camaro Pontiac Firebird Fuel Pump Module Assembly TRQ FPA61929
- 41 gph
- 4
- Yes
- Yes
- Gas
- Strainer
- Yes
- Electric
- 109 PSI
- 9.49 mm
- In Tank
- 250 Ohms
- Yes
- 1
- 44.91 gph
- Yes
- 1
- No
- 40 Ohms
- 80 PSI
- Quick Connect
- 37 gph

How to Replace Fuel Pump 1994-2002 Dodge RAM 1500
This video shows you how to install a new fuel pump on your 1994-2002 Dodge Ram 1500.

