How to Replace Front Wheel Hub and Bearing 2000-06 GMC Yukon
Created on: 2020-04-01
Watch this video to learn how to install a new wheel hub and bearing assembly on your 2000-06 GMC Yukon.
Tools needed
-
Hammer
Socket Extensions
Pry Bar
Jack Stands
Trim Tool Set
T55 Torx Socket
Brake Caliper Hanger
Wheel Chocks
Ratchet
Floor Jack
Swivel
Needle nose pliers
Torque Wrench
15mm Socket
Rust Penetrant
Brake Parts Cleaner
Flat Blade Screwdriver
Socket Driver
Paper Towels
Copper Anti-Seize
Center Punch
Brake Grease
Wire Brush
36mm Socket
1/2 Inch Impact Gun
22mm Socket
Just take the center cap off. Use a straight blade screwdriver. Get behind here. This is 22-millimeter socket. Take the lug nuts off. Take the wheel off.
I'm gonna take these two caliper bolts out. I'm gonna use a T55 socket. I'm just gonna tap them in because this is pretty rusty. There we go. Cracked it free. Now use the gun. That one came right out. Slide those out. Take a straight blade screwdriver, just pry out on the caliper a little bit, compress the piston. Slide the caliper off. We need to flip it over. It's a good idea to attach it somehow so it doesn't fall. But if you can get it to sit right there, that's good. And just take the old brake pads off. Use an 18-millimeter socket. Take these two caliper bracket bolts off. These are normally on there pretty tight. There we go. All right, those are broken free. Take those out. Grab the bracket, slide it right off. Grab the rotor, slide it off. If it doesn't come off that easy, take a hammer and just hit in these areas. Just try not to hit the studs. Now I'm gonna use a 36-millimeter socket. Take this nut off. Take this washer off as well. This is pretty rusty. I'm just gonna spray a little rust penetrant in there. Let that soak. I'm just gonna use a punch and give it a couple taps, just to make sure this is loose. You don't wanna push it too far, just make sure the axle's separated from the hub a little bit.
Then spray the backside a little bit with some more penetrating oil. Let that soak. Disconnect the connector up top, this little tab. Just slide that. And then the other connector is gonna go down to the hub. Disconnect these. Use a trim tool. Pry up. Pop that out. You need to pop these off, like this. Or if you have trouble with it, you can just pop the retainer open and just slide these out. Sometimes these break right there, and it's just easier to open those up. Slide the wire over here. Use some needle-nose pliers, just squeeze this clip. And slide that out, outta the way.
Now I'm just gonna take these three bolts off on the backside of the knuckle. These go to the hub. I'm gonna use a 15-millimeter socket. Take those out. Just be careful near the CV boot, you don't wanna rip it. There we go. Got them all at least loosened. And take this bolt out. And this top one I can't get that out. I'm just gonna leave that in there. When the hub comes forward, then that bolt will be loose.
Now I'm gonna take a hammer and hit the hub from the backside to try to separate it from the knuckle. Sometimes these are frozen on there pretty good. And it's actually starting to move. You can grab the backing shield and just see if you can wiggle it. Spray a little bit more rust penetrant in there. The axle, a little tap. And just slide it out. And that bolt is just loose. I'm just gonna leave that right there for when I go to reinstall it. Just gonna clean up this knuckle. Just use a wire brush. Clean up some of this rust. Take this backing shield off. Gonna reuse this. If this is rusty, you can clean this up with a wire brush a little bit. I'm gonna use some anti-seize on this area so that if I ever have to take this off again, it comes off easy. Just put a little on the splines too. Slide the wire through the backing shield and install the new hub. Get it lined up. That's good. Get the bolt started. Gonna start with that top bolt. It's kinda hard to get to.
All right, with that bolt started, go ahead and take the wire. We can rerun the wire. And I can either pop that one out or just pop the new one off and reuse the old one. Screwdriver, pop that off. Lock it in place. Put that there. And we'll plug this in right there. And then reposition this, and that's good. And you get the other bolts in. And tighten these bolts up. Move this a little more. All right. Now we're gonna go back to all these bolts and torque them to 133 foot-pounds. And do the same on the other two. Put the washer on. Put the nut on. It is a good idea to replace the nut. But you can reuse it if you have to. And tighten this up. I'm just gonna put the pry bar through here, and then the other end is on the ground. That's gonna prevent the hub from spinning. And I'll torque this nut to 177 foot-pounds. That's good. Now we're gonna clean up this bracket. Just take a straight blade pocket screwdriver. Take these clips off. And there's a lot of rust underneath here. Take a wire brush, clean this up. If you have to, you can use a file. Just be careful, you don't wanna take too much material off. And then take some brake caliper lubricant and just wipe that down. Brake caliper grease there and right there. And take the new caliper slides or anti-rattle clips. Put those on there. Line it up, find the right one. Put it on there. Put a little more brake caliper grease on here, just a thin coat. Just where the pads are gonna make contact. Take a little bit of anti-seize, just go around the hub. We'll see around the center here and spread it out. Nice thin coat. Just gonna take the rotor, put it on backwards. I'm just gonna clean the surface. Use a little brake parts cleaner. And we'll wipe it with a rag with just that protective coating on there to prevent it from rusting. And flip it over, do the same on this side. And wipe it down.
Now take the old caliper bolts. I'll just put a little thread-locking compound on there. And line the caliper bracket up, goes this way. And put the bolts in. Get those lined up. And use the torque wrench, and torque these to 129 foot-pounds. Good. Now install the new brake pads. Now the warning indicator on the inside is gonna go at the bottom and just one, not one at the top. Just slide that in position. And the outside one will have both. That's good. Now I'm gonna compress the caliper. Use the caliper compressing tool. If you have to, use the old brake pad to help you. And just go slow. You don't wanna push these in too fast. This is gonna push the brake fluid through the hoses, through the lines, back up into the master cylinder. All right, those are compressed. Take the tool out. Just make sure the seals look good, the dust seals. Those look good. Now put the caliper back over the pads and line it into the bracket. Take the brake caliper pins, just use a little brake parts cleaner on them. Wipe them off. Take some brake caliper grease. Grease them up. And slide the pins back in position. Get them started. And then tighten them down. Now I'm gonna torque these bolts to these caliper guide pins to 80 foot-pounds. There we go.
And put the wheel back up. Put the lug nuts on. Now I'm gonna torque these lug nuts to 140-foot-pounds in a star pattern to tighten the wheel down evenly. And just go around again, double-check. Install the center cap. Now just pump the brake pedal. There's gonna be an air gap between the caliper piston and the brake pads. Pump that up. Just go slow. And once it feels good, then you're all set. And double-check your brake fluid level in the brake reservoir. Max line's right there. If you give it a little shake, our fluid's right about there.
Shop Products


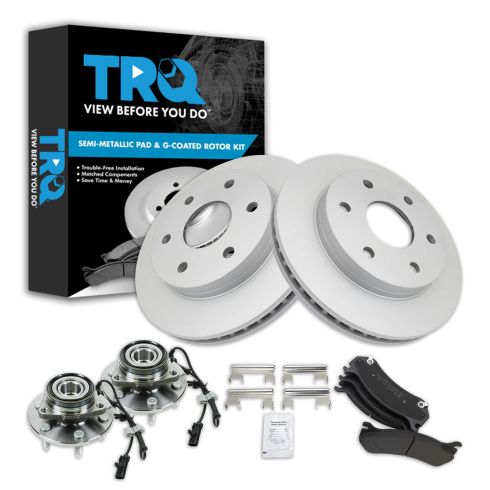
Chevrolet GMC Cadillac Front Semi-Metallic Premium G-Coated Brake Pad & Rotor Kit with Wheel Bearings TRQ BKA43990
Part Details:
- Premium G-Coated
- Semi-Metallic
- (2) Front Wheel Bearing & Hub Assemblies
- (1) Front Semi-Metallic Brake Pad Set
- (2) Front Premium G-Coated Brake Rotors
How to Replace Front Wheel Bearing 2000-06 Toyota Tundra
How to repair, install, fix, change or replace a worn out, vibrating or groaning wheel bearing hub on 00, 01, 02, 03, 04, 05, 06 Toyota Tundra
