How to Replace Front Struts 2006-10 Ford Explorer
Created on: 2017-05-16
How to repair, install , fix, change or replace your front shocks with their loaded struts. This video is applicable the 06, 07, 08, 09, 10 Ford Explorer or Mercury Mountaineer.
-
step 1 :Removing the Wheel
- Loosen the five 19mm lug nuts
- Raise and support the vehicle
- Remove the lug nuts
- Slide the wheel off the hub
-
step 2 :Removing the Strut
- Apply rust penetrant to the strut
- Unclip the plastic retainer from the top of the strut
- Remove the three 13mm nuts from the top of the strut
- Remove the 24mm bolt from the bottom of the strut
- Remove the flag nut from the control arm
- Lower the control arm and lift the strut out of the control arm
- Remove the 21mm nut from the tie rod ball joint
- Strike the wheel knuckle with a hammer to loosen the tie rod ball joint
- Separate the tie rod from the wheel knuckle and set it aside
- Remove the strut
-
step 3 :Installing the Strut
- Remove the 18mm nut from the upper control arm ball joint
- Strike the wheel knuckle with a hammer to loosen the upper control arm ball joint
- Separate the upper control arm from the wheel knuckle
- Put the strut into place
- Start the three 13mm nuts at the top of the strut
- Start the 24mm bolt into the bottom of the strut
- Thread the flag nut onto the 24mm bolt
- Tighten the three 13mm nuts
- Clip the plastic retainer onto the top of the strut
- Raise the suspension to ride height with a jack
- Place the upper control arm ball joint into the wheel knuckle
- Fasten the 18mm bolt onto the upper control arm nut
- Tighten the control arm nut to 41 foot-pounds of torque
- Place the tie rod ball joint into the wheel knuckle
- Fasten the 22mm nut onto the wheel knuckle
- Tighten the 22mm nut to 52 foot-pounds
- Tighten the 24mm bolt at the bottom of the strut
- Lower the suspension and remove the jack
-
step 4 :Installing the Wheel
- Slide the wheel into place
- Start the five 19mm lug nuts
- Lower the vehicle to the ground
- Tighten the lug nuts to 100 foot-pounds in a crossing pattern
Tools needed
-
24mm Socket
13mm Socket
15mm Wrench
Socket Extensions
Torque Wrench
Hammer
Rust Penetrant
Pry Bar
18mm Wrench
8mm Wrench
Jack Stands
18mm Socket
19mm Socket
21mm Socket
21mm wrench
24mm Wrench
22mm Wrench
Ratchet
Floor Jack
22mm Socket
Hi, I'm Mike from 1A Auto. We've been selling auto parts for over 30 years. We're dedicated to delivering quality auto parts, expert customer service, fast and free shipping, all backed by our 100% satisfaction guarantee. Visit us at 1AAuto.com, your trusted source for quality auto parts.
Using the 19 millimeter socket and a breaker bar, loosen the lug nuts on your tire. Raise and support your vehicle. We're doing this on a lift to make it easier to show you what's going on, but this job can be done at home on a jack and jack stands. Finish removing your lug nuts. You should be able to do this by hand at this point. You can use a ratchet if you need to. You can then remove your wheel and tire.
It may be a good idea to apply some penetrating oil to whatever parts you're going to be working with. There are three 13 millimeter nuts on the top of the strut that you'll need to remove. There's also a little plastic harness retainer here that you can just pop off with either a trim tool or a small flat blade screwdriver. Once that's out of the way, unless you have a very low profile socket ratchet, you'll need to remove the nuts with a 13 millimeter wrench. If you have a ratcheting wrench, now is an awesome time to utilize it.
Loosen and remove the 24 millimeter bolt on the bottom of your strut. This has what's called the flag nut inside the control arm, so there's actually a little leg on it that'll jam against the control arm and prevent it from turning. You're going to start this with the breaker bar because they tend to be pretty tight. Once we get it moving, we'll switch over to a ratchet. Be ready to catch the flag nut once you've backed the bolt out enough. Hold on to the strut while you work the bolt out of the bar. You may want to use a pry bar for this, but you can do it by hand. Just find a good place to get in there and bring the control arms down so you can lift the strut up.
Once you got the bottom of the strut out of the control arm, sometimes you may need to undo the 21 millimeter nut on your outer tie rod. To avoid damaging the tie rod end, hit the side of the knuckle in order to release it and remove your strut from the vehicle.
Now, depending on your specific vehicle, you may need to remove the upper ball joint from the knuckle to get enough clearance to install your new strut. We're installing a loaded one, so it's actually a little bit taller than our older one was because it had sagged from being on the truck for so many years, so we're obviously going to replace both sides to make sure we keep our ride height level. We're also going to undo this 18 millimeter nut with a socket and ratchet and then hit it with a hammer and release it from the knuckle, just like we did for our tie rod end.
We should now be able to install the strut nice and easy. Start the three 13 millimeter top nuts by hand. Reinstall your 24 millimeter nut into the bottom of the strut. You may need to lift up on the lower control arm and use the socket and ratchet to help center it and set it back in part way. Then we'll get your flag nut on there. Hold that while you get the bolt started. Bring the bolt down close, but don't tighten it yet. We want to wait until we have the weight of the vehicle on the suspension before we twerk all of our hardware. Tighten the three 13 millimeter nuts down with your 13 millimeter wrench low profile socket and ratchet or ratcheting wrench, depending on what you have available. Once you've got the nuts tightened down, if you used a ratcheting wrench, I recommend using a standard box end to finish tightening them down because the ratcheting wrenches don't tend to be super strong for high torque and they're usually a little bit shorter, so double check them with a box end and then reinstall the retainer plastic on the rear two bolts.
Using a screw jack if you're on a lift, or a standard floor jack if you're working on the ground, put the weight of the vehicle onto the suspension. This will also get you close enough to install the upper control arm. Get that 18 millimeter bolt started. Using the 18 and an eight millimeter wrench, the 18 on the nut and the eight millimeter on the shaft of the ball joint, hold that while you tighten it down. Once you get it snug so the tapered portion is seated back in the knuckle, you should be able to get your ratchet on there without it spinning. Torque the nut to 41 foot-pounds.
Install your tie rod into the knuckle. If you seated in there fully, that should prevent it from spinning while you reinstall your 22 millimeter nut. Tighten that down with a 22 millimeter socket ratchet. Torque the nut to 52 foot-pounds.
Reinstall the wheel and tire onto your hub. It's easiest to put a lug nut inside of the 19 millimeter socket to start it onto the studs. Get all five of these down as tight as you can by hand and then we'll torque the wheel once there's some weight on it. Lower the vehicle back down and put partial weight onto the wheel of the tire. This means that you may have your jack or lift under the vehicle. Ge the tire to touch and let the vehicle come down some without allowing it completely off of the lifter jack. Torque your lug nuts to a hundred foot-pounds in a cross pattern.
Thanks for watching. Visit us at 1AAuto.com for quality auto parts, fast and free shipping, and the best customer service in the industry.
Shop Products


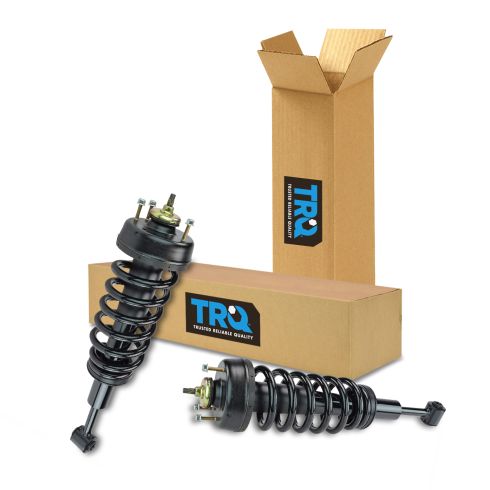
2006-10 Ford Explorer Mercury Mountaineer Front Driver & Passenger Side 2 Piece Strut & Spring Assembly Set TRQ SCA57055
Part Details:
- 2 Piece
- (1) Front Passenger Side Strut & Spring Assembly
- (1) Front Driver Side Strut & Spring Assembly

How to Replace Strut Assembly 2000-05 Ford Focus
Watch this video to learn how to fix a sagging or loose suspension. The experts at 1A Auto show how to replace the front shocks in your 00-05 Ford Focus.
