How to Replace Front Shocks 2005-15 Toyota Tacoma
Created on: 2020-04-17
Watch this video to learn how to install a new engineered to fit TRQ front shock assembly in your 2005-15 Toyota Tacoma.
Tools needed
-
Torque Wrench
Hammer
Socket Extensions
Rust Penetrant
Pry Bar
Jack Stands
19mm Wrench
18mm Socket
19mm Socket
Liquid Thread Locker
Trim Tool Set
Pocket Screwdriver
Rubber Mallet
Socket Driver
Wheel Chocks
Center Punch
Straight Cutters
Ratchet
Floor Jack
Swivel
Once your vehicle is raised and supported safely, you're gonna remove all six lug nuts. Now that the wheels out of the way, let's continue on by removing this right here. You can just pull that down. It depends on how far you want to go to get it out of your way. That looks pretty decent for now. That exposes the nut right here. We're gonna spray this with some penetrant.
Now, you can either loosen up this upper bolt right here so the control arm can move up and down and that'll make it a little bit easier or you can leave it tight, and then you won't necessarily have to worry about readjusting it and re-torquing it at the end. The next thing we're gonna do is use the 19-millimeter wrench. We're gonna come right up here on this bolt, and you're gonna use your 19-millimeter socket to remove this nut. Let's get this locking clip off of here. Just take your pocket screwdriver, grab underneath the ear, pull it away, and then draw this out.
I'll show you what I'm talking about. That's what it looks like. So I came in with my flathead, I pulled this away, and then I pulled out the cotter pin. The next thing I want to do is remove this bolt right here. I just want to be careful because usually, they freeze up inside the control arm. Got it. That gives us plenty of slack right there. If you feel like you need more, you can take off the bracket that comes down here as well.
The next thing we're going to do is remove the nut from the sway bar link so we can get this off of here. Just try to pull the stud, do the same for the other side. Now we have a nice clear view and an access area to get this nut off. I like to take my nut, and I'll just start it on there just a couple threads. That's gonna prevent this from falling down once this breaks free. Let's go ahead and bonk right on the knuckle right here. I'm just gonna try to break this free from each other. All right, that's enough. Take off that nut. You should be able to lift this up. I can carefully pull this aside.
Now, when you do this, you want to be careful not to put a tug on your ABS wire, leave a little bit of slack, and, of course, your brake hose as well. Just go ahead and get the knuckle off of the upper ball joint on the other side as well. Now that we have the other side off, we can go ahead and lift this up. Kind of moves things out of the way, that looks pretty good. The next thing we need to do is remove these three top mounting nuts. I'm gonna start with the forward two. And then as I start unscrewing the rearward one, I'm gonna bring down the shock to give myself more room between the body.
Nice. What I like to do is I just like to take one of these nuts and just put it right on top just a couple threads so that way there once we get out the bottom bolt and we separate this up here, you don't have to worry about the strut coming out and potentially hurting you. The next thing we're gonna do is grab our 19-millimeter wrench, put it right on here to hold the bolt so it can't spin on us. Use your 19-millimeter socket and take off this nut. Let's grab our punch and a hammer and just finish getting this bolt out of here. Watch your fingers. So now we're just gonna take our pry bar and see if we can pry this out of the lower control arm. Be careful for any pinch points. Nice. Next what we want to do is take our pry bar, just get right in between here and see if you can break this free.
There we are. Let's get this off of here. Slide out that lower portion, bring it down, and then just kind of do whatever you need to do to get it out of the area. Okay, so once you've replaced the part and you know that it has the same length as your original, go ahead and take off these upper nuts. We're gonna start putting it into the body of the vehicle here. So once you've compared your new shock to your old shock and you know you have the same length, let's go ahead and install. Come right in from the bottom first, see about sliding it down. Lift up my control arm, line up those three upper bolts.
But before I start the nuts, just take a peak at the bottom. Make sure that's lined up as well. If the hole is not lined up and maybe it's facing in the opposite direction, you need to spin the shock. Let's go ahead and start in all three of those upper nuts real quick, but we're not gonna tighten them down yet. Okay, let's just bottom out all three of these nuts. The next thing we need to do once we have those snugged up is come right here with a pry bar. You're gonna go in between this cam bolt right here and your lower control arm and you're gonna carefully pry. And when we pry, we're going to try to force that control arm down so we can line up this bolt hole.
It's close. I'm just gonna keep trying until it lines up, and then I'm gonna put my bolt through. So now you want to have a punch handy and your rubber mallet handy because as we try to line this up, as soon as it gets close, I'm gonna try to drive my punch right through, and then I'll wiggle it around to try to line up the holes. All right, I'm starting to see a hole here. I can go just like that. That looks great. Now I'm gonna bring the bolt from the rear to the front.
Go ahead and grab your washer and your nut, put the washer on there. If you want to use a tiny bit of thread locker, we'll call it your prerogative. Start on that nut. I'm gonna hold the bolt side with my 19-millimeter wrench again just like I used to take it off, and now we're gonna snug this up. Don't over tighten it because we're gonna be torquing this in the upper portion to manufacturer specifications. Anytime you do a shock of any sort, it's always a great idea to do them as a pair. With that said, now is a perfect time to go ahead and do the other side front. The process for it would be the same exact as this side. Go ahead and torque these upper nuts to 47 foot-pounds.
Of course, the rear one's gonna be a little bit harder to get to. But if you can't get it with the torque wrench, just go ahead and make sure it's nice and tight with a wrench. Now it's time to go ahead and torque this lower nut right here. We're gonna torque it to 100 foot-pounds. Torqued. Now, assuming you've already done what you needed to do on the other side, we're gonna continue on. Tighten up your upper control arm so it's not gonna flop around like this, you don't want to leave it down. You need to actually have it at approximately the right height if the vehicle was sitting on the ground, and then you would go ahead and snug this up, and then we'll torque it to manufacturer specifications.
Let's hold this side with our 19-millimeter wrench and go ahead and snug this one up. And we're gonna torque this to 85 foot-pounds. Torqued. Let's go ahead and pull this over. We're gonna try to pull down on your control arm. If you can't get it far enough down, well, don't get too worried. We'll use a pry bar and use some leverage. Use your 19-millimeter socket, snug this up. Let's torque this to 81 foot-pounds. Once it's torqued, you need to make sure that your castle nut portion lines up with the cotter pinhole. If it does not, you need to continue tightening until it does. That looks pretty great.
Let's get our cotter pin in there, slide that through, and lock it in. The next thing we're gonna do is put in this little bolt to hold this in. If you want to use a little copper never seize, it's probably a great idea. Go ahead and snug that up. Okay, bombed out. Teeny bit more, that's great. Let's get the sway bar link back into the knuckle. Make sure you put on your washer first just like that. It's easy to forget. I'm gonna line this up, start in the nut just like that. And then, of course, now is a great time to go over and do the same on the other side before you snug this up. Go ahead and hold that.
We're just gonna bottom this out, and then we'll torque it to 52 foot-pounds. Now, the process for this would be the same on the other side of the vehicle. Okay, we're cruising. Let's get the wheel back up on here. And, of course, get all your lug nuts on and started. Let's go ahead and bottom out all the lug nuts. Okay, now we're gonna do the same to the other side, and then we're going to torque them to manufacturer specifications. All right, let's go ahead and torque the wheel in a crisscross pattern to 83 foot-pounds. Torqued.
Shop Products


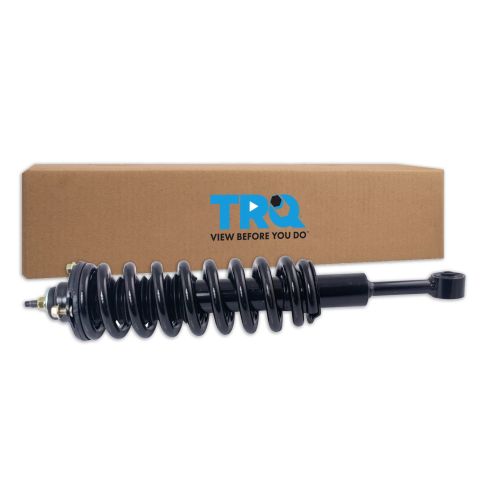
Toyota 4Runner FJ Cruiser Tacoma Front Driver Side Strut & Spring Assembly TRQ SCA70142
Part Details:
- Yes
- 17.05 in
- 22.05 in
- Loop (Eyelet) Bushing and Sleeve
- Threaded Stud
- Yes
- Yes
- 5 in
How to Replace Strut Assembly 2000-05 Chevy Cavalier
Watch this video to learn how to replace the front strut assembly on your 00-05 Chevy Cavalier.
