How To Replace Front Lower Control Arm 2007-16 GMC Acadia
Created on: 2020-07-20
This video shows you how to install a new control arm with ball joint on your 2007-16 GMC Acadia.
Tools needed
-
Pickle Fork
21mm wrench
Torque Wrench
Gloves
Hammer
18mm Wrench
8mm Socket
Wheel Chocks
18mm Socket
Floor Jack
Safety Glasses
22mm Socket
I'm gonna remove the wheel, use a 22 millimeter socket. I'm gonna pull the wheel off. I'm gonna take this ball joint nut off. You can use a 21 millimeter wrench to loosen it up. And take that off. I'm gonna use a pickle fork to disconnect the ball joint from the knuckle. There's different types of tools that you can use. There we go. It's separated. I'm gonna take these two bolts out. There is nuts on the top. Use an 18 millimeter wrench, those on the nuts. And then use an 18 millimeter socket to take the bolts out.
Now to remove this bolt and nut, we're gonna have to loosen up the link for the sway bar. The sway bar is in the way right now, if we were to pull that bolt out. You can try to slide that out, but most likely it's gonna be in your way, so we have to take the link off on this side and on the opposite side. I'm just gonna use a little rust penetrant. There's a little bit of rust on the stud. Take an 18 millimeter wrench and we can loosen up the nut. And this stud is gonna spin, so you wanna use an 8 millimeter socket, put it on the stud. You could try to loosen this up with an impact. But the stud is just gonna spin.
And take the nut off. Now you can take the stud out, just like that. With both of those links disconnected, then you can slide the whole sway bar up, and then you can access that bolt. And you can use a 21 millimeter socket and a 21 millimeter wrench on the nut. And loosen this up. You can slide the bolt up. Now just take a pry bar and just pry this out. There you go. Now take a 24 millimeter socket to take this nut off.
Then you can slide this bushing off. Now, you're gonna take that protector off and slide this bushing on. Now where this ring is, that goes towards the inside of the bushing. On this bushing it happens to have this blue area right here, the outside is white. Take the nut and just snug this up a little bit. We're gonna torque it later. And loosen it up a little. We want this to be able to move. I'm gonna take the new control arm and then just slide it in position. Take the ball joint, slide it into the knuckle. You can take the nut. Get that started. Now, get this bolt lined up, and put the nut on. Now, I'm gonna take these two bolts. Slide those through. Put the nut on top. Now, I'm gonna snug these down first. Use an 18 millimeter wrench up top, 18 millimeter socket down below.
Now, I'm gonna tighten these bolts to 55 foot pounds. Now, I'm gonna put a screw jack underneath the control arm and safely support the control arm. You wanna get the control arm as close to ride height as possible. It would be ideal if you could put the tire back on, put the vehicle down and then torque the nut here and torque the bolt here, but it's not that easy to get a torque wrench under there. So do the best you can to get this close. Then you can use a 13/16 wrench or a 21 millimeter wrench, 21 millimeter socket on the bolt and torque this to 111 foot pounds.
I'm gonna torque this nut to 144 foot pounds. Now we can use our wrench while this lower control arm is still supported, and tighten this nut up. And then once you get it tight, if you have the ability to put a torque wrench on there, you can torque that bolt, that nut to 30 foot pounds and then an additional 90 degrees. Now, I can lower this down, and slide that up, the sway bar up. Slide the link stud through this bracket on the strut, get the nut started and use an 18 millimeter wrench, 18 millimeter socket to tighten this up. And torque this nut to 59 foot pounds. I'm gonna put the tire on.
Now, I'm gonna torque these lug nuts to 140 foot pounds in a cross pattern or a star pattern to tighten the wheel down evenly.
Now I'll go around again just to double check. Now when you've done this job, you're gonna need to bring the vehicle to a shop to have it aligned, otherwise you're gonna have premature tire wear.
Shop Products


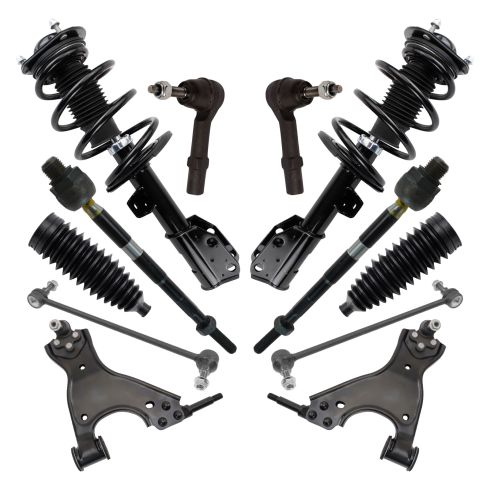
Chevrolet GMC Buick Front 12 Piece Steering & Suspension Kit TRQ PSA17960
Part Details:
- (2) Front Sway Bar Links
- (2) Front Lower Control Arms with Ball Joints
- (2) Front Strut & Spring Assemblies
- (2) Front Outer Tie Rods
- 12 Piece
- (2) Front Steering Rack & Pinion Bellows
- (2) Front Inner Tie Rods

How To Replace Rear Rearward Control Arm 2007-16 GMC Acadia
This video shows you how to install a new rear rearward control arm on your 2007-16 GMC Acadia.
