How To Replace Rear Rearward Control Arm 2007-16 GMC Acadia
Created on: 2020-08-10
This video shows you how to install a new rear rearward control arm on your 2007-16 GMC Acadia.
Tools needed
-
Torque Wrench
Socket Extensions
Jack Stands
10mm Wrench
Pick
21mm Socket
21mm wrench
Socket Driver
Wheel Chocks
10mm Socket
Ratchet
Floor Jack
Swivel
1/2 Inch Impact Gun
22mm Socket
Marker / Writing Utensil
Remove the wheel, I'm gonna use a 22-millimeter socket. Take the wheel off. So that this wire doesn't break, I'm going to disconnect this wire right here, just use this pick tool. Just slide this out, right there. You can disconnect these retainers, just slide these off. That'll give me more slack. Just let that hang, that's good. I'll take a 21-millimeter wrench. There's a nut right here, put it on that nut. And then 21-millimeter socket, take this bolt and loosen it up.
Just make sure you don't get too close to the rotor because once this bolt comes out, it is going to tip forward. There's the nut, it's a nut and a washer. Then you could push on the rotor a little bit. Try to pull this bolt out and just slide that out. Before I loosen up this cam nut right here, I am going to mark it. Just take a marker that you can use. That way, at least, the alignment's closer when you're done. You're still going to need to get an alignment done anyway, but at least it'll be close. All right, that's good.
Now I'm going to use a 21-millimeter socket to take this nut off. And then on the backside of the stud, you could use a 21-millimeter on the nut on that side but sometimes it's better just to use a 10-millimeter, put it on the end of the stud, prevent it from spinning, and loosen this up. Take this nut off and take this cam washer off. Then just hold the arm and then try to pull the stud and nut the rest of the way through. If you have to, you can use an air hammer. Sometimes that's all it takes. All right, and it slides out. You can grab the arm and just slide it out. There you go.
Now take the new arm and just slide it back in position. This wire is going to go around on that side. And take this bolt and stud, slide that back in position. And take that cam washer, slide that back on, put the nut back on. And with the 10-millimeter wrench on the backside, you can snug this up. Now just make sure your line lines up where you marked it. Then you can tighten that down a little bit more. Try to put this arm in position where it would be if the vehicle is on the ground. Generally right there is good. That's good.
Then you can tighten this nut to 103 foot-pounds. Make sure you have that 10-millimeter wrench on the other side. It's good. I'm going to take this bolt, line this up here. Once you get that in a little bit, then grab this arm, push this in a little bit as you try to slide this down. You can get the bolt to come through a little bit, then you can get this lined up just like that. Maybe a little more. There you go. And then just hold this arm while you hammer the rest of the way in. There you go.
Take the washer and the nut, put it on the end of the bolt. Make sure the wires aren't in the way when you go to tighten this down. And then put the wrench on here, then snug this down. It is recommended that you replace this bolt when doing this job. I'm going to use a 21 and I'm going to torque this with the wrench over here to 74 foot-pounds. And then the second pass you're going to go 90 degrees so you can put an angle meter on here, or if you don't have one, just do the best you can. All right.
And for the ABS wire, the wheel speed sensor wire, the clip was broken on the old one. So we're just going to use a wire tie and just trim it off. And then take these other clips. I'm just going to slide onto the bottom just like that. There you go. Now put the tire back on. Now, I'll torque these lug nuts to 140 foot-pounds in a star pattern. That way it tightens the wheel down evenly. And I'll just go around again, double check.
Shop Products


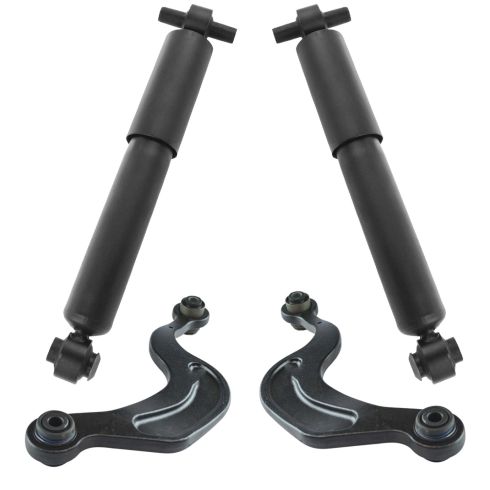
2016 Buick Enclave Rear 4 Piece Suspension Kit TRQ PSA64853
Part Details:
- (2) Rear Shock Absorbers
- 4 Piece
- (2) Rear Upper Rearward Control Arms
How to Replace Control Arm 2002-09 GMC Envoy XL
See the steps involved in replacing the front upper control arms in a 02-09 GMC Envoy XL.
