How to Replace Front Engine Mount 2002-06 Nissan Altima
Created on: 2017-09-12
Got a bad engine mount? Follow the steps in this video and replace it yourself!
-
step 1 :Removing the Engine Mount
- Loosen the top bolt from the engine mount with a 17mm 12-point socket and ratchet
- Counterhold the lower nut with a 17mm wrench
- Loosen the lower bolts with a 17mm socket and ratchet
- Support the engine and transmission with a floor jack
- Remove the three bolts the rest of the way
- Remove the engine mount
-
step 2 :Installing the Engine Mount
- Insert the new engine mount into place
- Insert the upper mount bolt and tighten it
- Insert the lower mount bolts
- Counter holt the nut with a 17mm wrench
- Tighten the lower bolts
- Torque the bottom bolts 51 to 72 foot-pounds
- Torque the upper bolt 58 to 72 foot-pounds
Tools needed
-
Socket Extensions
Torque Wrench
17mm Wrench
Rust Penetrant
17mm Socket
Jack Stands
Ratchet
Floor Jack
1/2 Inch Breaker Bar
Hi, I’m Mike from 1A Auto. We’ve been selling auto parts for over 30 years!
Going to spray some rest penetrant on our bolts that are holding in the engine mount. It's three bolts. The bottom two and the top one. I'm using a breaker bar with a 17mm 12-point. I'm going to loosen the top one but I'm not going to remove it yet. See, it's turning, and now it's coming loose. I'm going to try the bottom ones. This lower bolt, I switched to a regular style 17 mm socket and a breaker bar. So that's actually moving it.
I need to counterhold the nut that's on this side. Let me adjust my breaker bar. I got that moving. Got that moving nicely. Let me move to the other one. Sometimes you have to switch to a 12-point socket just because it gives you more places to thread it on, to slide it over the bolt with your breaker bar. Since you're not using a ratchet, you can't spin it. Now with those loose, I'll support our engine and transmission. So now with those bolts loose, I'm going to support the engine and transmission with a floor jack. This will take the weight off of the engine mount so that I can undo the bolts and we'll move it.
Since these are free, I can use a ratchet with a 17 mm socket. Start with removing the top one. With the top bolt loose, I can pull it out. Place this aside. Now I can remove the bottom ones. Start with this inside one, going to counter-hold this nut. All right, so I'm going to take this wrench and I'm just going to hold the back of the head of the bolt and as I ratchet it out, I'm pushing on the bolt outwards. The mount isn't threaded, it's just sometimes it gets tight and you just thread it out. There's a little bit of corrosion on there. Let's get the other bolt out.
Counterhold the nut. Use my 17 mm socket on the ratchet. And there's our final bolt. And I'm going to maneuver the mount out of here. Let's see. Get the pry bar, give it a push. I've spread the ears out on this engine bracket a little bit with a pry bar. Still wasn't quite enough to get it past these, so then I lifted up on the engine to give me a little more room. You can lift up on the engine a little bit, not too much, but once we got to that point, I can get over it. Now this engine mount can come out from the top.
Here's our old mount from our vehicle. This is our new one from 1AAuto.com. As you can see, it has the same exact design. This one's a little bit soft because it's got some miles on it. New one's a lot stiffer. Same mounting holes on both. This is a good match. It'll go in the vehicle and keep the engine supported.
Flip it around. Maneuver the new engine mount into place. Install the top mount bolt first. The top bolt loose, we're going to adjust the bottom mount holes. So they don't line up so I'm going to lower the engine down by using my stand, or jack. I'm just going to lower it til they line up. Right about there. These are a through bolt with a nut. Originally, they went from this side, but just for ease of installation, I'm going to install them from this side. Doesn't really matter. You may have to jack up on the car on the jack to move the engine up and down to get them in there.
I'm going to get them both in there before I put the nuts on. Force the bolt all the way through. Now I can lower the jack and let the weight of the engine onto the mount. Install our nuts on the other side. Take my 17 mm box wrench and counter-hold this nut. Take the 17 mm socket and ratchet, tighten it. See, by flipping the bolts around, it's a little easier to do this. You got more room to work. I'm going to get these snug, and we'll come back and torque them.
Torquing the bottom bolts is 51 to 72 foot pounds. We're going to do 64. The top one is 58 to 72, so again, we're going to do 64. I'll start with the top one. My 17 mm wrench here to counter-hold this one.
Thanks for watching. Visit us at 1AAuto.com for quality auto parts, fast and free shipping, and the best customer service in the industry.
Shop Products


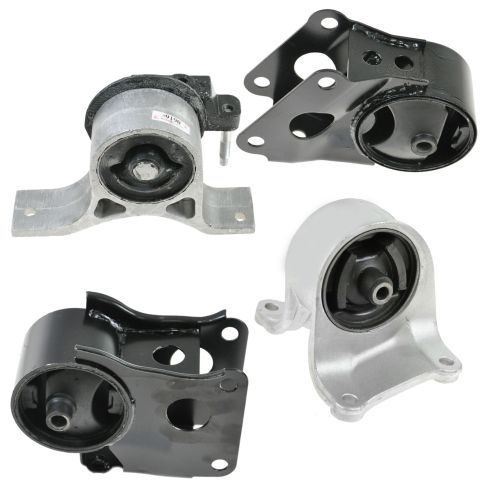
2002-06 Nissan Altima L4 2.5L Automatic Transmission 4 Piece Engine & Transmission Mount Kit DIY Solutions EMT00012
Part Details:
- Highest Quality Materials
- Quality Tested - built to a strict level of product standards.
- 4 Piece
- (1) Transmission Mount
- (2) Front Engine Mounts
- (1) Rear Engine Mount

How to Replace Rear Engine Mount 2007-12 Nissan Altima
This video shows you how to install a rear engine mount on your 2007-12 Nissan Altima
