How to Replace Front CV Axle Shaft 2001-02 Ford Ranger
Created on: 2016-12-09
Watch this video to learn how to replace a worn, vibrating or broken CV axle shaft in a 01-02 Ford Ranger.
-
step 1 :Removing the Wheel
- Pry off the center cap with a flat blade screwdriver
- Loosen the 32mm axle nut
- Remove the wheel lock with the wheel lock key
- Loosen the 19mm lug nuts with the vehicle on the ground
- Raise the vehicle with a floor jack
- Secure the vehicle on jack stands
- Remove the lug nuts
- Pull off the wheel
-
step 2 :Removing the Brake Rotor
- Remove the two 15mm bolts from the brake caliper bracket
- Hang the caliper aside with a bungee cord
- Pull off the brake rotor
-
step 3 :Removing the CV Axle
- Hold the hub with a pry bar
- Remove the 32mm axle nut
- Tap the axle out of the hub with a hammer
- Remove the 15mm bolt from the upper control arm
- Tap the wheel spindle loose with a hammer
- Separate the control arm from the wheel spindle
- Unclip the ABS sensor wire harness from the frame with trim tools
- Sepreate the CV axle from the hub
- Separate the CV Axle from the main axle with a pry bar
-
step 4 :Installing the CV Axle
- Put the CV axle into place
- Tap the CV axle into the main axle with a hammer
- Install the CV axle into the hub
- Connect the wheel spindle to the upper control arm
- Tap the upper control arm into the spindle with a hammer
- Start the 15mm bolt and nut for the control arm
- Tighten the 15mm bolt to 41 foot-pounds of torque
- Connect the ABS wire harness to the frame
- Start the axle nut by hand
-
step 5 :Installing the Brake Rotor
- Put the rotor into place
- Put an old axle nut on one wheel stud
- Thread a lug nut onto that wheel stud by hand to hold the rotor in place
- Remove the bungee cord from the caliper
- Put the caliper into place
- Start the two 15mm bolts for the caliper bracket
- Tighten the two 15mm bolts to 85 foot-pounds of torque
- Remove the placeholder lug nut and axle nut
-
step 6 :Installing the Wheel
- Slide the wheel into place
- Start the lug nuts by hand
- Tighten the lug nuts preliminarily
- Lower the vehicle to the ground
- Tighten the lug nuts to 100 foot-pounds in a crossing or star pattern
- Tighten the hub nut to 162 foot-pound
- Reattach the center cap
Tools needed
-
Socket Extensions
Torque Wrench
Hammer
15mm Socket
Pry Bar
Jack Stands
19mm Socket
Trim Tool Set
32mm Socket
Flat Blade Screwdriver
Bungee Cord
Chisel
Ratchet
Floor Jack
1/2 Inch Breaker Bar
Hi, I'm Mike from 1A Auto. We're dedicated to delivering quality auto parts, expert customer service, fast and free shipping, all backed by our 100% satisfaction guarantee. Visit us at 1AAuto.com, your trusted source for quality auto parts.
In this video, we're going to be working with our 2001 Ford Ranger four wheel drive. We're going to show you how to remove and replace your front CV or drive axle assembly. If you like this video, please click Subscribe. We have a ton more information on this truck as well as many other makes and models, and if you need this part for you vehicle, you can follow the link down in the description over to 1aauto.com. Here are the items you'll need for this repair.
Using a taped flat-blade screwdriver, locate the relief cuts in the hub cap. Stick the screwdriver in, and pry out to release it from the wheel. Before removing your wheel and tire or jacking up the vehicle, loosen your 32mm axle nut with the socket and breaker bar. This particular truck has a wheel lock on it, so we'll need the wheel lock key in order to remove it. Otherwise, the rest of the nuts come off with a 19mm socket and breaker bar. Simply crack them loose for now, and then raise and support your vehicle and remove the lug nuts the rest of the way. Remove the wheel from the vehicle.
Remove the two 15mm bolts securing the caliper bracket to the spindle. Be sure to crack both of these loose before removing either one fully. Using a bungee cord, mechanic’s wire, or zip tie, secure the entire caliper bracket and assembly up out of your way. Remove your rotor.
Finish removing your 32mm axle nut with the socket and breaker bar. You may need a pry bar to keep the hub from turning while you remove the nut. Tap the end of the axle with a hammer to release it from the splines on the wheel hub. We'll use a 15mm socket ratchet and wrench to remove the pinch bolt for the upper control arm. Once you've removed the hardware, we'll tap the face of the spindle with a hammer to release the joint. Using a pickle fork or a ball joint separator here will damage our boot and ruin this upper control arm.
You may want to pop a few connections off on the ABS harness just to give yourself a little more room to swing that spindle out without damaging anything. Remove the outboard CV axle from the hub. Where the inboard CV joint meets the axle, we'll place a pry bar on both sides. Make sure you pry out evenly to release the axle. Remove the axle from the vehicle.
Here we have our old part that we removed from our vehicle and our new part from 1AAuto.com. As you can see, these parts are identical, being the same length with the same joints. We have the same female splines on the axle end, the same splines and threads on the hub end. It even comes with a new axle nut to make sure that we can torque this down and get it on there, nice and secure. If your vehicle needs a new CV axle, this new part from 1A Auto is going to go in direct fit just like your original equipment and fix you up right.
Reinstall your CV axle into the vehicle. Line up the splines. You may have to give it a good tap to get those to engage over the snap ring. Reinstall the splines into the hub and lay your spindle back up and into the upper control arm. Reinstall the pinch bolt and the nut. Tighten up the 15 mm pinch bolt with a socket ratchet and wrench, and torque to 41 foot-pounds. Reconnect your harness and start your new axle nut on by hand.
Reinstall your rotor. One trick I like to use is taking an old axle nut and placing it over one of the wheel studs, putting a lug nut on hand tight. This keeps the rotor upright while we install our caliper carrier and makes it that much easier. Unhang your caliper from whatever it is you hung it from. Reinstall all of it over the rotor. Reinstall your two 15 millimeter bolts. Tighten down the hardware with a socket and ratchet. Torque the bolts to 85 foot-pounds. Remove the lug nut and axle nut from your rotor.
Reinstall your wheel and tire. Start your lug nuts by hand. Torque the lug nuts to 100 foot-pounds in a cross pattern.
Tighten the axle nuts socket back on with your 32 mm socket and a breaker bar. Once you've got it tight, torque the axle nut to 162 foot-pounds. Reinstall your center cap, and you're good to go.
Thanks for watching. Visit us at 1AAuto.com for quality auto parts, fast and free shipping, and the best customer service in the industry.
Shop Products


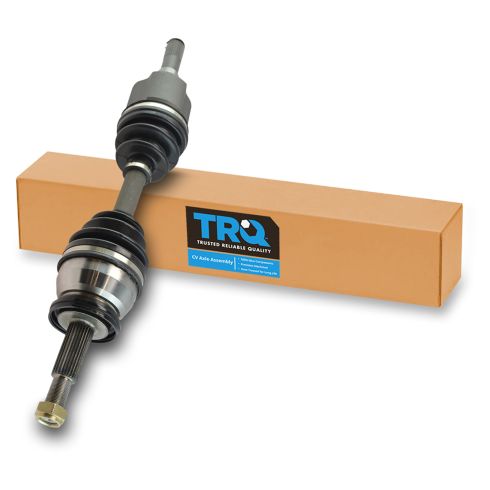
Ford Mazda Mercury Front Driver Side CV Axle Assembly TRQ CSA82286
Part Details:
- 27
- 27
- Male
- 593 mm
- 23.35 in
- Standard Replacement
- No
- 1.26 in
- M22x1.5
- Yes
- 32 mm
- Male
- Neoprene
- Neoprene

How to Replace Front Passenger Side CV Axle 2003-07 Honda Accord
Watch this video to learn how to replace the passenger side CV axle on your 03-07 Honda Accord. The driver side is covered in another video!
