How To Replace Front Brakes 1993-97 Dodge Intrepid
Created on: 2011-09-20
How to repair, install, fix, change or replace your own worn, squeaky, fading old front brakes on Dodge Intrepid, years 93, 94, 95, 96, and 97.
-
step 1 :Removing the Wheel
- Loosen the lug nuts with the vehicle on the ground
- Raise the vehicle with a floor jack
- Secure the vehicle on jack stands
- Remove the lug nuts
- Pull off the wheel
-
step 2 :Inspecting the Brakes
- Check the thickness of the brake pads
- Check the brake pad wear indicator
- Check for gouges on both sides of the rotor
-
step 3 :Removing the Brake Pads
- Remove the two 10mm bolts from the brake caliper
- Pull the caliper aside
- Pry the brake pads off with a flat blade screwdriver
-
step 4 :Removing the Brake Rotor
- Pull the rotor off by hand
-
step 5 :Installing the New Brake Rotor
- Slide the rotor on
- Thread one lug nut to hold the rotor in place
-
step 6 :Installing the New Brake Pads
- Pry the piston back with a flat blade screwdriver or push the piston in with a C-Clamp
- Put an old pad in the caliper
- Use a large C-clamp and the old pad to push the pistons back
- Install the new brake pads into the bracket
- Put the caliper on
- Thread the two 10mm bolts by hand
- Tighten the bolts to 20 foot-pounds
-
step 7 :Reattaching the Wheel
- Remove the placeholder lug nut
- Slide the wheel into place
- Start the lug nuts by hand
- Tighten the lug nuts preliminarily
- Lower the vehicle to the ground
- Tighten the lug nuts to 100 foot-pounds in a crossing or star pattern
-
step 8 :Testing the Brakes
- Pump your brakes repeatedly until they feel firm
- Test your brakes at 5 miles per hour and then 10 miles per hour
- Road test the vehicle
Tools needed
-
A Piece of Pipe (for leverage)
Flat Blade Screwdriver
Torque Wrench
Pry Bar
Jack Stands
19mm Socket
10mm Socket
Lug Wrench
Ratchet
Floor Jack
1/2 Inch Breaker Bar
Brought to you by 1AAuto.com, your source for quality replacement parts and the best service on the Internet.
Hi, I'm Mike Green. I'm one of the owners of 1A Auto. I want to help you save time and money repairing or maintaining your vehicle. I'm going to use my 20-plus years experience restoring and repairing cars and trucks like this to show you the correct way to install parts from 1AAuto.com. The right parts installed correctly: that's going to save you time and money. Thank you and enjoy the video.
In this video, we're going to show you front brake repair on this 1997 Dodge Intrepid, same as any '93 to '97. This vehicle actually doesn't need new brakes so you won't see me put new brakes on it. You'll just see me take them off and put them on. Tools you'll need are jack and jack stands, either your tire iron or 19mm socket with a ratchet, possibly a breaker bar and a piece of pipe, and then you'll also need a 10mm socket and ratchet and a screwdriver.
First, you want to remove your wheel while the vehicle is on the ground. These lug nuts were on way too tight and what I had to do is I used a socket. Make sure your socket is on there good because these caps can kind of get bent and chewed up and make it more difficult. Make sure your socket is on there good. I used a breaker bar and a piece of pipe for extra leverage and I actually had to do that and loosen up all five lug nuts. Said another way, if you're using hand tools loosen the lug nuts on the ground, jack and support with jack stands the car so it's up in the air and then remove the lug nuts the rest of the way. Now we can check our condition.
You can see right here, there's a little slot that you can see. That's actually the brake pad. You can see the brake rotor here. It appears this car has pretty new brakes on it so I'm actually not going to change them. I'm just going to take it apart and put it back together. You can see here too, the pad and you can see there's a little bevel to it so there's space between the pad and the rotor there. That means that pad has plenty of wear left on it. For the rotors themselves, you take the back of your fingernail just run it up and down and you should feel a little texture but you shouldn't feel any deep grooves or gauges or anything. Like I said, these brakes look like they're still brand new, not brand new, but they're in very good shape so I'll just show you how to take them apart and put them back together.
Basically, what you're going to do is just remove two 10mm bolts: one here and one down here. Fast forward here, we use a 10mm socket with a ratchet handle and these bolts should come apart pretty easy. They're only supposed to be tightened in there at about 17 to 19 foot pounds. They just hold the caliper in place. They don't really absorb any of the braking pressure.
Use a screwdriver. It doesn't have to be huge. It just kind of helps you get things started. The caliper comes off and then the pads come right out of the caliper. Use a screwdriver and pry these clips right off, and push the pad. Again, as I said, this is the outer pad. That's a wear indicator, with plenty of life left there. The inner pad pulls right out, again, and that one has plenty of life left. I'm just doing this to show you.
Here, I just want to make sure you don't put any stress on your hose and then easily enough, the rotors come right off.
Put them back on. When I put it back together, I always like to stick a lug nut. It just holds things in place. If your brakes are worn, this piston will have worked its way out further on the caliper and you'll want to push it back in. Now you can do that a couple of ways. When it's still mounted, you can actually take a large screwdriver, larger than the one I have here but I'm just showing you with this one. You take a large screwdriver, you can put it in and then pry against either the rotor or one of the pads and that will work that piston back in and again, you'll want to use a large screwdriver for that.
The other possibility is using a large C-clamp. Have your little brake pad still installed in the caliper and take the C-clamp and you'll probably be able to see it a little bit. Just watch this piston here as I tighten up the clamp and it goes back into the caliper. Now, remove your clamp. My inside pad is already in there. It just pushes into the caliper. Let's put my outside one in correctly and all you do with this one is get it into place, and push it right in.
Now you're ready to put this back in. You want to make sure you push these bolts, these little slides, make sure they are nice and free. They should slide back and forth nice and easily. Push them out, and put your caliper in place. You might need to grab onto them and pull them. Grab onto this bottom one and just pull it out, pushing that on. With these little teeth or brackets, the top of your brake pads should be nice and tight against this caliper bracket.
Start our 10mm bolts back in. Just move it around a little bit until they find their way in. Tighten these 10mm bolts to 20 foot-pounds and you might say, "Well that's not all that tight for brakes". Again, these bolts just hold everything into place. This big bracket here is what really takes the braking pressure.
Apologies here, I forgot to change the angle. You want to pull that lug nut off, put your wheel on, start all your lug nuts by hand so you don't cross-thread them and then I'm just using my impact wrench to preliminarily tighten them up. I'm not tightening them that tight, just getting the wheel seated so I can put it back down on the ground. Now with the vehicle back on the ground, I've got my torque wrench set to 100 foot-pounds and I'll tighten the lug nuts using a star pattern.
Then, very important, after you do the other side, get in your car, pump the brakes a bunch of times until your pedal's firm again and then just do a stop from five miles an hour and ten miles an hour. Make sure the brakes are working correctly before you go out and road test it
We hope this video helps you out. Brought to you by www.1AAuto.com, your source for quality replacement parts and the best service on the Internet. Please feel free to call us toll-free, 888-844-3393. We're the company that's here for you on the Internet and in person.
Shop Products


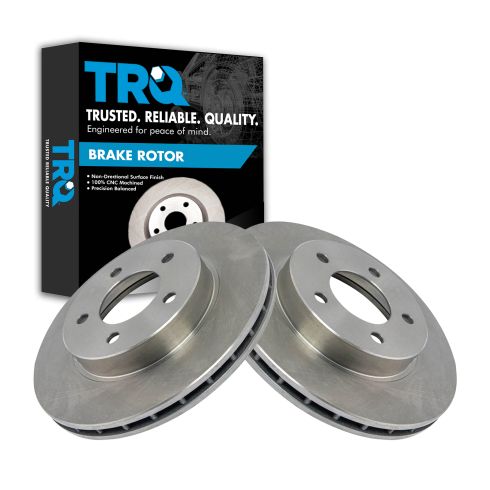
Dodge Chrysler Eagle Front Driver & Passenger Side 2 Piece Brake Rotor Set TRQ BRA76935
Part Details:
- 2 Piece
- Vented
- (1) Front Driver Side Brake Rotor
- (1) Front Passenger Side Brake Rotor
- 52 mm
- 0.55 in
- 282 mm
- 22 mm
- 5
- 4.49 in
- No
- No
- Smooth
- 0.87 in
- No
- 24 mm
- Vented
- 0.94 in
- Cast Iron
- 2.91 in
- 74 mm
- Conventional
- 114 mm
- 2.05 in
- Standard Replacement
- 14 mm
- 11.1 in
How to Replace Brake Kit 2000-05 Chevy Impala
If your 00-05 Chevy Impala brakes are squeaking, its probably time for a new set! Replace your own with expert help from 1A Auto in this tutorial video!
