How to Replace Front Brakes 2011-14 Honda Odyssey
Created on: 2017-07-17
How to repair, install, fix, change or replace your own worn, squeaky, fading old front brakes on 11, 12, 13, 14 Honda Odyssey
-
step 1 :Removing the Wheel
- Loosen the 22mm lug nuts with the vehicle on the ground
- Raise the vehicle with a floor jack
- Secure the vehicle on jack stands
- Remove the lug nuts
- Pull off the wheel
-
step 2 :Removing the Brake Pads
- Remove 14mm bolts from the brake caliper
- Pry the brake pads into the caliper with a flat blade screwdriver to push in the pistons
- Pull the caliper aside
- Secure the caliper with a bungee cord
- Remove the clips from the brake pads
- Pry the brake pads off with a flat blade screwdriver
- Remove the brake pad slides
-
step 3 :Removing the Brake Rotor
- Remove 19mm bolts from the brake caliper bracket
- Pull off the brake caliper bracket
- Remove the Phillips screw from the rotor
- Pull the rotor off
- If the rotor will not come off, thread the lug nuts and strike the hub area of the rotor with the ball end of a ball peen hammer
-
step 4 :Preparing the New Brake Pads and Rotors
- Clean off the hub rust with an abrasive pad
- Spray brake cleaner on the hub
- Apply brake grease to the hub
- Slide the rotor on
- Clean the rotor with brake parts cleaner
- Tighten the Phillips screw to the rotor
- Clean the brake pad slides with a wire brush
- Apply grease to the caliper slides
- Clean the caliper with a wire brush
- Apply grease to the brake pad tabs
-
step 5 :Installing the New Brake Pads
- Put the bracket back into place
- Start the 19mm bolts by hand
- Press the old metal plate protector to the new pads
- Install the new brake pads into the bracket
- Put an old pad in the caliper
- Use a large C-clamp and the old pad to push the pistons back
- Put the clips in and hold the brake pads
- Put the caliper on
-
step 6 :Reattaching the Wheel
- Slide the wheel into place
- Start the lug nuts by hand
- Tighten the lug nuts preliminarily
- Lower the vehicle to the ground
- Tighten the lug nuts to 94 foot-pounds in a crossing or star pattern
Tools needed
-
14mm Wrench
Large C-Clamp
Torque Wrench
14mm Socket
Jack Stands
19mm Wrench
Flat Blade Screwdriver
Phillips Head Screwdriver
Bungee Cord
Anti-Seize Grease
M8 Bolt
Ratchet
Wire Brush
Floor Jack
Cloth Rags
22mm Socket
Hi, I'm Mike from 1A Auto. We've been selling auto parts for over 30 years. We're dedicated to delivering quality auto parts, expert customer service, fast and free shipping, all backed by our 100% satisfaction guarantee. Visit us at 1AAuto.com, your trusted source for quality auto parts.
Today we have a 2014 Honda Odyssey that we are going to be doing front brakes on, and the very first thing that we want to do is get these five lug nuts loose while the car is still on the ground. Once they're loose, then we'll jack up the car. We'll use a 22mm socket and a 1/2" drive ratchet to get them loose. You can raise and support your vehicle with a jack and jack stands in the driveway or in a garage.
In our case, we have a lift, so we're going to be using the lift to make it a little easier to film.With all five lug nuts loosened on the ground, we should be able to just spin them off by hand using the 22mm socket that we cracked them loose with. Now we can pull the wheel off of the Honda.
We're going to take the caliper off now. There's 14mm bolts on the top and the bottom. This caliper is a little different than most because it actually has a slide bolt that will sometimes turn with the 14mm. Right here is a 14mm bolt. If we turn it with the wrench, you'll see the inside caliper slide is actually turning with it. What we have to do is take a 19mm wrench just like that, and then we'll be able to loosen the 14mm. There we go. Once you crack is loose, you should be able to just spin it out by hand just like that.
Now we'll do the same for the top. 19mm on the slide. Once we've cracked it loose, we'll just spin it out by hand. Now we're going to take the caliper off of the caliper bracket. It's sort of stuck on there at the moment, so what I like to do is I'll hang on the caliper a little bit. This compresses the piston on the inside. That makes it much easier to slip right off. You can see this one has dual pistons. We are going to take this now and hang it up here because you don't ever want to leave a caliper hanging by the caliper hose because it will damage the hose. We'll hang it right up there and out of the way.
You'll see that the brake pads have these little clips on them. These clips just make the pads push out and separate from the rotor so that they don't drag on the rotor. All they do is pop right out just like that. You can use a flat screwdriver if they're stuck in there, but they pop out just like that. At that point, you can pull the brake pads right out like so. Now we need to take off the caliper bracket, which is this item right here. It has two 19mm bolts, one on the bottom, one on the top. These bolts are usually quite tight, so while you can take them off with a wrench, it's a little easier if you use a 19mm socket and a long 1/2" drive ratchet. I'm going to go ahead and crack those loose. We'll do the top one. Once they're loose, you should be able to spin them right out by hand. Then you can remove the caliper bracket right off of the knuckle.
Now we want to take off the rotor. The rotor is held on with one Phillips screw, but typically Honda rotors are held on really tightly. Even when we take the screw out, we're still going to have to use these two holes and thread a couple of bolts into them. That will pull the rotor off of the hub.
We're going to start by removing this screw. Now ours is actually just spinning right out with the screwdriver, which is nice on a newer vehicle, but if your vehicle has any age to it or if it's in a rusty climate, these things are always stuck. When they're stuck, you can use an impact driver. This basically is like a screwdriver that you pop into the screw. Then you hit the end of it with a hammer and it forces the screwdriver into the screwdriver and it spins it at the same time. They're really cheap to buy, and this is one of the greatest helping tools that you can have when you're doing brake rotors.
Now that we have the screw out, we're going to thread two bolts into here, and it's going to pull this rotor off of the hub. These bolts are M8 by 1.25 thread pitch. We just grabbed a couple from our bucket of bolts, and we're going to thread them right in. Here's just a couple of bolts that we found in a bucket of stuff that we had. You can go to your hardware store and grab these if you don't have them. In our case, they're M8 by 1.25, as I said before. You just thread them right in. These bolts happen to be a 13mm, but if you buy them at a hardware store, it might be a different size. You can see, as you thread them in evenly, it's pulling the rotor off of the hub. It's actually a pretty great design because, in our area, all of the rotors are always rusted under the hub, and not all rotors have these, so you have to hit them with a hammer or something like that. This makes the job a whole lot easier. We'll just keep going back and forth until the rotor is completely off.
Of course our bolts aren't long enough, so we're going to have to get a longer set of bolts for this. It looks like about a 1-1/2" bolt is not long enough. We just found a longer bolt. I only have one of them so I'm going to have to do one side at a time most likely. Look at that, our rotor actually decided to come off so we don't even need this. There we go.
You can see, it basically rusts all around here and then all around the center. That's what holds the rotor on. You can see all the rust behind it. This rust builds up and it basically locks the rotor onto the hub. Using those two bolts is the best way to get it off. As we know, the rust builds up around here, so we're going to use an abrasive pad to just go around the edge of the hub and clean it up. That way, when we put the new rotor on, it will just slide right on.
We're going to do the same for the middle right around here. You can see all the rust and dust coming off of it. Now we're going to spray it with a little bit of brake cleaner to get all the dust off. Now we're going to take a little brake grease and just go around the edge. Hopefully, next time that somebody does brakes, they'll thank me for doing this because the rotor will come off a little easier. We'll go around the center where the rotor always sticks, and then we'll just go around the edge. Hopefully this will prevent a little bit of rust for the next person that does these brakes.
Now we're going to put the new brake rotor on the hub. You can see the marks where the old bolts were used to pull the rotor off the hub. Then you'll see the hole where the bolt goes. You want to make sure you line up all of those. It looks like it goes just like this. As you can see, it slid right on right over the center and everything. That's because we cleaned it all up. Now we're going to thread the screw right into the hole. Make sure to hold the rotor flat. Then we'll just tighten it up with a Phillips-head screwdriver.
You can see that the rotor has some greasy fingerprints on it and it has some oil from when it was shipped to prevent the rust. What we're going to do is use some brake cleaner and a cloth to wipe off the rotor. That way, when we get the new pads on there, it will seat really nice and evenly with no junk in between. We'll do it to that outer part of the rotor, and then we'll go and we'll spray the inside of the rotor as well. This is the brake caliper bracket. We want to clean it really well before we put it back on the car. These pieces right here are brake pad slides. These are replaceable if yours are damaged in any way. Usually they're made out of stainless and they hold up really well, so they often outlast the car. You can see, they snap right into place.
We're going to just clean them. You can use brake cleaner and a wire brush to clean them. Or, if you happen to have a parts washing tank like we do, that makes it a little easier as well. Now that we've cleaned all the major dust off of the caliper bracket, we're going to slide it back on and put the two 19mm bolts through the knuckle and into the caliper bracket. Now we're going to put the 19mm socket back on there with the 1/2" driver ratchet. Then we're going to tighten them up.
Here we have the old pad and the new pad. The old pad has this metal protector plate on it, so we're going to take that off and we're going to put it on this new pad. Just clips right on. You want to make sure the squeaker goes at the top on the inside pad. What we're going to do first, though, is we're going to put a little anti-seize on the bottom and the top. That will allow the pad to slide in the caliper bracket nice and smooth.
We're going to do the same for the front pad. We'll put a little anti-seize around the edge. You don't want to go overboard with this stuff because you don't want to get it on the pad itself. You just want to make sure that it will slide. We'll get it in here just like that. Now we'll do the outer pad with a little anti-seize. Slide it right in.
Now we want to compress these pistons back into the caliper, so we're going to release the caliper from its bungee cord home. Can set it right here. We're going to put an old brake pad right in here and then use a c-clamp to compress these pistons, because we need to push them back into the caliper. Get the caliper set up here. Then we'll just slowly turn the clamp in until both pistons are bottomed out. Now we can take the c-clamp off, and the old brake pad.
This process is a little bit tricky because these clips want to push the brake pads out, so you have to basically put the clips in, hold the brake pads in, and then slide the caliper over them. We're going to do it just like this. We'll put the pins in. Making sure to hold the pads in place, we'll put the other clip in. Then we'll take the caliper. Make sure you don't bind up the hose. I almost put the hose into a s-shape. Then you can slide the caliper over the pads. Now we're going to take the two caliper bolts, which are 14mm, we're going to slide them into the caliper and start threading them in by hand. You always want to start every bolt by hand because you don't want to crossthread it.
Now that they're both in by hand, we can go in with our 14mm wrench and we'll tighten up the caliper. Again, it looks like this 19mm slider bolt is turning with the other bolt, so we'll get our 19mm and then we'll make sure that the 14mm is tight. We'll do the same for the bottom.
We can now put the wheel back on the hub. Just line up all the lug nuts, push it into place, and then put the lug nuts one at a time by hand. Now we're going to tighten these by hand with our 22mm socket and 1/2" ratchet. Now we're going to lower the vehicle. With the Honda back on the ground, we can now take our 22mm socket and torque wrench and we can torque these to 94 foot pounds. You always want to do a crisscross pattern so that it torques down evenly. Now we're going to get in the vehicle and pump the pedal. You'll notice that it goes almost to the floor the first time. Now it's nice and firm.
Thanks for watching. Visit us at 1AAuto.com for quality auto parts, fast and free shipping, and the best customer service in the industry.
Shop Products


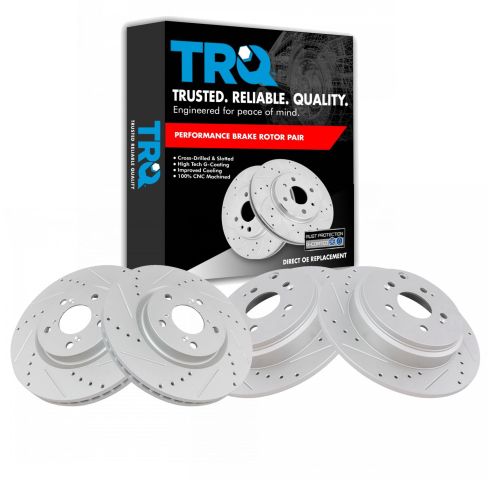
2011-14 Honda Odyssey Front & Rear 4 Piece Premium G-Coated Performance Brake Rotor Set TRQ Performance BRA13973
Part Details:
- Solid
- Vented
- 13.15 in. (334mm)
- 5 Lug
- 12.60 in. (320mm)
- Performance
- 4 Piece
- Premium G-Coated
- Slotted X Drilled
- Performance
- (1) Front Premium G-Coated Performance Brake Rotor Set
- (1) Rear Premium G-Coated Performance Brake Rotor Set
How to Replace Front Brakes 2001-05 BMW 325 Xi
Learn how to remove the old front brakes and prepare and install new ones with this how-to video. This video also includes the necessary torque specs
