How to Replace Front Brakes 1996-2000 Dodge Caravan
Created on: 2012-02-17
Check out this video to see how you can service and replace the front brakes on your 96-00 Dodge Caravan.
-
step 1 :Remove the wheel
- Use your lug wrench or 19 mm socket and breaker bar to loosen the lug nuts.
- Raise and secure the vehicle.
- Remove the lug nuts the rest of the way and set the wheel aside.
-
step 2 :Dismantle the brakes and discard the old pads and rotors.
- Observe your rotors and brake pads; look for signs of excess wear, uneven wear, or gouging in the pads and rotors.
- Use your 10 mm socket and breaker bar to remove the caliper bolts.
- Use a flat blade screwdriver and a prying motion to compress the caliper pistons enough to get the caliper off the rotor.
- Discard the old brake pads and compress the caliper with a large c-clamp.
- Remove the rotor.
-
step 3 :Install the new pads and rotor and reassemble the brakes.
- Hit the new rotor with brake parts cleaner or mineral spirits to remove any grease that may cause parts of the brakes to run hot and cause uneven wear.
- Mount the new brake pads followed by the calipers.
- Torque the 10 mm caliper bolts to 17-19 ft lbs.
-
step 4 :Replace the wheel
- Mount the wheel and preliminarily tighten the lug nuts (but do not torque them just yet)
- Lower the vehicle.
- Use a star pattern to torque the lug nuts to 100 ft lbs.
Tools needed
-
A Piece of Pipe (for leverage)
Large C-Clamp
Flat Blade Screwdriver
Torque Wrench
Jack Stands
19mm Socket
10mm Wrench
10mm Socket
Lug Wrench
Ratchet
Floor Jack
1/2 Inch Breaker Bar
Brought to you by 1AAuto.com, your source for quality replacement parts and the best service on the Internet. Hi, I'm Mike from 1A Auto, and I hope this how-to video helps you out, and next time you need parts for your vehicle, think of 1AAuto.com. Thanks. In this video, we're going to show you how to service the front brakes on this 1998 Dodge Caravan, same as any '96 to 2000 Caravan or Voyager. Pretty easy operation. We're going to show you both just checking them and removing and replacing them. This vehicle, it ends up the brakes are in fine shape, so we just take them apart and put them back together to show you.
Tools you'll need are a jack and jack stands, a lug wrench or a 19-mm socket with a breaker bar or a ratchet and a pipe, you'll need probably some extra leverage to get those lug nuts off, a 10-mm socket or a wrench, a large flat-blade screwdriver, a large C-clamp, and a torque wrench. First, you want to start out, raise and support the vehicle and then remove the hubcap and then either use a large ratchet and 19-mm socket or an impact wrench and remove your lug nuts and the wheel. Okay, brakes are pretty easy to check and to service. Check the condition of your rotors. These rotors actually look like they're in pretty good shape. Take the back of your fingernail, run along the rotor surface. If you feel any deep grooves, then you need to replace your rotors. These feel good. These brake pads, see how you can see the edge here? Doesn't even touch the rotor surface. That's kind of a wear indicator. These pads have plenty of life left on them, but we'll show you how to take off the pads and the rotors. First thing you need to do is remove 2 bolts, 1 here and 1 here using your 10-mm. They should come off with a small ratchet pretty easily. We'll speed it up here as I remove those bolts. To get the rotor off, take a screwdriver, put it right in here, pry it out a little bit, and that kind of upsets the piston in a little bit, and let's see here.
You should be able to pull your caliper right off. Okay, your pads. You can see this outer one has a clip on it. Just kind of press up, use your screwdriver to help you push it up and out. You can see, like I said, plenty of life left in these brakes. Just showing you how to do this. Your inner pad, you can just squeeze right out and it comes out, and put the inner pad back in for now. Put this up and out of the way. You just want to be careful that you don't want to put too much ... Put that like that and make sure you don't put too much stress on this hose. Your rotor comes right off if you need to replace it. Like I said, looks good. Put that back on. If you're putting new pads on, you'll need to reset your piston inside your caliper, and you do that with a large C-clamp. Set the clamp so one end is on the end of the caliper there. The other end is pressing on your brake pad, and as you slowly turn that, you can see it forces the piston back in. Okay.
Once that's reset, you can remove the clamp. A lot of times, I like to put a lug nut on here. Holds both ends in place. Your outer pad just goes right in. Just kind of clip it right into place. Before you go to put this back on, you want to make sure that these slides slide back and forth nicely, and to put it together, you want to have them pushed all the way down, push your pad down, and then, you're going to put this front end first. Get this right underneath, pull out on your slide on the top, pull out on your slide on the bottom. Make sure everything goes together nicely. Now use our bolts. Kind of put them in. Move it around a little bit until they start in. Once you have them tight, you want to torque them with a torque wrench, probably between 17 and 19 foot-pounds. Speeding up here a little bit, I'll remove that lug nut. I put the wheel and tire back on. Thread the lug nuts on by hand first, then kind of tighten them preliminarily with my torque wrench. Obviously, I'm showing you one side here. If you do a brake job, you want to do both sides. With the vehicle on the ground, torque the lug nuts to 90 to 100 foot-pounds and use a star pattern. Now, put the wheel cover back on. Make sure you line up the valve stem cutout with the valve stem. After you work on the brakes, make sure you pump your brakes a bunch of times to help reset the piston, and then, do a stop from 10 and 5 miles an hour before you road-test the vehicle.
We hope this helps you out. Brought to you by www.1AAuto.com, your source for quality replacement parts and the best service on the Internet. Please feel free to call us toll free 888-844-3393. We're the company that's here for you on the Internet and in person.
Shop Products


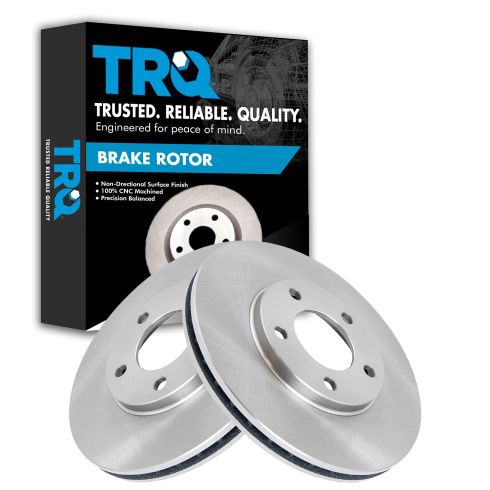
Dodge Chrysler Plymouth Front Driver & Passenger Side 2 Piece Brake Rotor Set TRQ BRA77167
Part Details:
- 2 Piece
- Vented
- (1) Front Driver Side Brake Rotor
- (1) Front Passenger Side Brake Rotor
- 0.55 in
- 282 mm
- 1.50 in
- 11.10 in
- 22 mm
- 5
- 4.49 in
- No
- No
- Smooth
- 0.87 in
- 2.87 in
- No
- 24 mm
- Vented
- 0.94 in
- Cast Iron
- Conventional
- 38 mm
- 114 mm
- 73 mm
- Standard Replacement
- 14 mm
How To Replace Front Brakes 2000-04 Ford Focus
Check out this video and learn how to do your own brakes! This one is for your 00-04 Ford Focus. You can do it, 1A Auto will help!
